Photo Corners headlinesarchivemikepasini.com
![]()
A S C R A P B O O K O F S O L U T I O N S F O R T H E P H O T O G R A P H E R
![]()
Reviews of photography products that enhance the enjoyment of taking pictures. Published frequently but irregularly.
On Assignment: Post Production


29 January 2013
Just throw them on a thumbdrive or CD," the smartphone photographer suggested when we agreed to share our images with him.
But two AVIs and 66 Raw files wouldn't have been appreciated, we suspected. So we sat down at our computer to process the files into images.
In previous entries on this assignment, we detailed what we packed for the event and how we shot the event. In this piece we'll discuss our post processing of the images.
CHOICES
Because we've reviewed image editing software for a number of years, we have our choice of tools. But the usual arrangement is that you make a commitment to one product or another and stick with it through thick and thin.
So we'll try to keep this generic but at the same time we'll highlight the special features of the tools we did use.
We'll also craft this discussion for both beginners and old hands. No matter what camera you use, post processing can make a dramatic difference in your final images. And these days you don't have to spend a fortune on software to enjoy that advantage.
WORKFLOW
Our workflow for this event was the same as for any other shoot:
- Copy the images from our card to the computer, automatically adding copyright data and assigning them to an archivable folder. Sometimes we also convert the proprietary Raw files into DNG files but we didn't this time.
- Rotate the JPEGs and review the images. Most of our work ends up on the Web, so rotation (whose tags browsers don't get) is routine.
- Select a set of images to edit and process them.
- Upload the exported images to an image sharing service and send the URL to a few interested parties for review before finalizing the project.
- Complete the presentation by burning CDs for the participants, making prints or putting together a DVD presentation. It varies.
Our normal archiving process takes care of burning archival DVDs for local and offsite storage as well as copying the images to a set of external hard drives. So we'll omit that step but it's part of this game, too.
IMPORT
Import is fairly automatic when we insert the card into a one of the card readers permanently attached to our computer. On Mac OS X, Image Capture launches and displays the thumbnails. We select the new ones (or all of them) and copy them to a temporary folder.
That prompts a script (an AppleScript) we wrote to figure out what the date is, format it and ask us for a slug for the images. It then creates a folder named with the date and slug, like "2013.01.10 Dance" that sorts nicely no matter what year it is. Then it moves all the new images out of the temp folder into this new folder. At the same time, copyright information is written to the Exif header of JPEGs and to DNG files, if we chose to convert the Raw files to DNG.
REVIEW
We drag that folder to a Photo Mechanic icon on our tool bar. Photo Mechanic does just one thing but it does it very well. It is particularly popular among photojournalists for its automated metadata entry.
But we just like it for its fast display of thumbnails and quick batch rotation. Clicking one image also brings it up in a larger window from which you can navigate and review the whole collection.
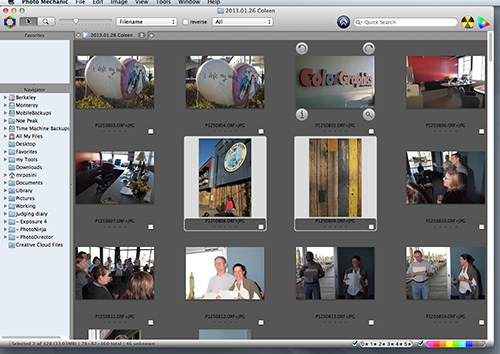
Photo Mechanic. Camera JPEGs for review.
That always gives us something to think about as the images are rotated losslessly.
WHAT WE SAW
We were reviewing the camera JPEGs (66 of them), of course, and what we saw we generally liked. Being in control of the light really helped.
The flash looked a little hot in some tight shots while some distance shots were a bit dark. We also noticed our camera crops were safe ones, a bit generous. And still there was some distortion when the lens was at wide angle. In group shots, the faces on the edges suffered.
And we had a good deal of tilt to deal with. The images weren't significantly skewed but only slightly, which can be disturbing.
We made mental notes of the sort of revisions we wanted to make, not to each shot but in general. They were nothing we might have complained about looking at the images in Playback mode on the camera. But it never hurts to polish a bit.
DECISIONS, DECISIONS
Our normal workflow would be to import the folder of images into Lightroom and breeze through them in Develop mode before exporting them as JPEGs. It's a very efficient workflow for both a large number of images and a smaller set you want to refine.
We gave some thought to using Photoshop Elements because we had two videos to deal with. One was taken with a strong backlight and the other in almost total darkness. But we didn't want to process 66 stills in Elements.
Instead, we decided to use DxO Optics Pro 8. We felt we would get better distortion corrections and we wanted to relight a few of the darker images. Version 8 of the program is spectacular with salvaging shadow detail.
For the video, we decided to try Photoshop CS6's new tools, including the fast new Mercury Graphics Engine for rendering and the ability to use Photoshop's layer tools.
OPTICS PRO
Good news, bad news. The good news is that we really did like the results we got from Optics Pro. We were able to easily correct skew and crop, of course, but just as easily we were able to optimize the tonality of the images and correct distortion.
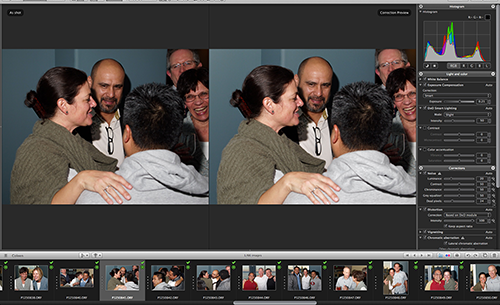
Optics Pro 8. Side-by-side comparison.
The bad news is that processing 66 images on the OS X version of the program is sluggish. We moved the mouse faster than Optics Pro could update the image and it was, after Lightroom and Photoshop, annoying.
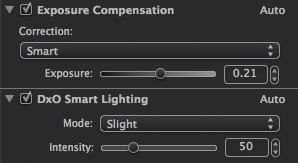
Tonality. We used Smart Lighting heavily on these to get dramatic improvements.
More bad news. DxO's JPEG exports mangled the MakerNotes of the Exif header. So when we tried to use Phil Harvey's ExifTool to add our copyright information to the final JPEGs, it complained.
There's a switch in ExifTool to fix that (-F) but it wasn't able to help with these files. Fortunately there's a switch to ignore the problem (-m) and that's what we did.
You might wonder why we had to add copyright information when our import process does that. But in this case, we were exporting as JPEGs the camera's native Raw format, to which no copyright information had been applied.
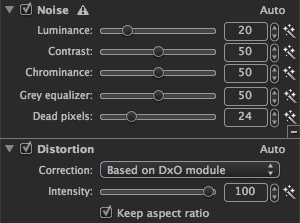
Distortion. An easy fix.
PHOTOSHOP VIDEO
We really dreaded working on the video. There was one long sequence and one shorter one. But we felt like we might need a three-day weekend to edit and render and export the revised footage.
Not to worry. That Mercury Graphics Engine hauls. Exports moved along swiftly, creating MP4 files of the original AVIs.
But what we really got a kick out of was using an adjustment layer on the whole video. We pulled up Curves, lightened the backlight clip and the dark clip, too, played it to make sure there were no surprises and just exported it. Piece of cake.
We also made a couple of JPEG frame grabs to add to the stills collection. It was easy to scrub through the new timeline view until we found just the right frame.
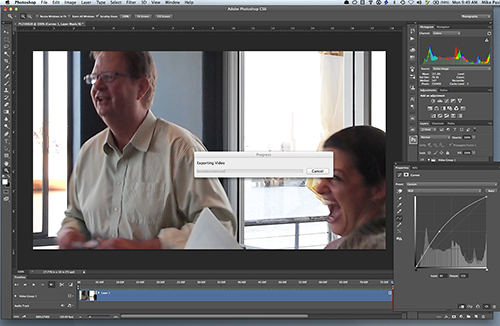
Photoshop CS6. That curve (lower right) is an adjust layer applied to the whole video. Here we're compensating for the backlight.
Photoshop CS6 can do a lot more with video than earlier versions. We weren't tempted for even a second to launch Premiere. Which is saying something.
SHARE
Everybody needs an editor. And for event photography it helps to share a rough cut to see if something can be improved.
There are a lot of options for sharing your images online. Use the one that's most convenient for you and your viewer. There is no other rule.
Revel. Detail of the automated layout of the Revel Web page.
In our case, we uploaded the images to Revel, which Adobe has recently unleashed as a free service. It does take some time to get the images on the server, but that's true of any server. We organized them into an album and gave the green light to share it, copying the URL to the clipboard and pasting it into an email we sent to our reviewers.
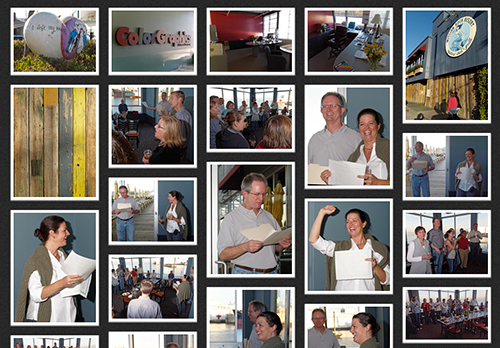
When the reviews came in, we didn't have any revisions to make so we burned the CDs with a folder for the stills and another for the video. That's all we had to do for this job but we might also have made a large print of the group shot or assembled the stills and video into a DVD presentation.
CONCLUSION
It was a fun event and pleasant to process the images. It hardly seemed like work at all, really.
And as far as the smartphone photographer knew, all we did was throw our shots on a CD for him.