Photo Corners headlinesarchivemikepasini.com
![]()
A S C R A P B O O K O F S O L U T I O N S F O R T H E P H O T O G R A P H E R
![]()
Reviews of photography products that enhance the enjoyment of taking pictures. Published frequently but irregularly.
Fotomagico 4 To The Rescue


4 November 2013
Now and then the editor in us chuckles amicably before slapping the wrist of our other hand to remind us we shouldn't give it all away in the headline. But we just can't curb our enthusiasm sometimes. This is one of them.
Enthusiasm is not the word you would have used if you could have seen us wrapping up the project. We were in tears. Emotionally wrought. This is what we live for, we cried to no one in particular. This is it!
Whatever were we talking about?
BACK STORY | Back to Contents
In February we had driven down the coast a few villages to Half Moon Bay where, in a little seaside cottage, a very dear friend of ours (oh, let's just say a life-long friend even though we've only known each other since we were 17) was celebrating a surprise birthday of a certain impressive vintage.
She was turning 30 again.
It's one of the fringe benefits of our profession that we can attend events like this without troubling ourselves to wrap a present. If, that is, we bring along a camera. And so we had.
But how we shoot "events like this," as we call them, has changed a bit since God put movies into still cameras. We've become aware of moments that should be captured as clips and moments best memorialized as stills.

Final Product. The first image printed as the cover with a matching ribbon and case color.
The woman seated in front of you on her knees explaining how she did this or that for the party is best captured as a still in our book. But when the champagne glass is raised and order called for so the adoring spouse can give a toast -- or, as in this case, introduce his wife so she can make her own toast -- that's a clip.
At the same time, we've developed the acrobatic finesse to shoot a clip with our right hand and toast with our left. It took a lot of practice, we have to admit.
THE PROBLEM | Back to Contents
Naturally no one can wait to see what you've got. We tried to sneak away, in fact, but the imposing elder sister of our friend caught us and demanded to know if the honoree knew we were leaving.
"No," we replied honestly. "It's a surprise."
That being the perfect way to leave a surprise party, she demanded we freeze while she retrieved her sister to tell her the joke. And since it delayed our departure, we felt it would suffice to explain any delay in delivering the images we had captured, too.
But the problem is just that. Delivering the images. Because you have both stills and video. Oil and water. How do you deliver that, exactly? In an easily digestible form?
Sure, you can burn a CD with the camera originals, but you're a professional. You do canvas prints, slide shows, full-length movies. Some degree of artistry is expected.
There are plenty of programs out there that promise to handle that sort of hybrid presentation. But they make you work too hard, wait too long, fuss too much and give up in despair at the end.
That's the problem.
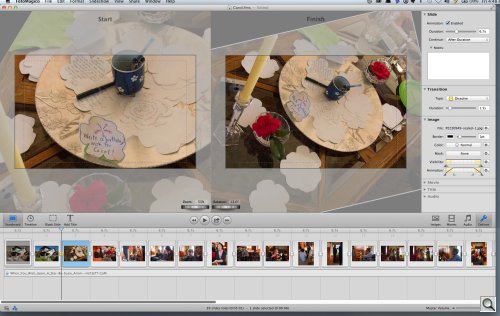
FOTOMAGICO | Back to Contents
We didn't relish the idea of spending hours specifying pan and zooms in Premiere just to use a few seconds of video clips. We'd have ended up with nothing more than the low resolution of a video file for all our work, after all.
And our vain hope the Elements would somehow make this easier was quickly dashed as we waited for it to wake up from each command we gave it. You have to start from the Organizer, by the way. We got that. And that's about all. We didn't have patience for the laborious tutorials or the surprisingly poor performance on a system that handles Premiere adroitly.
This, after all, was really just a slide show.
We remembered an old friend, a program we'd actually enjoyed making slide shows with. We'd used Fotomagico 3 to build a slide show of stills, adding a little music, for a few memorial CDs. It was remarkably easy to do some sophisticated effects.
Fotomagico 4. Stills and clips in one seamless production.
So we were delighted to learn that Fotomagico 4 had added movie clips to its arsenal. Could this be the way to tell our hybrid story?
REQUIREMENTS | Back to Contents
It would if it met a few requirements tricky requirements. Those included:
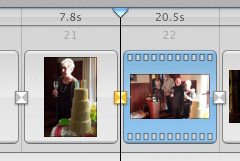
Storyboard View. Each item with its transition.
- Drop a clip into the Timeline as easily as a still
- Duck any soundtrack volume under the clip's audio
- Transition smoothly from still to clip and clip to clip
- Handle any aspect ratio incompatibilities
We were looking, in short, for seamless integration of stills and movies while handling all the audio complications of a sound track conflicting with the movie audio. And Fotomagico does, indeed, meet the criteria (in fact, it surpasses them). Although we didn't immediately appreciate just how. Which is the point of this review.
We also expected the program to run under Lion, which is what our main machine is running. But we had a chance to test Fotomagico under Mavericks briefly and found no problems.
DOCS | Back to Contents
When it comes to the Fotomagico documentation (and even reviews), you really don't learn very much. Everyone seems to stop at the basics. Nobody seems to dare tackle things like ducking audio or transitioning from a still to a clip.
We know this because we got stuck.
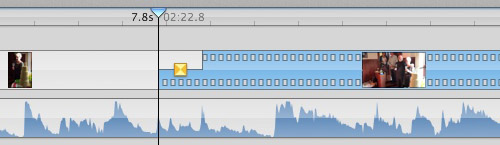
Timeline View. More audio detail.
We had some MP4 files from an Olympus E-PL1. We dropped them into the Timeline just like a still. When we played the show, though, the last still remained frozen on the screen as the accompanying music played through. Not what we had expected.
So we looked around for an explanation, a little help. In the included Help file and online reviews. Nothing helped.
SOLVING THE PROBLEM | Back to Contents
The one clue to our problem was that when we put the playhead on the clip and looked at the editing screen, the clip was only displayed in the right-hand or ending frame. The left-hand or start frame was dark.
That suggested to us that Fotomagico hadn't parsed the camera MP4 file correctly. Which would not have been a surprise.
To test that theory, we processed the camera MP4 in Elgato's Turbo.264 HD, which we reviewed some time ago. "Reviewed" probably isn't the word for it. That little utility has been a godsend on a number of occasions, solving incomprehensible problems quite easily. The free Miro Video Converter is a close second.
Turns out the Elgato file worked perfectly. So it was an obscure format issue that not even Fotomagico was aware of enough to complain about.
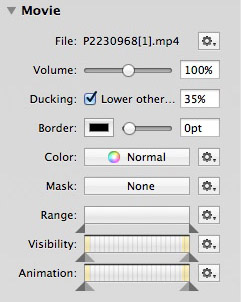
How to Duck. Just enable the Ducking option and adjust the volume level.
DUCKING THE PROBLEM | Back to Contents
At about six seconds an image, we had enough material to cover a rather long song. But what about the sections of the presentation in which the clips had audio too?
Certainly you want the clip's audio to be heard. But you may be surprised to learn that you don't want the song to be completely mute either. You want a little continuity there. You just want the song to be muted. Background music.
You do this by ducking the audio for the song. And to do that in Fotomagico, you just access the Movie properties and set a level for other audio. Sounds odd, but makes sense.
The default value is 50 percent but for our music, we liked a 35 percent reduction. It seems to depend on the original audio of the song. You don't want to hear nothing (70 percent) or just the deepest bass (50 percent).
BACK TO THE BEGINNING | Back to Contents
You can do this the hard way or the easy way. But building the presentation from nothing doesn't have to be hard.
Instant Slideshow. A jump start.
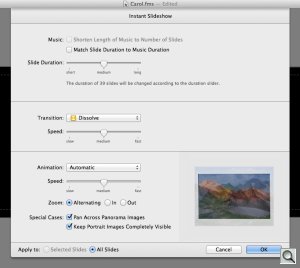
Fotomagico holds some default values for things like duration and transition. You can access them from the Instant Slideshow option. Or just set your options.
You can also calculate realistic values for these by dividing the duration of your music minus the duration of any clips by the number of images. If you're so inclined.
Once you've established likely durations and your default transition, just select all the images you want to use and drag them to the Timeline. You've got a show.
After we'd done that, we dropped in our clips between the stills they had chronologically occurred. And we were telling the story.
But one of the fun things about Fotomagico is just how easy it is to tweak that automatic production.
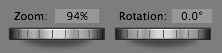
Pan and Zoom. Real, real simple.
As we watched the show, we made notes about pans or zooms that could be improved and the order of shots that might be better presented if not chronological.
You can make those all of those edits with nothing more than intuitive drag-and-drops. And the interface for panning and zooming is simply the most direct we've ever used.
Changing the slide order was a little more trouble than it should have been. Fotomagico seemed confused about whether we wanted to stack slides on top of each other or reorder them. But a cut and paste did the job.
TITLE | Back to Contents
We did still need a title. And we had a title shot of the building we took on arrival. The seaside cottage.
In our wedding video project we established a title sequence of a monotoned image with text fading in and out as the monotone gave way to color. We liked that a lot so we did a variation of it for this presentation.
We converted the original color image of the cottage into a sepia tone in Photoshop CC. And dropped that image in front of our color image in the Timeline.
We had to slightly rotate the sepia image and enlarge it a bit. But when we got what we liked, we simply copied the geometry using the Contextual menu and Pasted it to both the end image and the starting color image. For the ending color image, we zoomed in to the front door. Get it?
We overlaid a title over the sepia image, fading it in. Perfect.
SYNC | Back to Contents
We had a nice shot of the sunset that day to end the show. We say "nice" because it wasn't just a sunset. It was taken through a window of the cottage so there was the reflection of a lighted lamp shade in the shot. Sort of a metaphor for the individual in the world, you know.
The trouble with it was this: where was the music at that point?
Fotomagico has a nice trick or two for tailoring the duration of a selection of images to the audio track. It can also let you set the transitions to the music manually (which we didn't have to do). So we spent a few seconds compressing and expanding the duration of a selection of slides to match the music.
And then we were done.
PLAYER PROBLEMS | Back to Contents
Fotomagico 4 has not been without its problems as Boinx reengineered it for new features like picture-in-picture. Our experience putting this presentation together went smoothly but we did have a mysterious problem when we exported it using the Fotomagico Player.
We wanted to put the presentation on a CD, which we knew would be viewed on a recent vintage Mac running Mountain Lion. The player seemed like the perfect approach, promising the best performance and image quality.
We tested it on a Mac running Lion but we had a problem. Running the player showed a black screen with no sound. We were able to Force Quit the player (by swiping to another screen after getting the cursor back by hitting the Escape key a few times).
We made some revisions to the presentation and tried it again. This time the export played fine. We burned it to a CD formatted for both Mac and PC (so the original image and movie files could be accessed on either platform). And there it failed to run again. Black screen.
So there's still something fishy about the player.
On the Boinx Fotomagico support forum, one fellow sufferer quoted from an email received from Nick Black at Boinx:
Standalone Player uses Quicktime to display the slideshow. Since there's different versions of Quicktime in different versions of Mac OS we cannot guarantee playback on versions of Mac OS other then the one used on the Mac where the Standalone Player file has been created. If you need your slideshow to be 100 percent compatible with all versions of Mac OS, we recommend sharing it as HD video.
Our solution was to export a QuickTime movie using the iPad option, which showed the presentation with both good performance and high quality. That ran on the MacBook Pro from a CD and could also be copied to an iPad.
But the export can take a good bit longer. Something like half an hour was required to encode our presentation of 37 images and 3 movies.
BURNING A CD? | Back to Contents
Now that we live in the post-disc era, with some laptops eschewing a built-in CD/DVD drive entirely, it's hard to escape the obvious questions. How do you deliver a presentation like this?
We knew our friend had a 13-inch laptop with a drive in it so we were golden with a CD, on which there was room for the original images and clips, too.
But what if you don't know?
Well, a CD is still a pretty safe bet (and can be wrapped in a pretty ribbon, too). Somewhere in the house there is bound to be a drive. If nothing else, perhaps an external drive.
And it's easy to wrap, too.
But you can also deliver it on a variety of wireless storage media or via the Web using services like DropBox or your own FTP server. Not quite as elegant (unless you make a gift of the wireless storage media too) but it isn't an elegant age.
CONCLUSION | Back to Contents
It's a multimedia world. And it always has been. Our tools haven't always been up to the task but there's no reason now to worry about telling your story with both stills and movies when you have an ace in the hole like Fotomagico.