Photo Corners headlinesarchivemikepasini.com
![]()
A S C R A P B O O K O F S O L U T I O N S F O R T H E P H O T O G R A P H E R
![]()
Enhancing the enjoyment of taking pictures with news that matters, features that entertain and images that delight. Published frequently.
Safeguarding The Integrity Of Your Photos


23 June 2014
Nothing lasts forever, as you no doubt perpetually hear whenever something breaks. But some things are meant to survive. Like photographs.
Photographs are by nature designed for the ages. They are intended to survive for generations. To be viewed by those not yet born. To document long-ago lives, bringing them to life again.
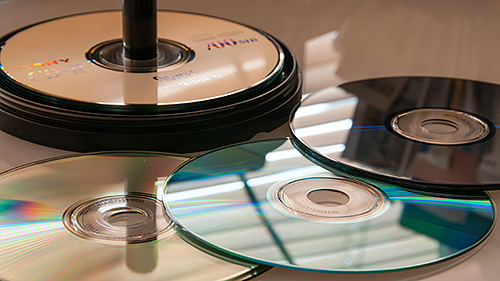
Archived Images. Different disc types increase your odds of beating data corruption.
The fragility of a slide or a strip of negatives is obvious. They can be scratched, creased, stained -- the hazards go on and on. So when it became possible to digitize images, we thought our problems were over. The bits would be written to media that would outlast us.
Hasn't turned out that way.
Although digital storage is a very reliable medium, it isn't a perfect one. It's safe to say that almost all of the digital images you've ever captured are just fine. It's also safe to say that there's no photographer who hasn't lost a few images to data corruption.
And the scary thing is that you may not realize it.
COPYING DATA
Every time you copy digital data, it's an opportunity for data corruption. That starts with copying the images from the camera's card to your hard drive or uploading an image from your camera's internal storage to the cloud.
You might assume that, on receipt, some data validation occurs to make sure the copy is accurate. But you'd be wrong.
Most file systems know when a transfer has been interrupted or aborted but they don't bother to check if a completed transfer is accurate. Sun Microsystem's ZFS, once considered as a replacement for Apple's Hierarchical File System, does compute a checksum to check data integrity, but it's a rare bird. Mac OS and Windows do not.
Why not? We suspect it's a nice mix of convenience and reliability.
As you might suspect from sitting through that long verification process when you burn a DVD, it would take a lot longer to complete a copy if it had to be verified, too.
And since transfers are conducted over controlled circumstances, if there were a problem (say, with a USB cable) you wouldn't need a verification process to point it out. The transfer would fail to complete.
So it doesn't happen enough to warrant checking.
And yet it happens. John Siracusa's Mac OS X 10.7 Lion: the Ars Technica review cites a study of 1.53 million disk drives over 41 months, that showed over "400,000 blocks had checksum mismatches, 8 percent of which were discovered during RAID reconstruction, creating the possibility of real data loss."
BIT ROT
Whatever medium stores your digital data, whether it's a card, a hard drive, flash memory or anything else, the longer it sits, the weaker the stored state becomes.
Solid state media like SSDs and memory cards store data using electrical charges which, imperfectly insulated, can leak. Cards, which tend to be used for short term storage, don't address this but SSDs do copy data from one memory location to another to refresh it.
Magnetic media like floppy discs and tape and optical media like CD-R, DVD-R and BD-R (the discs you can burn on your drive) can decay.
What can you do?
The best insurance against bit rot is to make fresh copies of your data on new media every few years.
Fortunately, you don't live with a hard disk very long. You buy a bigger one (typically by buying a new computer) and move everything to it, thus refreshing it before data corruption can sneak in.
But left long enough undisturbed, bit rot does occur on digital media. And you won't know about it until you try to open the corrupted file. Nothing on the operating system checks for it.
OTHER GREMLINS
There are plenty of other gremlins besides copy errors and bit rot.
Here's a partial list: loose cables, current spikes, firmware bugs, phantom writes, reads/writes to the wrong disk block, parity errors, driver errors and even accidental overwrites.
To name a few.
VALIDATING DATA
Apart from making fresh copies of your archive, there are some things you can do to validate the data on your internal drive from time to time, too.
Let's look at this from the perspective of protecting your images, rather than generic data. There are some unique options for images.
Lightroom
Lightroom is a good place to start. When you import images into a Lightroom catalog, the program verifies them and will report any problems. We found a couple of corrupted images that way, in fact.
While Lightroom can validate its Catalog, that doesn't look at the integrity of your images. They're two different things: the database and the photos.
And Lightroom's missing photos check doesn't address this issue either. It merely tells you that an image in the database can't be found on your disk. Probably because you used the operating system rather than Lightroom to move it.
But Lightroom can validate DNG files (from the Library menu). DNG files have their own validation data. An MD-5 validation hash can be embedded in the DNG file itself to refer to the original source image data stored in the DNG file.
What about non-DNG files?
In Lightroom you can laboriously recreate the previews just by changing the Standard Size Previews setting in the Catalog Settings and then using
Library > Previews > Render Standard Previewsto rebuild them.If there's data corruption, the preview won't be able to be rebuilt and Lightroom will let you know.
Then, too, you can convert JPEGs into DNGs for the checksum advantage. As Adobe's Eric Chan explained:
The DNG file will be approximately the same size as the JPEG (since we can now use JPEG compression instead of lossless compression) and also because the JPEG image data will actually just be copied over verbatim. (i.e., when building lossy compressed DNGs from jpegs, we do not decompress the JPEG data, then recompress it into the DNG -- that would lose quality).
DNG Converter
Clearly, you don't need Lightroom to check DNG files. The free DNG Converter from Adobe for Macintosh or Windows will do the job, as this video demonstrates:
And using DNG Converter is an efficient way to check large numbers of DNG files.
The Checksum Solution
While proprietary Raw formats (like NEF, CRW, ORF, etc.) and JPEGs do not include either unmodified image data or a verification hash like DNG files, you can compute an SHA1 checksum value of any file and store it for comparison later. Think of it as a manual mode.
A checksum is simply the result of a mathematical calculation made on the original data. The calculation computes a different value whenever anything in the original data is changed.
By comparing an older value stored in a text file to a freshly computed value for the same file, you can detect whether or not the file has changed. If the values are the same, there's been no change.
In HFS+ Bit Rot, Aymeric Barthe outlines the three-step procedure for Mac OS X, which also works for Unix systems. Windows users can do something similar, as we explain below.
The first trick is to calculate checksums on all your image files. Here's how Barthe does that:
# Compute checksums
find . -type f -a ! -name ".DS_Store" -exec  shasum '{}' \; > shasums.txt
Key to that command line is the Unix utility shasum, which is included with OS X. The Microsoft File Checksum Integrity Verifier, a separate download, uses a different set of arguments but the idea is the same.
That command line calculates the checksums of the original data. It looks for files (not directories) and skips OS X's .DS_Store files (which are invisible). Just navigate to your topmost directory (or any directory with images) before running the command. It writes a checksum value and the file's name on each line of a text file called
shasums.txt.You run these next steps to see if the data has subsequently been corrupted:
# Check against checksums
shasum -c < shasums.txt  > check.txt

# Filter out differences
cat check.txt | fgrep -v OK
The first step checks the values in
shasums.txtagainst the existing files and reports the results in a new file namedcheck.txtwhich is read by the second step, which displays any problems.Some Issues
There are some issues to be aware of if you roll your own checksums.
Any time an original file is edited, the checksum is invalidated and must be recalculated.
And it can take a while to run, too. We pointed it to our collection of over 50,000 images on an external drive and went to bed. It took over an hour to compute the checksum on every image.
Another problem with this approach is that if you use one
shasums.txtfor all your images (by running it from the topmost directory), you'll have to update it by rerunning it over everything again.One way to work around that is to keep a
shasum.txtin each directory of images you add to your collection. Assuming you don't touch the originals after you add them to your collection, that means you'd just run the command each time you create a folder of images.The
shasums.txtfile created by this procedure can be edited. It's just a text file, after all. But be sure to update the path to the filename on each line if you store it or permutations of it in a different location.RECOVERY
It's important to know if a file has been corrupted but that's all a checksum can tell you. It can't restore the file.
Backing up valid data is essential because to recover from any significant corruption, an uncorrupted copy is required. There are utilities that can patch minor corruption in a file (as we mention below) but an uncorrupted copy is the best insurance against corruption.
Unfortunately, it's just as easy to corrupt a backup as to suffer the original corruption. No alarm goes off when a bit gets flipped, so the backup you dutifully run every day blissfully copies that error to your backup device. By the time you discover the problem (by opening the file), an uncorrupted copy may have aged out of your backup system.
Multiple copies, made at various times to various media, enhance your odds of being able to recover.
What if you don't have an uncorrupted copy?
Desperate problems require desperate solutions. We're familiar with one unerase utility that can sometimes repair a corrupted image, although we've never been able to fix a corrupted JPEG with it, say.
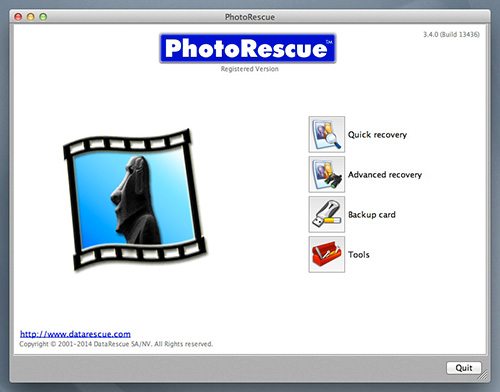
PhotoRescue. Not just for erased images.
PhotoRescue can "undelete, unerase and recover pictures, images, photos and files lost on corrupted, erased or damaged compact flash (CF) cards, SD Cards, Memory Sticks, SmartMedia and XD cards."
It's "optimized for JPG/JPEG files, TIFF files, GIFs and BMPs. It also offers a constantly updated support for most camera's RAW file formats: CR2, RAW, RAF, CRW, NEF, ORF, MRW, etc. and many types of movie files. In some cases, it can even rebuild pictures that have suffered minor corruptions."
Although it isn't documented, PhotoRescue also works on hard drives, not just cards.
CONCLUSION
Whether you're copying data or you've simply stored it away, it is never safe from corruption. Most file systems don't confirm valid copies or check on the health of stored files. Data corruption happens silently, so you don't notice it.
Backing up valid data is essential because to recover from any corruption an uncorrupted copy is required. But it's just as easy to corrupt a backup as to corrupt the original data. Multiple copies, made at various times to various media, enhance your odds of being able to recover.
Nothing may last forever but eternal vigilance is the key to minimizing data corruption.