Photo Corners headlinesarchivemikepasini.com
![]()
A S C R A P B O O K O F S O L U T I O N S F O R T H E P H O T O G R A P H E R
![]()
Enhancing the enjoyment of taking pictures with news that matters, features that entertain and images that delight. Published frequently.
Editing Photos With iOS 8


19 September 2014
We were anxious to try out the new Camera app in iOS 8 with its expanded Edit function. You know, under the guise of a review, we dash into these things to save you grief. So we tapped on a JPEG image of the Rumbalino on our iPad and then tapped the Edit option in the top right corner to reveal the new image editing options.
Right away we noticed a problem. All the options were on the left side of the screen.
So to do anything, we had to reach across our image to tap a command or drag a control. That gets old fast. Unless you're left-handed.
THAT SHY UI | Back to Contents
There are a number of hidden user interface controls in iOS (and Mac OS X as well, for that matter). And they seem to be growing. For no very good reason, for example, the navigation bar disappears in the iOS version of Safari, taking an extra tap to reveal it before you can jump to another site.
Wrong Side. Righties obscure the image when making edits? That can't be right.
We knew there had to be a way to get the Edit interface to the other side of the screen. But there was no visual hint how to do it.
We tried dragging them, swiping them and dragging the image panel. Nothing worked.
Almost by accident, we rotated the iPad into a portrait orientation and the controls fell to the bottom of the screen. Shades of the old Etch-A-Sketch! Could we just slip them over to the right-hand side with another rotation?
Yep.
OPTIONS | Back to Contents
Once we did that, we could actually see what the controls did. (Why, we must ask, do they default to the left side when you have the hinged cover on top? An orientation issue?)
There are five main tools whose names were made up because there is no label on them:
The Magic Wand is an auto enhancement tool. No options. Click and -- magic -- your photo is enhanced.
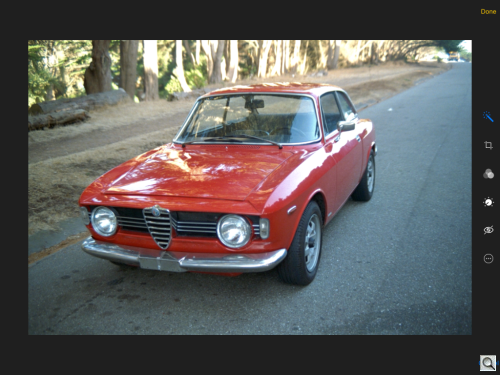
Magic Wand. Auto Enhanced.
The traditional Cropping tool also rotates the image, using a non-traditional degree readout with a Reset control. In the top right, there's a standard rotate 90-degree tool and at the bottom right, there's a set of standard aspect ratios.
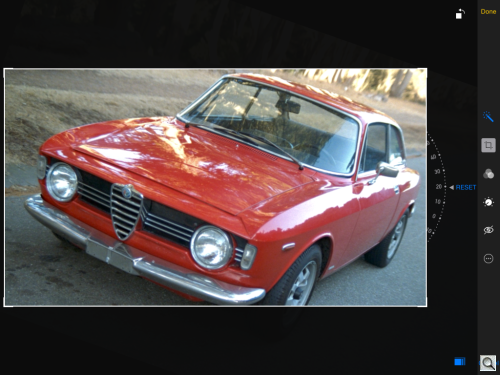
Crop & Rotate. Full featured. Here we're enforcing a 16:9 aspect ratio.
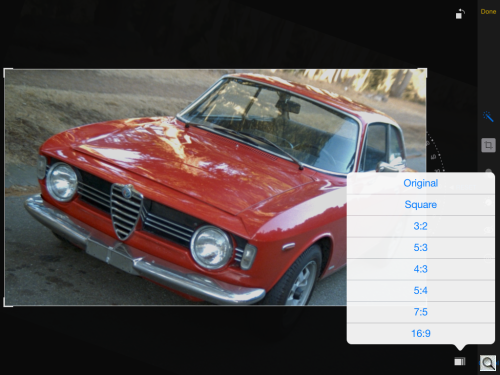
Aspect Ratio Popup. And this is how we chose which aspect ratio to enforce.
The Presets tool offers a set of looks including Mono, Tonal, Noir, Fade, Chrome, Process, Transfer and Instant.
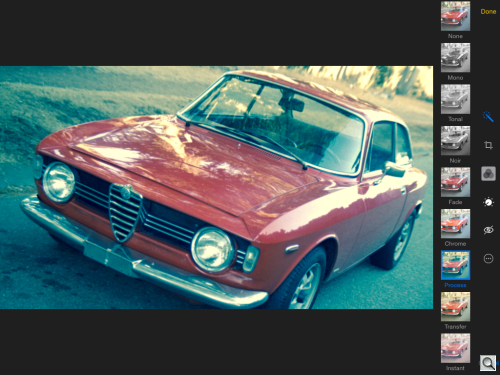
Presets. Underwhelming. We picked 'Process' because, you know, life's a process.
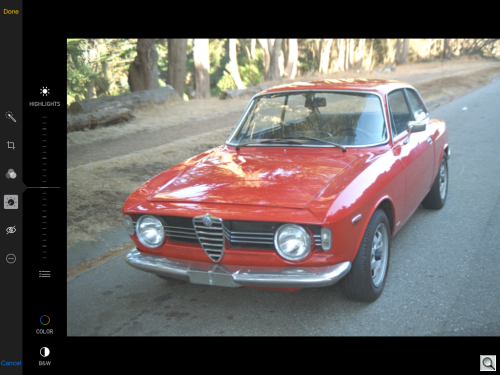
The Manual adjustments tool offers three options: Light, Color and B&W. They all remain accessible after you choose one (so don't Cancel, just look up or down the menu bar for the others). And they all provide a slider with thumbnails showing the effect plus a hamburger icon to access specific attributes. The Light option, for example, provides separate controls for Exposure, Highlights, Shadows, Brightness, Contrast and Black Point.
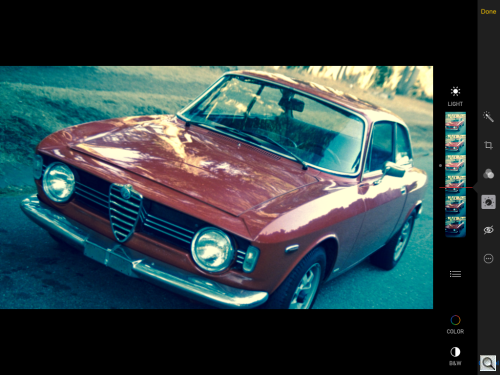
Light. Scroll the thumbnails.
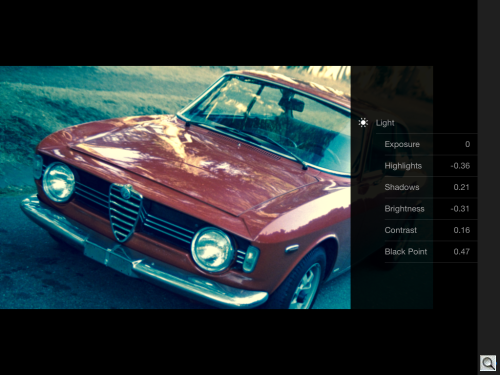
More Options. Tweak any of these values with a slider (see below).
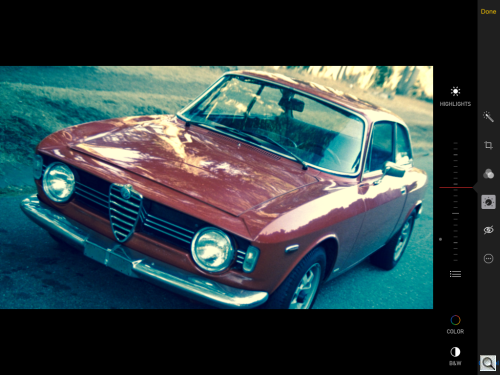
Light Highlights. Adjusting just the highlights, for example.
The Red Eye tool prompt you to tap on the red eyes in the image.
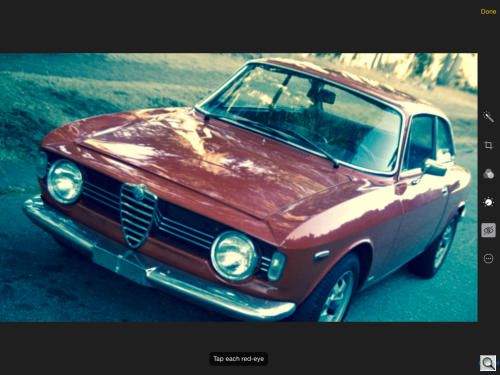
Red Eye. Audience participation required.
An Extras tool accesses other Photo Editors installed on your system. On Day One only Scanner Pro had been updated to work with other apps on our system.
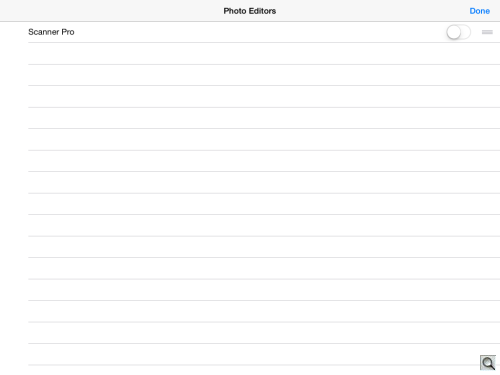
More. Which means other Photo Editors.
MORE UI TIPS | Back to Contents
The cropping tool supports some gestures. So you can pinch to zoom but not rotate (how come is that, Apple?). If you don't like the shape of the crop, tap that aspect ratio tool in the bottom left to pick another.
Move the tools to other sides of the screen by rotating your device.
When you make a change and then tap the Cancel button, you'll be prompted to confirm you want to discard the changes. Just tap the text bubble to confirm.
If you automatically enhance an image with that Magic Wand tool, it turns a lovely blue to let you know it's been activated. But none of the other tools do that.
QUIRKS | Back to Contents
We liked the automatic adjustments. They fixed up the Rumbalino nicely. And cropping was a breeze and full featured.
Presets were underwhelming. And no, you can't add your own.
Manual edits are all global at the moment. There are echoes of Adobe Camera Raw in them but they don't perform with the same sophistication. Our attempts to recover a little tonality in blown highlights actually introduced a color cast and changed the saturation. Not at all what we wanted.
CONCLUSION | Back to Contents
We're not a fan of hidden user interface controls that are so obscure they remain unused. We are a fan of simplicity. There's a little of both in this version of the Edit option. We've tried to provide a few tips to avoid the frustration.
We only worked with one troublesome image so the jury is still out on the effectiveness of the controls. As far as their user interface goes, they make an interesting contrast to Adobe's choices in Lightroom mobile. In our book, Adobe's done a better job on both usability and functionality but we suspect Apple is addressing a different crowd. A crowd that will have fun with them.
But if these new Edit tools are any reflection of OS X's Photos application, with which the company hopes to replace both iPhotos and Aperture, get the fire extinguisher, Nelly. There are going to be flames.