Photo Corners headlinesarchivemikepasini.com
![]()
A S C R A P B O O K O F S O L U T I O N S F O R T H E P H O T O G R A P H E R
![]()
Enhancing the enjoyment of taking pictures with news that matters, features that entertain and images that delight. Published frequently.
Getting a Head Start


5 August 2021
There are two ways to think about presets. They can be recipes for a specific look or treatment or they can be a head start on an image edit. As a recipe, they work well for sets of images. As a head start they work well for images you'd like to spend more time editing.
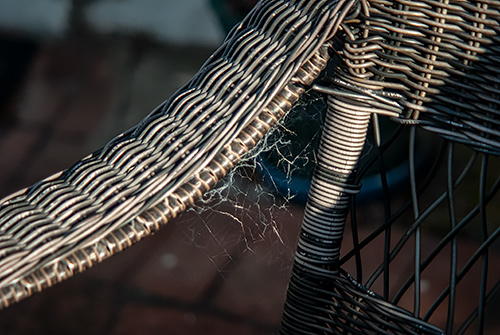
Armrest. Nikon D200 with 43-86mm Nikkor at f3.5, 1/750 second and ISO 200. Processed in Adobe Camera Raw.
Half asleep the other morning, we stumbled through the wrong door and found ourselves on the patio where we quickly became enamored of the early sunlight. We grabbed the nearest camera, focused manually on a few things and took a few shots before we went back inside to boil some water to make coffee.
A few days later we went through the images trying to find something in focus that we might like to work on a little more. This armrest in the sunlight intrigued us.
We got a head start on our edit with a preset we use for all of our old cameras.
When you open a Raw file in Photoshop, Adobe Camera Raw pops up. And if it recognizes that you've assigned a preset to that camera, it will apply it. That's the head start that always begins our Raw edits these days.
Like everything we've been shooting the last few years, we convert the Nikon .NEF Raw file to the non-proprietary Adobe DNG Raw file on import. Camera Raw knows what we like to do with our Nikon D200 Raw files, so it set the Basic sliders for us.
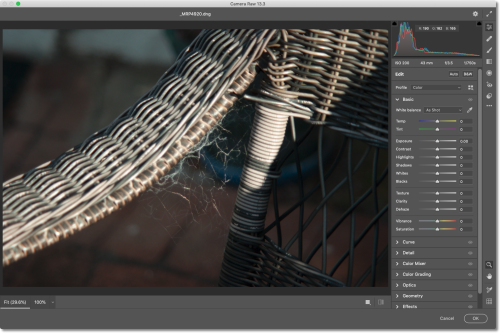
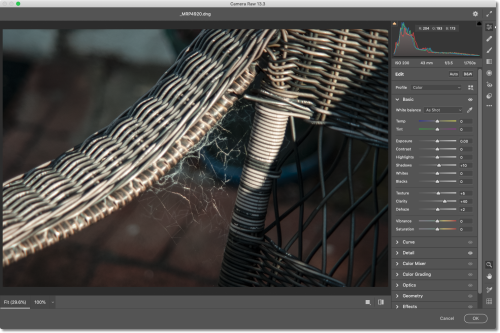
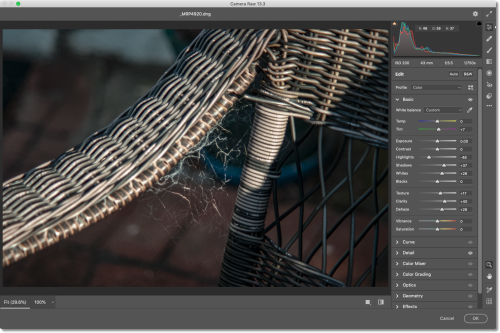
In the Camera Raw rollover above, you can see what the image looks like with no automatic intervention (or head start). The middle images shows the image after the preset is applied (which is normally how we first see the image). The image on the right shows the final edit after we played around with it a while.
Subtle (looking at the image) but substantial (watching the sliders).
The preset doesn't optimize the image. It doesn't even read the image. It simply (but automatically) applies the same adjustments we almost always used to apply manually.
If we were working with a portrait, though, we'd cringe at that automatic Clarity setting. The Texture slider would also be an issue. Both would emphasize wrinkles and other unflattering physical features.
Which is why our preset is only a starting point.
And not just for Raw files. Our cameras shoot Raw but our iPhone doesn't. Nevertheless the preset Adobe Camera Raw applies to the iPhone's JPEGs makes a great starting point. We're often surprised at the improvement of what looked pretty good to begin with. So whether you have a Raw file or a JPEG, configuring a preset can be not just a time saver but inspiring.
BTW, as our Candelabra Aloe shot demonstrates, you can run an image through Camera Raw more than once to get even more of a good thing. In that case it was Clarity.
Getting that head start from a conservatively set preset lets you spend more time experimenting than getting water to boil.