Photo Corners headlinesarchivemikepasini.com
![]()
A S C R A P B O O K O F S O L U T I O N S F O R T H E P H O T O G R A P H E R
![]()
Reviews of photography products that enhance the enjoyment of taking pictures. Published frequently but irregularly.
Installing The OpticFilm 120


25 February 2013
(Rather than publish a long single-page review after we've shipped the review unit back, we've decided to report our OpticFilm 120 experience on a continuing diary-like basis with links in the Story box at the right to the other articles in the series. That gives you a chance to hit the Feedback button at the bottom of each article to get your questions answered promptly. -- Editor)
Installing the OpticFilm 120 is a two-step dance. Hardware one, software two. Both have a move or two to consider, too.
HARDWARE | Back to Contents
Installing the hardware involves locating the scanner in a convenient spot and cabling the power supply and a USB data cable to it.
While side-to-side clearance is not an issue, both back and front clearance is. The scanner requires about 14 inches in front to load any of the 13.25-inch long film holders. But what about the rear? If the holders are ejected from the slot in the rear of the scanner, you'd have to allow at least that much room behind the scanner, too.
That's a little awkward.
We suspect you load the holder completely into the scanner, which then moves the holder back out the front as each frame is scanned so you don't have to worry about back clearance -- or dust getting into the rear slot.
That's not quite how it works, it seems, after a few early scans. Sometimes the holder is ejected out the front, sometimes out the back, so you need full clearance in the rear, too.
Update: A few software revisions later, the behavior has cleared up a bit. During an Overview scan of the whole holder about as much of the holder sticks out the back as the rear cover extends. But the holder is now always ejected out the front slot.
Also worth mentioning is the weight of the unit. At 12.57 lbs. it isn't light. So even though the unit itself doesn't vibrate noticeably, make sure to set it on a sturdy support.
HOLDERS | Back to Contents
The holders themselves are among the best engineered film holders we've used. They are heavier than most, almost half an inch thick with a geared track on one side and smooth track on the opposite long side.
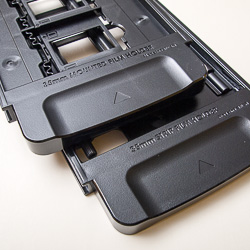
A nice wide handle at one end also identifies the type of holder
Holder on top shows the geared side and holder below the smooth side
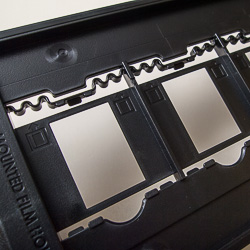
35mm Mounted Slide holder
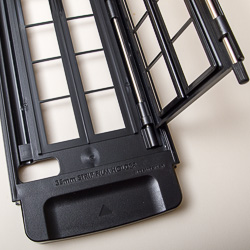
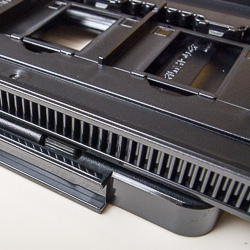
Other holders are hinged with magnetic clasps
The front of each holder has a handle that identifies the holder and on the back edge a white square no doubt aides calibration. Except for the five-frame 35mm slide holder, the holders use a hinge mechanism which attaches with magnets to sandwich the film securely in the holder.
Update: We have more on the holders in the Holders Report.
PLUGGING IT IN | Back to Contents
The Quick Guide (all of 14 pages in English) recommends plugging the power adapter into the scanner first before plugging the adapter itself into the wall. You likewise then plug the USB cable into the scanner before connecting it to your computer's USB port.
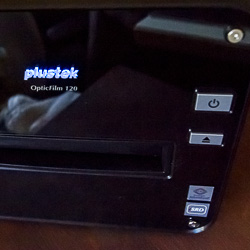
Buttons. The logo lights up with power on. Just a Power button and an Eject button.
The included USB cable is about five feet long.
To power it up, you simply press the Power button. The logo immediately lights up in blue to indicate the unit it ready.
To power the unit off, you hold the Power button in for three seconds. We're not sure why it isn't a simple toggle, but it isn't.
There's only one other button to worry about on the scanner. It's the Eject button to crank the holder out of the scanner when you've finished with it.
SOFTWARE | Back to Contents
Included with the OpticFilm 120 is a DVD case with two CDs:
- One includes the Plustek driver and associated materials like the full user guide.
- The other includes SilverFast 8. To activated SilverFast 8 (and to register it and to upgrade it, too) you'll need the serial number printed on the front of the DVD case. So it's an important number you should copy to your drive for reference.
We installed the Mac OS 10 version on a 13-inch MacBook Pro we use as a scanning station. An Intel processor is required on the Mac.
Plustek. Very quick driver installation.
We turned the scanner off for the duration of the software install. You only need it on when you first launch SilverFast so it can detect the scanner.
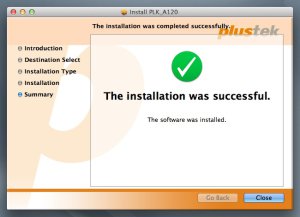
Begin with the Plustek CD (v1.0.0.24). The Plustek install went very quickly using the standard installer. It doesn't, however, tell you what it installed or where it put it.
The SilverFast install also uses the standard installer. The Read Me warns you to install the Plustek files first (which are indeed the driver). The installer advised that the installation would require about 415.5-MB of space and include some SilverFast tutorials.
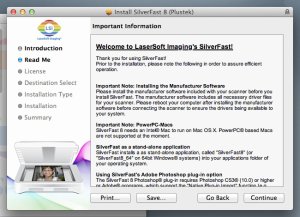
SilverFast. Read Me for scanning software install.
That only took a couple of minutes.
Next we powered up the scanner so SilverFast could find it and launched SilverFast 8. We were immediately informed our install of v8.0.1r18 was a bit out of date and should be upgraded to v8.0.1r20. So we did that.
We entered the serial number from the front of the DVD case and were then asked to insert the CD itself for serialization. After entering our salutation in the Registration Dialog, though, it crashed. Hmmm.
Our second attempt went more smoothly, although very sluggishly. There is a warning screen that advises you there's a problem if it stays up but it went away after a few long seconds.
You do have to confirm registration by clicking on a link emailed to the email address you use to register the software. Then you can do the update by logging in to the SilverFast site, reentering your serial number and then your email address to go to the appropriate download page.
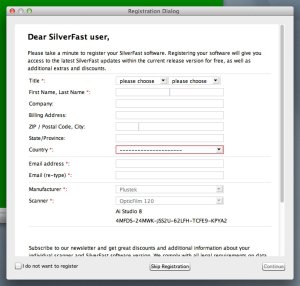
Registration. Confirmation required before you can download the update.
This download required 428.7-MB of hard disk space, a bit larger.
Meanwhile, the OpticFilm 120 went to sleep. The Power button glowed red and the logo no longer glowed blue. A tap on the Power button brought it back to life, though.
Then we were (nearly) in business. Before we could do any serious scanning, we had to profile the scanner. Fortunately, SilverFast makes this very easy.
PROFILING | Back to Contents
Inexpensive scanners do not come with IT8 targets and certainly not SilverFast's barcoded ones, which make it easy for the software (instead of you) to associate the target colors with known values.
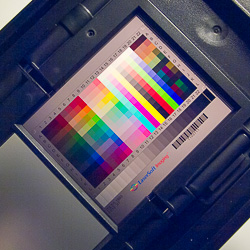
IT8 Target. The SilverFast targets are barcoded so you don't have to point to a data file.
Inexpensive scanners these days use LED light sources. Unlike, say the Epson V700/V750 (which uses a white cold cathode fluorescent lamp), the OpticFilm 120 also uses an LED light source, too. And while an LED light source is more consistent than a cathode fluorescent, requiring no warm-up, it never hurts to profile the scanner.
We've found the generic profiles for inexpensive scanners to be more than adequate. But if you're interested in getting the most out of your scanner, profiling it now and then is worth the few seconds it takes. Applause to Plustek for including the tools in the package. They aren't cheap to acquire separately.
To profile the scanner, you simply scan an image with a full range of colors that have been measured so their values are known precisely. Those values are compared with the scan results to show how this particular unit sees them.
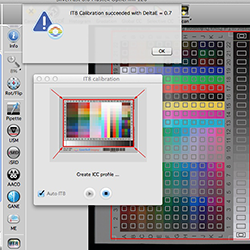
Profiled. The window shade indicates the ICC profile was created. IT8 Calibration window indicates status and behind it you can see the Preview of the barcoded IT8 target with the overlay aligned automatically.
SilverFast's target includes a barcode that points SilverFast to the companion data file for the target's color patches. This makes it very simple to calibrate your scanner, essentially just loading the appropriate target and pressing the Calibration button in the Preview window.
We used the 6x7cm holder, dropped the transparent IT8 target into the opening furthest from the front of the holder and nudged the holder into the front slot of the scanner. The scanner grabbed it and pulled it in a bit.
Then we went back to SilverFast, indicated we were scanning a 6x7cm Transparency (the first big icon in the top left reveals a pulldown menu when clicked) and then clicked the IT8 Cal button in the workflow strip alongside the image preview. In just seconds, the target was scanned and the profile created.
We were now ready for our first scan. But that turned out to be quite an adventure, as we explain in our Update to this review.