Photo Corners headlinesarchivemikepasini.com
![]()
A S C R A P B O O K O F S O L U T I O N S F O R T H E P H O T O G R A P H E R
![]()
Reviews of photography products that enhance the enjoyment of taking pictures. Published frequently but irregularly.
OpticFilm 120 Scans


21 March 2013
Ah! Finally, the scans. Our test suite for the OpticFilm 120 includes both color and black and white 120 film, Kodachrome and Ektachrome positives, plus some color negatives. And we have comparison scans with the CanoScan 9000F, Epson V700/V750 and Microtek M1.
It hasn't been easy. Even with the latest version of SilverFast 8 (v8.0.1r22), for Mac OS X, we've continued to be slowed down by the software itself.
That little problem between the Overview and JobManager is bigger than we thought. Deleting the images in JobManager and using the Overview thumbnails to add to the JobManager list, causes the JobManager display to show the wrong thumbnail or SilverFast 8 to scan the wrong image.
At one point, we actually previewed and scanned the Maserati shot only to find SilverFast 8 had processed and saved the Boat shot. A completely different image than what was previewed.
That's serious enough that we've reported it to LaserSoft Imaging and it's being addressed.
We were also confused by SilverFast 8's propensity to reset our default filename and destination. You may recall that we were redrawing the scan area for each image because the scanner doesn't allow SilverFast 8 to position the holders. In this version of the software, SilverFast associates the filename and path with the frame itself. As LaserSoft Imaging explained, "They are back to the default destination folder and file type when you're drawing a new frame because they're a frame-based parameter."
There are smaller issues with SilverFast 8 on Mac OS, as well. The controls, for example, fail to update properly as you moved over a corner. And on occasion the scanner simply fails to respond to SilverFast's initialization request when doing an Overview. Quiting and relaunching SilverFast resolves that issue.
We've reported these issues to LaserSoft Imaging and as they are resolved, we'll update this report.
THE SUITE | Back to Contents
Despite the nuisances, we've managed to get through a suite of scans that cover 120 film (positive and negative), Ektachrome, Kodachrome (in 48-bit and HDR modes, too) and color negatives.
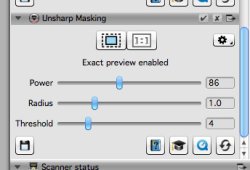
Unsharp Masking. Typical Settings.
Except for the monochrome frames, the scans were made with SilverFast 8's Auto Color Correction and Unsharp Masking (with an Amount of 86 or so, Radius of 1 and Threshold of 4). We avoided defect removal in general (with one exception) simply to eliminate it as a factor in evaluating the scanner's performance.
Most of the scans were done at quarter optical resolution, which we believe is the setting that would most often be employed in making prints. We discussed resolution further in a prior installment of this review. We did scan at three optical resolutions and have provided several 100 percent crops of scans at quarter, half and full resolution.
In addition, we've compared the OpticFilm 120 scans to older scans made on a number of other scanners we've reviewed over the years.
Tri-X Grain. Scanned at 10,600.
Everything you see here, we hasten to point out, has been (slightly) sharpened for Web output. And, except for the 100 percent crops, resized. So examine at the 500-pixel full-frame images for their color and tonality.
The OpticFilm 120 specs claim an output resolution of 5300 dpi for the CCD. In practice that resolves to around 4300 dpi, according to LaserSoft Imaging's tests. We'll be doing a resolution target scan for this unit next week. But those numbers exceed the typical resolution of units like the Epson V700/750 and CanoScan 9000F of just under 2000 dpi.
If there's sufficient interest (use the Feedback button at the bottom of this piece), we'll consider making the full-frame quarter-resolution scans available to subscribers for download.
120 SCANS | Back to Contents
Our first scan of all, of course, was the included 6x7 IT8 target on Fuji Provia film. With Auto Color Correction and Unsharp Masking (86/1/4 are the settings we used throughout), it's a nice image itself. Here is the reduced full-frame quarter optical resolution scan with a 100 percent crop:
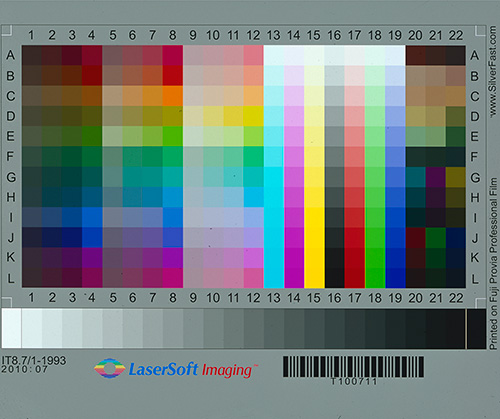
IT8 Target. On 120 film. Note the SilverFast barcode.
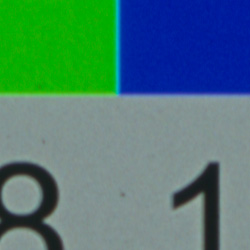
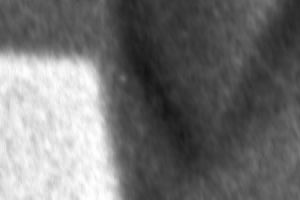
IT8 Detail. 100 pct. crop.
We also scanned several black and white 6x7s.
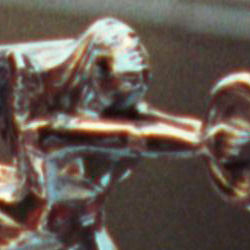
Our favorite is this clown. The full frame image is resized from a quarter optical resolution scan.
Below it are three crops showing quarter (2650 dpi), half (5300 dpi) and full (10,600) optical resolution.
Although this is a Plus-X emulsion, the Plus-X NegaFix setting didn't do it justice, so we just clicked through the list until we found a more flattering one. Think of them, in short, as filters, and try a few out.
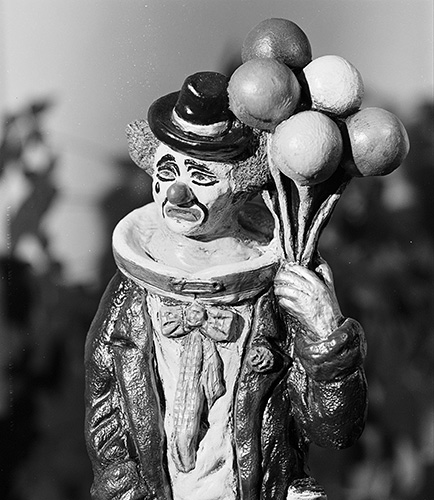
Full Frame Clown. Nice tonality.
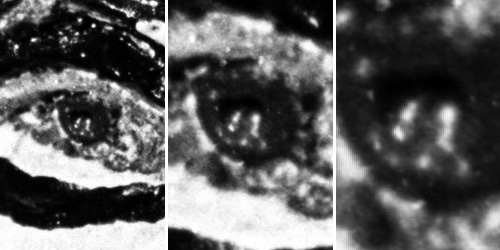
100 Pct. Crops. The eye scanned at 2650, 5300 and 10,600 dpi.
Another favorite set of images is a bouquet of roses. The water drops are sharp and clear while the tonality is rich. Below it, we show the 100 percent crops at quarter, half and full resolution.
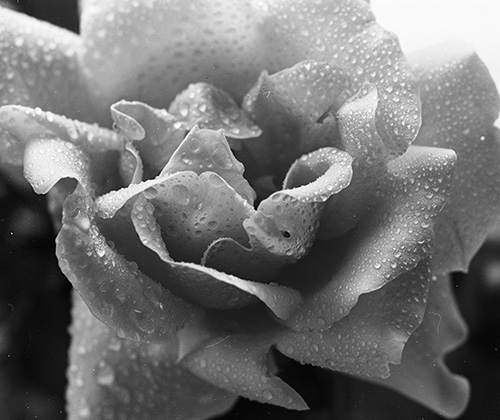
A Rose. Very nice tonality.

100 Pct. Crops. The eye scanned at 2650, 5300 and 10,600 dpi.
Here's the same shot scanned by the CanoScan 9000F:
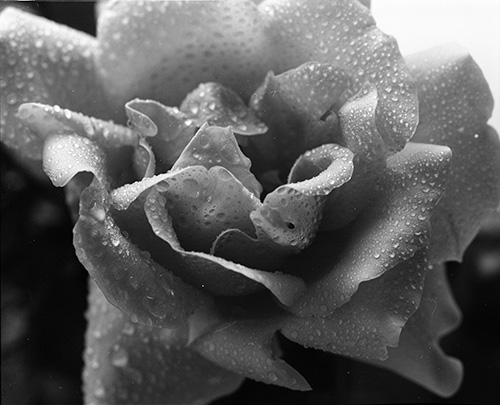
CanoScan 9000F. Same frame scanned on the 9000F.
EKTACHROME | Back to Contents
When we complained about the 35mm slide holder masking oversized 35mm film, we were surprised to see this one from Canada cropped pretty nicely anyway. So we scanned it using both Unsharp Masking and iSRD defect removal.
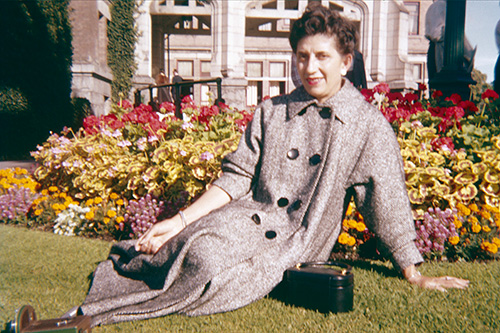
Ektachrome. We restored the color and used defect removal to clean up this circa 1950s image.
SilverFast 8's iSRD intelligent defect removal software did an excellent job in Automatic mode, removing a number of spots in the image. In our tests, iSRD manages that improvement without degrading the sharpness of the image. In fact, flipping back and forth between the scan of the same image without iSRD applied and one with it, all you notice is the mysterious removal of the defects. The rest of the image is just as sharp.
Defects. The original Ektachrome scan.
iSRD. With intelligent defect removal applied..
And the color (which was quite faded) is also very nicely restored to a natural palette.
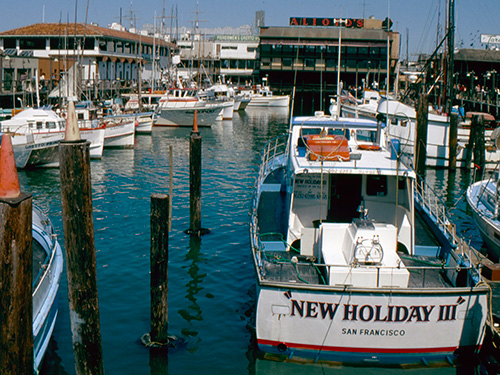
Our Fisherman's Wharf scan and Aquatic Park scan were also nicely rendered. Particularly in comparison to two leading flatbed scanners, the Epson V700/V750 and Microtek M1.
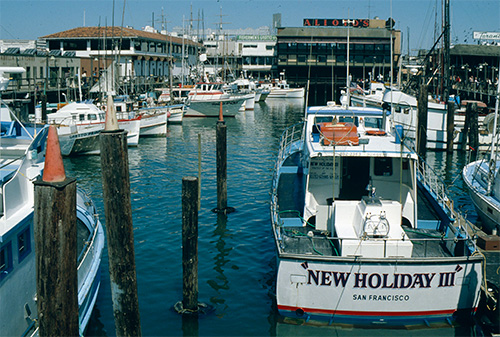
Fisherman's Wharf. Resized quarter optical resolution scan.
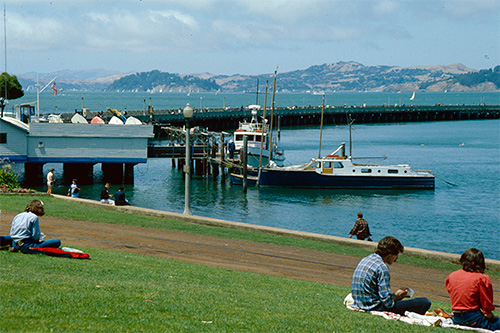
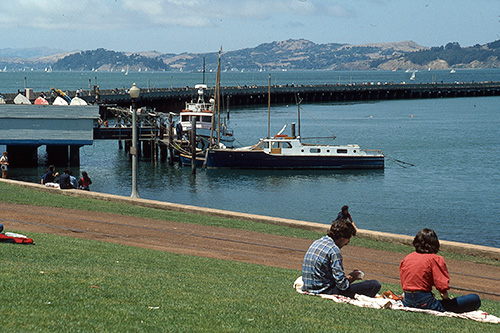
Aquatic Park. Resized quarter optical resolution scan.
Here's the Wharf shot from the Microtek M1:
Fisherman's Wharf. The Epson v700/V750 is a bit less sharp.
Here's the Aquatic Park shot scanned by the Epson V700/V750:
Aquatic Park. Not the same frame but the same shot scanned by the Microtek M1.
KODACHROME 48-BIT & HDR | Back to Contents
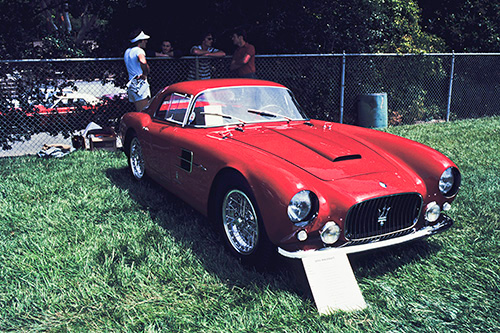
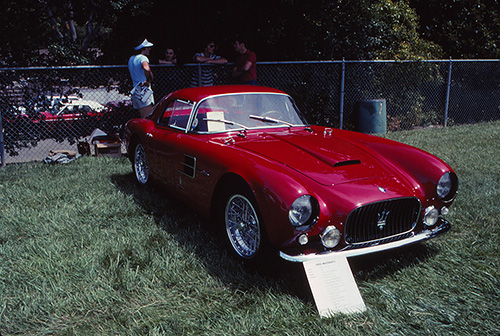
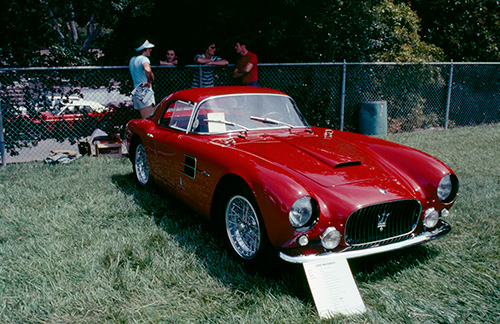
The Maserati is our test Kodachrome. We never get tired of looking at it. And it's a tough scan as our wildly diverging results show.
The red, for one thing, is hard to capture. And the placard has some text on it that is hard to capture, too. Not to mention the people in the shadows behind the car. And that green grass.
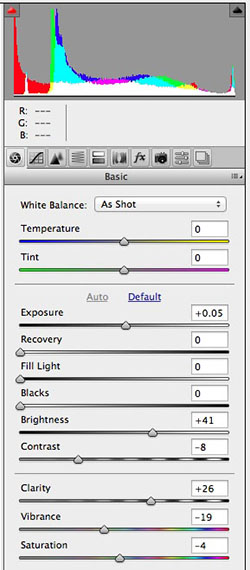
Camera Raw. Auto settings for the 48-bit scan show some extreme slider positions.
They're all problems on this image.
In fact, you may have thought (as we did) that the Multi-Exposure auto-corrected scan we showed previously (and shown below) is a bit dark. We opened the JPEG in Photoshop CS6 to see if a little Curves magic would make a difference but we quickly ran into trouble. So it was back to the scanner.
One nice thing about SilverFast 8 is the simple Global Color Correction tool. Because the preview is live, it's easy to make some dramatic as well as subtle changes to get where you want to go.
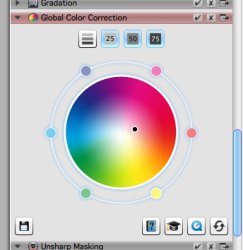
Global Color Correction. Move the dot and watch the preview. Fine touch with the outer dots.
That JPEG was scanned at 48-bits (16-bit channels), which SilverFast converted to a 24-bit color image (8-bit channels). But we wondered about just scanning the frame with 16-bit channels to work on it in Adobe Camera Raw, creating in short a Raw file as the scan.
There are two ways to do this in SilverFast 8. One is to just select the 48-bit option. The other is to select the 48-bit HDR option.
The 48-bit HDR scan is as raw as scanner output gets. All the adjustments are disabled except Multi-Exposure. No gamma is applied by default but you can specify one.
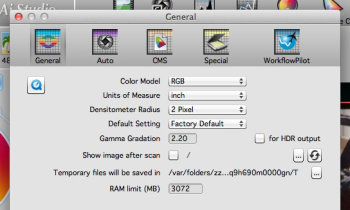
HDR & Gamma. The HDR captures don't include a Gamma gradation by default but the General Preference lets you change that.
The 48-bit scan, on the other hand, does permit color and tonal adjustments as well as defect removal. And still outputs 16-bit channels for fine-tuning in your image editing software.
We found it very difficult to work with the 48-bit HDR scan. Adobe Camera Raw required about a three stop exposure increase and sliders maxed out to get a reasonably credible image. We had a lot better luck opening the image in SilverFast HDR, which handles the format with a little more latitude.
Just as easy, though, was editing the 48-bit scan in Adobe Camera Raw. Although, again our slider controls were at the extremes.
Still, there's a significant improvement in the scan. Particularly worth noting is the side of the Maserati, which in the original JPEG is a bit too dark.
Here are the three scans: the original JPEG, a 48-bit scan processed in Adobe Camera Raw and a 48-bit HDR scan processed in SilverFast HDR v6.6:
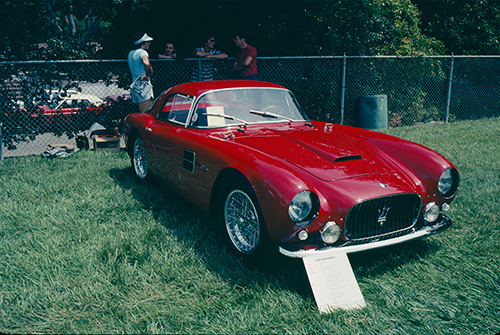
48->16-bit Scan. A bit dark, losing the figures in the background.
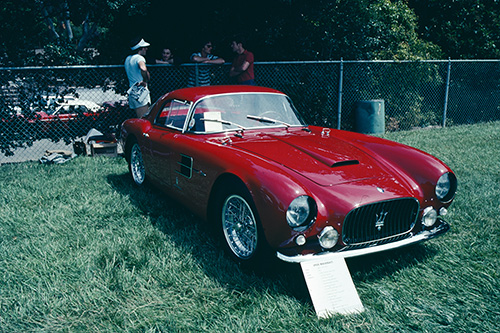
48-bit Scan. Better shadow detail, brigher red.
48-bit HDR. Processed in SilverFast HDR v6.6, looking for a brighter red.
Here's a full-frame comparison with the CanoScan 9000F and the Microtek M1:
9000F. Compare to 48-16-bit scan above.
M1. One of the better scans.
Grill detail from the OpticFilm 120 at all three resolutions:
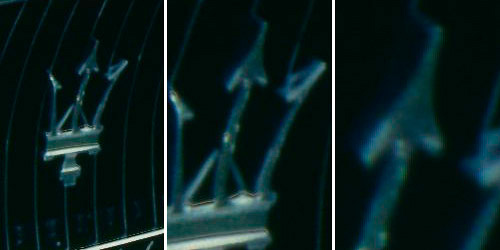
Maserati Grill. Scanned at 2650, 5300 and 10,600 dpi.
And finally, here's a comparison of the 9000F at 9600 dpi with the OpticFilm 120 at 10,600 dpi. Both images were sharpened the same amount in Photoshop CS6.
9000F & OpticFilm 120. Full optical resolution (9600 vs. 10,600).
COLOR NEGATIVES | Back to Contents
Color negatives are a special challenge. SilverFast includes a way to handle that challenge called NegaFix. Like the black and white emulsion filters, NegaFix provides a number of emulsions to help convert the scans.
These frames are mostly Kodak Gold 400. And NegaFix did a very nice job on the conversion to a positive image.
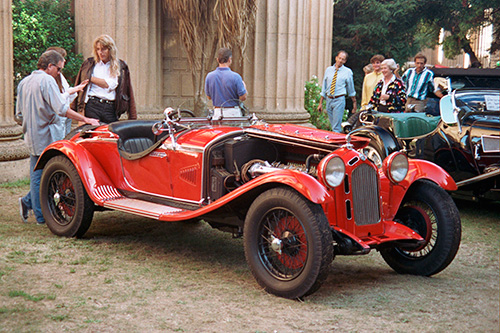
Alfa Romeo. We warmed the image slightly using the Global Color Correction tool.
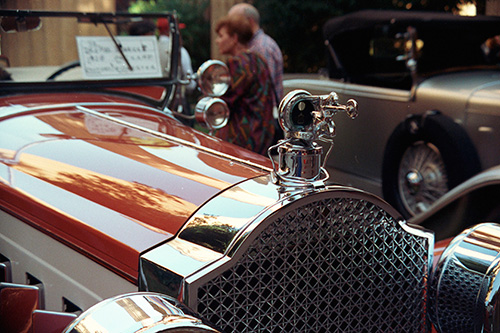
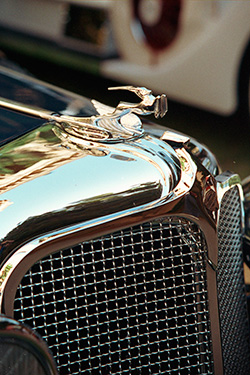
Pierce Arrow. Brilliant hood ornament.
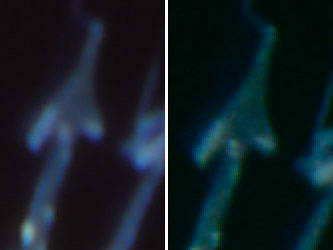
And some slightly sharpened 100 percent crops of the 2650-dpi scans:
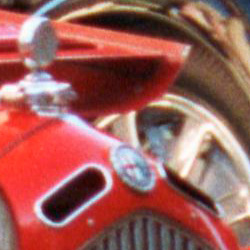
Alfa Romeo. 100 percent crop.
Pierce Arrow. 100 percent crop.
Here's a comparison of the OpticFilm 120 and CanoScan 9000F on the same classic car negatives. The original scans were processed exactly the same in Photoshop CS6: cropped 3:2, resized to 250-pixels wide and color balanced:
OpticFilm 120. Full frame.
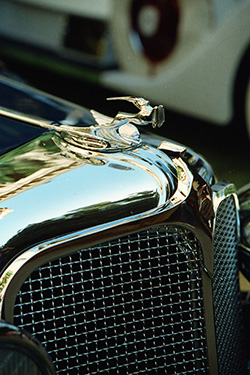
CanoScan 9000F. Full frame.
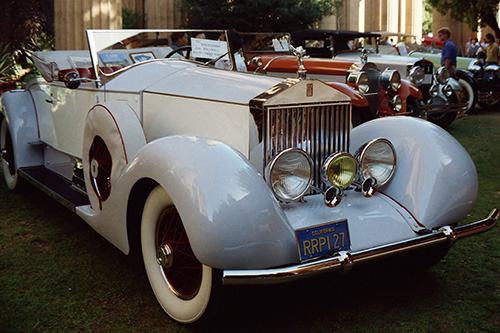
Finally, here's a lovely Rolls Royce processed identically in Photoshop CS6. The OpticFilm 120 scan, which was scanned using Multi-Exposure, has a good deal more shadow detail.
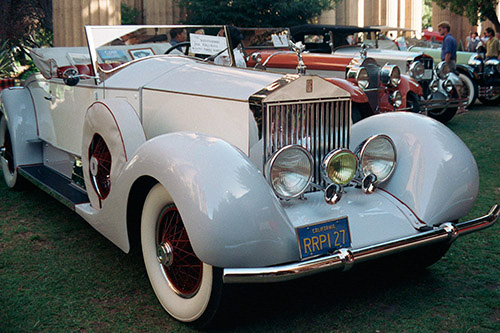
OpticFilm 120. Full frame.
CanoScan 9000F. Full frame.
NOTES | Back to Contents
The OpticFilm 120 delivered some very nice scans, really among the best we've seen of these images. No other scanner had achieved the level of detail, the range of tones or the color of these images.
And we achieved those results at the quarter optical resolution we would typically be scanning full-frame images. We did get a lot more data on full optical resolution scans, of course, which would allow enlargements of smaller crops of these images.
We have a few more tests to do so we'll keep this review rolling a little longer. Meanwhile, use the Feedback button to comment or ask a question.
Comments
I've recently jumped into the world of medium format film photography with both feet after purchasing a used RB67 Pro-S on my local craigslist in good condition. Wow! I started shooting digitally about five years ago and have gone up to the Canon 5D Mark III, but there is something about the negatives from 6x7 medium format camera that are amazing.
So, since I don't feel like paying Samy's (who are wonderful) $12 a roll to scan, I decided I need to buy a film scanner. Complicating matters is I'm also shooting some Polaroids (well, Fuji) with the Polaroid back and want to scan some of those as well. After searching and searching around the Internet, I was thinking of getting the Epson V700 since I thought dedicated film scanners were too expensive.
Well, so far your review of the OpticFilm 120 is changing my mind. At $2K it's still expensive, but not so far out of my reach if I save up for it. So I've decided I'll get the Epson V600 for now for my current need of Polaroid scans and Web+ quality negative scans and in six months or so, provided I'm still regularly shooting film and will find it worthwhile, I'll likely get the OpticFilm 120.
Thanks a lot for taking so much time and effort to do a thorough review of this recently released scanner and I'm very much looking forward to reading the last bit of your review. I think you've saved me some money in the short run and helped give me the opportunity to have higher quality output in the long run.
-- Aaron
Thanks, Aaron! That's a pretty good approach at the moment. While the OpticFilm 120 is shipping, it won't hurt to wait. At the moment, we're working with SilverFast Imaging to resolve the issues we've found using the scanner but at least one looks like it will require a hardware revision. We'll have more to say on both topics before conclude this rolling review. -- Mike