A S C R A P B O O K O F S O L U T I O N S F O R T H E P H O T O G R A P H E R
Enhancing the enjoyment of taking pictures with news that matters, features that entertain and images that delight. Published frequently.
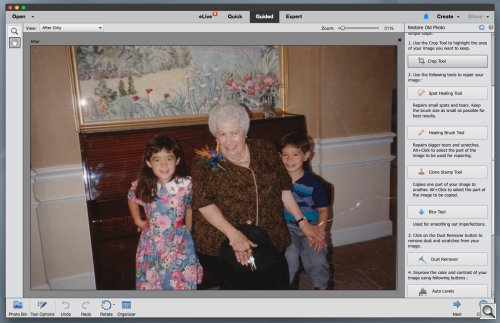
Restoring A Damaged Print
23 October 2015
We chose those words in our headline very carefully. This job involved a physical print, not an amorphous photo, and it had a big tear in it, among other things. So the job was to restore it not just retouch it.
Damaged Print. A tear, scratches and more.
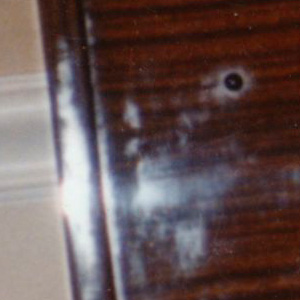
The "other things" included scratches and wrinkles from being rolled over by a drawer on extensions and various imperfections in the reproduction like pinholes.
Not long ago this would have been a job for a professional photo retoucher but today tools like the inexpensive Photoshop Elements and even the new Photoshop Fix, which runs on your phone, include almost all you need to do it yourself.
All that's missing to make this easy and fun is, well, a little advice.
There's more than one way to do this, so we'll list our preferred tools with the alternatives after them.
Any flatbed scanner. A camera (carefully aligned to the print) can also digitize the print.
Image editing software with a Healing Brush tool. A Clone tool takes more effort but was what we all used before Healing Brushes.
A photo printer. Everything from a four-ink all-in-one (which will also work to scan the print) to a professional-level photo printer (dye, pigment or dye sub) will to the job. Alternately, you can have your favorite photofinisher print the edited file.
That's not too long a list. We'll bet you already have everything.
We used a CanoScan 9000F, Photoshop CC 2015 and a Canon Pro-100. We prefer using a bitmapped editor like Photoshop rather than a non-destructive editor like Lightroom. It's just a smoother, more natural experience.
But there's no reason you can't do this in Photoshop Elements or even Photoshop Fix on your phone or tablet. If you work on a device with a small screen, you may find it difficult to gauge the overall effect of your edits and you will spend a lot of time scrolling around, but the tools work.
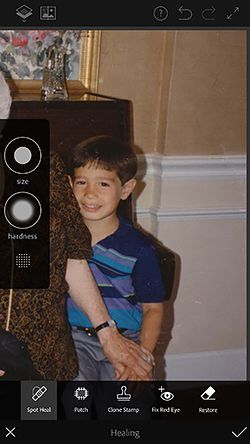
We did find it difficult to use small brush sizes in Photoshop Fix's Spot Healing Brush with just our finger. Zooming in helped a big but a stylus helped immeasurably. Still, nothing really beats a precise cursor in Photoshop itself for, well, precise work like this.
Elements actually provides a Guided Edit to step you through the process. That's not only a great way to get the ball rolling but it's also a good approach if you want to get the whole family involved without offering them a weekend workshop at some exotic vacation spot.
Elements Guided Edit. Step-by-step instructions.
The procedure we describe here varies a bit from the Elements Guided Edit but we have our reasons, as you'll see.
And, of course, there are other image editors with similar capabilities. Just look for a Clone tool or a Healing Brush.
Photoshop Fix. Even the larger iPhone 6 Plus screen is cramped for doing Spot Healing but it can be done.
The tear on our print had been taped on the back (fortunately) to prevent further damage. You may not be so lucky, with tape applied over the image itself.
Not all tape can be removed. Test a corner to see if it lifts easily, leaving the image intact. If not, leave it until you scan the image. With a scan as insurance, you can try to remove it with your preferred rain dance and accompanying incantation.
The tape on the back of our print was applied in several layers that might have prevented the print from lying evenly flat on the scanner bed. We probably didn't have to bother but we carefully peeled the tape off, layer by layer.
We then applied a single thin layer of tape to the back of the print. Not only would that prevent the tear from growing as we handled the print but the owner of the print would enjoy the improvement, too. And the single layer of tape didn't distort the print on the scanner bed.
The principle here is be careful not to make things worse.
Next, clean the scanner glass. You'll have enough to do without spotting new dust.
Consider cleaning the print, too. You won't get ink off (especially ballpoint) but you can give it a shot of compressed air (or just wave it gently in the air) to remove any dust already on it. If you're tempted to wash it in any way (which is not generally a good idea), scan it first.
The principle here is that with a scan of the print, you're free to try anything. But it's rarely worth the trouble to optimize the print itself.
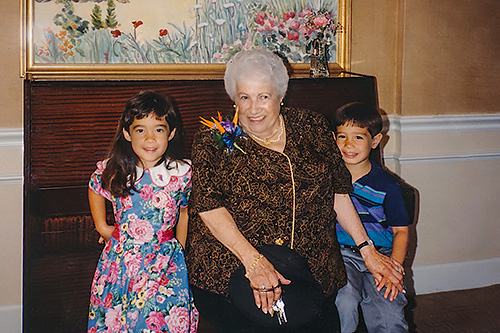
Our damaged print was a 4x6 from the film era processed by a machine. That's the bar we had to clear. Piece of cake.
One thing a scan provides that a print cannot is a degree of magnification that is truly spectacular on today's large monitors. A 4x6 print can't show the detail a 300-dpi scan will show on a 24-inch 1900x1200 monitor, which it will fill.
So you'll want to include the retouched file as part of the package. It's easier to share than a print, too.
And a detailed scan also makes it easier to see and fix defects, although it's easy to get a little too picky about that.
So scan your original at 300 dpi for same size reproduction. You should have an 1800x1200 image size to make a 4x6-inch print.
Yes, you can go higher. But a printer minimum would be about 150 dpi or 900x600 pixels. We're doubling that. But that doubling won't tax your computer (or tablet or phone).
It's possible you addressed some of these global edits in the scan itself. But just to be thorough check:
Tonal Range. Is your black actually black and not gray? Is your highlight actually white? Should it be? Do you need to shift the mid-tone gray darker or lighter? You can do this simply with the Levels tool or with more refinement using the Curves tool.
Color. You can make the same adjustments to each color channel to affect color. Or you can shift the Hue to a warmer or cooler palette. In some cases, you may have to restore the color from a faded print. The easy way is with an Auto Color correction but you can tune each channel in Levels to balance the image, too. The White Balance tool can be a one-click solution for this as well.
Lens Correction. Without any Exif data from an actual camera capture, you won't get the full benefits of modern software's lens corrections. But don't dismiss it. Generic corrections do improve the image. Running a scan through Piccure+ won't hurt, either. We did that with this image, in fact.
Geometry. Another tool that wasn't available in the point-and-shoot film days was perspective correction. If your verticals are converging (as they were in our image), this tool can straighten them. At a minimum, consider straightening the horizon.
Crop. Lastly, consider a tighter crop. We had a lot of wall in our image. Unimportant wall. And while the artwork behind our trio was charming, it wasn't what the photo was about. We didn't crop it out entirely, but we sacrificed half of it to make the faces larger in the final print, something the wide angle lens didn't do when it captured the image.
Good work. You'd do this for any scan, really. All that's left on this job is the nasty stuff.
The nasty work of repair and retouching is, by nature, a local edit.
Imagine hovering over a black and white print with a magnifier on your nose hunting white specks in a dark landscape and spotting them with a 000 brush dipped in Spotone. That's how it was done.
Today you have options. Scanning software may seem like a solution but it doesn't work very well on prints, just film (and not all film). It has to be able to detect a physical variation to find a defect.
It would detect the tear, yes, but tear repair is not at all time consuming. It's the spotting that's time consuming.
So you might think a Dust and Scratches filter would do the trick. But we always find these a bit too brutal. They soften the image. That's what we notice most.
So roll up your sleeves. This is best done manually.
There are really two kinds of local edits to perform. They use the same tools and skills but they deal with different kinds of problems. Repairs deal with things like our tear. Retouching gets rid of problems on the original print before it was damaged.
Large defects, like our tear, are best handled with the Healing Brush although you can artfully do it with a Clone tool, too.
In a few swipes the software will figure out what the defect should look like and paint over it. You can undo and reswipe or just reswipe if you don't like it but the Healing Brush is pretty smart these days.
Here are the repairs we made to our image:
Image 1 of 6: Tear Image 2 of 6: Scratches Image 3 of 6: Crease Image 4 of 6: Dust Image 5 of 6: Flash Image 6 of 6: Glare Image 1 of 6: Tear
Damage. Mouse over or tap for captions.
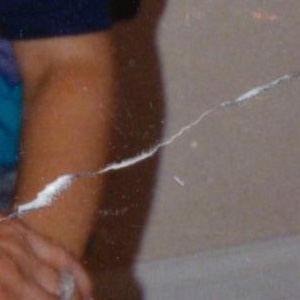
The Tear. We set the brush size big enough to cover the widest part of the tear and made a swipe or two on the part of the tear that crossed the wall. For the tear inside the body forms, we reduced the size of the brush and dabbed. Gone.
Creases. The print had been creased and the Healing Brush again came to the rescue, removing each crease in a single broad swipe.
Scratches. The print had been scratched pretty badly in one corner. Again, the Healing Brush again came to the rescue, removing each scratches with a single swipe.
You might think this stuff, being the most noticeable, would be the hardest to deal with. But it's usually a breeze eliminating problems like tears and creases when they don't destroy important parts of the image like faces.
If that's what you're confronting, you'll want to retouch the damaged area carefully using painting skills to reconstruct the missing detail.
Our retouching dealt with problems you would have seen on the print just after it was made. Those included:
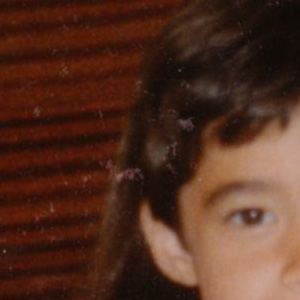
Spots. Small defects that would be noticeable in the print get our attention next. Anything around the faces, stuff around the clothes, arms, feet, etc. Anything that disturbs the background. We do ignore most of the tiny specs in the darker parts of the print which will unavoidably be filled in when you print. If you want the file itself to be pristine for on-screen viewing, though, knock yourself out.
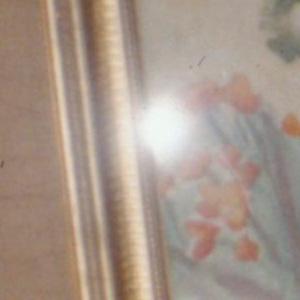
The Flash. The flash was reflected on the frame of the artwork so we knocked that down a peg or two with a big brush size on the Healing Brush. Just a click. One one version we eliminated it with the Clone tool, sampling the frame above the glare and painting on the glare. But we preferred a subdued glare.
Glare. We had some glare on the furniture that was really unsightly. It was a little too detailed for the Healing Brush to handle. The Healing Brush works miracles removing detail from broad backgrounds but it isn't quite so helpful restoring detail. But there was plenty of detail to clone, so we used the Clone tool to repaint the glared surface of the furniture. It took a while but it was worth it.
As you consider each defect, ask yourself how important it is in the photo. Are you just removing a distraction (or minimizing it in the case of the flash reflection on the frame)? Once you get rid of it, it isn't distracting and no one will scrutinize that area of the photo. You don't, in short, have to be perfect here.
And you will appreciate that crop and global repair now. It will have saved you from a lot more retouching.
It's not a bad idea at this point to send the file to the owner of the print for approval or comment. They may see something you didn't notice in the heat of the battle.
But once the battle is over, you're ready to print.
In our case, we wanted a 4x6 glossy. We used Canon Photo Paper Plus Glossy II on a Canon Pro-100 with dye-based inks.
You do have to use a glossy photo paper to match or exceed the damaged lab print. Ordinary paper won't cut it. And we like dye-based inks for this job (rather than pigments) for their saturation.
You don't need a Canon Pro-100, though. An all-in-one inkjet will do a better job than the lab print, too.
And lacking that, you can always order prints from your favorite online or brick-and-mortar photofinisher.
The result was a dramatic improvement on the original and would have been a big improvement even if the original hadn't been damaged. Perspective correction helped a lot and the tighter crop made all the faces larger. Tonality and color correction weren't bad in the original, so only local corrections were required.
The Canon Pro-100 print very closely seemed just like a lab print, but a really good lab print.
The kids in the photo are grown now but when they saw themselves again with their grandmother they had the delighted look of children again.