C O N T E N T S
Photo Corners headlinesarchivemikepasini.com
![]()
A S C R A P B O O K O F S O L U T I O N S F O R T H E P H O T O G R A P H E R
![]()
Enhancing the enjoyment of taking pictures with news that matters, features that entertain and images that delight. Published frequently.
An HTML Video Project


30 November 2015
It started out as a simple idea. We just wanted a short clip of her far-away father wishing Joyce a happy birthday. It was the best gift idea we could possibly have had.
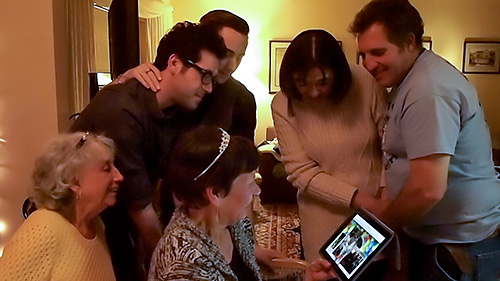
The Presentation. An enthralled audience.
The tech-savvy (and local) brother-in-law we asked for help, though, had the bright idea of inviting the rest of the family in the East to submit videos, too. It was the Thanksgiving weekend, after all, and everyone would be gathered in the dining room anyway. Why not take a moment to wish dear old Joyce a happy birthday?
After recovering from that jolt a few days later, it occurred to us that if the Eastern branch of the family was in on this, the Western contingent should be in on it, too.
Before we were done, we had some 24 video clips from newborns to octogenarians wishing Joyce a happy birthday.
NOW WHAT?
We knew when we started this that we could handle one video. But how were we going to handle 24?
We have a hunch the solution we came up with might be useful to you, too. Because this is one of those projects that you just know can be done but exactly how to do it is, well, a bit elusive.
We didn't have much time to figure this out, just a couple of days. And we had to work secretly with Joyce home from work for the four-day holiday.
But what we came up with is simple enough for anyone to do on their own computer and scalable enough to share on the Web.
THE FIRST DECISION
The first choice we made was to present the videos using a browser.
The Web is still the most versatile way to share things. Whether it's files or email or messages, they can get to your computer, your tablet and your phone using a Web browser.
It isn't necessary to put this project on the Web itself, though. You can just run it from your laptop. But to share it with everyone who participated, we wanted to put it on the Web.
Once we'd decided that, we were free of the Cecil B. DeMille production requirements of a single, long movie polished in something like Adobe Premiere Pro. We could just present the clips.
The trick was going to be figuring out how to do that.
PRESENTATION
We were lucky to have to videos arrive shortly after asking for them. There was a steady downpour of videos after that followed by a few light showers on the last day. But by then we had a system for dealing with them.
We used the two early arrivals (in different orientations, luckily) to figure out our presentation.
We used the two early arrivals (in different orientations, luckily) to figure out our presentation.
And the inspiration for that came from Photo Corners itself.
One of the things we enjoy about our main headlines page whenever we check a revision is that carousel of thumbnails at the top. It's colorful for one thing. And it's easy to code for another.
The question is could it be adapted for video?
A little research suggested that we could use the HTML5
videotag to present both a JPEG representing the video and controls to play the video in place (with the usual Full Screen control to enlarge it rather than a new HTML page for each video).All we'd have to do to add a clip would be to create the poster JPEG and add links to that and the clip as an HTML list element. Not really any coding there at all.
That's because the CSS for the list element takes care of the scrolling layout and the
videotag takes care of display the clip.A BACKGROUND
With the infrastructure resolved, we moved into production. The first task was to create a suitable background that could also serve as a title page.
This was just going to be a JPEG that would cover the window from the top, left and right. We'd let it go white at the bottom, matching the background color for the page, set in the CSS.
We used an image of balloons floating to the top of the frame with a photo of Joyce wearing her tiara (she just happens to be a princess) superimposed on it. We had to add a layer between them with a graduated fill that darkened the top of the frame enough to add some text wishing her a happy birthday.
When it was finished, we had a Disney-like image that filled the screen as a title page until the videos marched in from the right.
That, by the way, was accomplished by making the first link element in the carousel so wide that it forced the first video off screen. We used its caption to explain she should swipe her screen.
Did we say simple? That's pretty simple.
We also wanted the background to scale for various devices. So we made sure to add the
background-size: cover;line to our CSS for thebody.With the white background and white bottom of the JPEG, it wouldn't matter what size the window was.
To make the site responsive (translation: so it works on a phone too), we just changed our carousel margins. As with so many "responsive" designs that simply meant eliminating something. In this case, we eliminated a top margin.
THE VIDEOS
We didn't insist on any specific video production specifications. We knew better. We'd have take whatever we could get. Camera video, phone video, you name it. Horizontal, vertical, no problem. High Definition, Standard Definition, OK. MOV, MP4, WMV, we've got you covered.
But we weren't going to throw all that at the viewer. We had to standardize.
We decided on Standard Definition first because we knew we'd have to transmit a lot of these from our server, so we wanted to keep the bandwidth down. As it is, the storage requirement is as much as a year of Photo Corners.
Then we made sure we had either a MOV or MP4 for the
videotag to be happy. We didn't look into this much (there just wasn't time), so we simply went with what worked.Two simple conversion tools helped out a lot here. Miro Video Converter is free and handles everything. Look no further. But we also like Turbo.264 HD from El Gato and used that for everything that was not a WMV.
THE POSTER IMAGES
Next we had to figure out how to create a poster JPEG from the videos.
We thought there must be some handy tool or HTML command that does this automatically for free. But we found instructions for doing it simply and efficiently before we found a free utility.
You could, we found out, open the video in Photoshop and copy the first frame to paste into a new document that could be saved as a JPEG. But Photoshop reads in the whole video to do that.
It was faster to use QuickTime Player to open the video and copy the first frame, switch to Photoshop and paste it into a new document from the clipboard. Then save it as a JPEG.
We used the new Export as JPEG command, hoping it would save space but it isn't quite as efficient as the free ImageOptim, so we ran all the JPEGs though ImageOptim before we were done.
The poster images also gave us the dimensions of the videos, which we plugged into our list element HTML.
Here's what the list element code looks like:
<li>
	<video width="270" height="480" controls poster="clips/20151127_155239.jpg">
		<source src="clips/20151127_155239.mp4" type="video/mp4">
		Your browser does not support the video tag.
	</video>
	<p>
	The Godson</p>
</li>
HOSTING
This all worked great as we built the page on our laptop. A video would come in, we'd process it with a converter if necessary, open it in QuickTime Player, create the poster image, add the link to the HTML and give it a whirl.
We tested it on our laptop, a tablet and a phone. No problems.
The day of the party is the first time we tried running it from our remote server at Sonic.net. It worked fine.
We tested it on our laptop, a tablet and a phone. No problems.
And to confirm that it worked, we sent out an email to all of the contributors with the link to the "sneak preview." Throughout the day we heard back from them.
The only issue anyone had was one person whose older browser did not support the
videotag. But they were able to view the presentation on their phone.The bandwidth question did concern us. If everyone viewed the presentation several times, we'd be in danger of accruing additional hosting charges. But since we were at the end of the month and had some bandwidth to spare, we thought we'd risk it. It's only money.
THE SHOW
To introduce the show, we gave Joyce a birthday card with a mysterious message. Then we handed her the iPad with the background image (which we'd used on the card) staring at her from the browser.
The only hitch in the final presentation was that with everyone crowded around her wireless reception became spotty. But we solved that by moving from the dining room to the living room.
For the final, live presentation, we decided to serve the images from our home network, rather than the site. The videos would load a bit faster if they were local and did not have to serve multiple requests.
UPON REFLECTION
It did strike us (with no little amusement), as we thrashed around trying to decide on an efficient approach to putting this together, that we were using some pretty rudimentary tools.
Why hadn't we used Google Photos or stored the videos on Apple's servers (or even Vimeo or some other video sharing service) or used any of the powerful tools that are part of Adobe's Creative Cloud subscription?
We did investigate all that.
But we really didn't have time to learn Adobe Muse (which presented a fairly obtuse setup dialog to begin with) or figure out how to embed a video from the Google (it can be done, sort of) or Dropbox servers, among others. Some free sites that looked promising had restrictions on the number of daily uploads that exceeded our situation.
And while we know our way around Vimeo, you have to pay for an upgrade to the service to be able to keep uploads private.
But we'll continue to explore our options now that the immediate situation has passed. It would be nice to be able host all of our videos elsewhere.
As we said above, though, you don't need a commercial server for this. You can just set it up on your own computer and present the show in your browser. If you have a local area network, you can access shared files from other devices on the network. And if you enable Web sharing by activating Apache on OS X, say, you can share the files through the IP address of the computer they're on with any other device.
All you need is a little CSS, some simple HTML and a lot of friends and relatives to supply the content.
Comments
Great article, outlining a lot of effort on your part to put it all together. Bravo!!!
-- Mike Pascucci
Thank you! -- Mike