C O N T E N T S
•
•
•
Photo Corners headlinesarchivemikepasini.com
![]()
A S C R A P B O O K O F S O L U T I O N S F O R T H E P H O T O G R A P H E R
![]()
Enhancing the enjoyment of taking pictures with news that matters, features that entertain and images that delight. Published frequently.
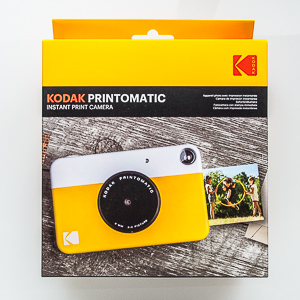
Test Drive: Kodak Printomatic


28 November 2017
The $69 Kodak Printomatic is not made by Kodak -- just as it's slightly more complicated cousin, the $99 Polaroid Snap, is not made by Polaroid. In both cases the venerable names have been licensed by C+A Global. And both use the same Zink (Zero Ink) thermo paper with an adhesive back.
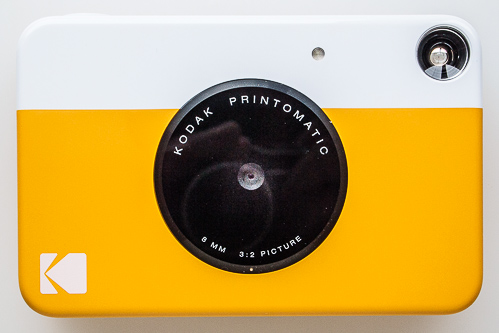
Front. Small circle is the LED flash.
But we came to think of this more as a small printer than a real camera. Image quality is poor despite the 10-megapixel sensor. It resembles the VGA images we used to get from a flip phone.

Rear. Note the three status LEDS at the bottom left.
But as a little box that can make prints when you snap the shutter, we found it to be a big hit with everyone.
So we took it for a test drive. This is our report.
IN THE BOX
Our review unit came with the following items in the box:
- Kodak Printomatic camera
- USB cable for battery charging and transferring photos
- A quick start card
Some online reports claim both a wrist strap and microSD card were included in the box, but that wasn't the case for us. And we've confirmed that the retail box contains only the items in our list above, as we received it.
We used a long rubber band as a hand strap. None of our professional options would thread through the eyelet holes on the plastic body of the camera. There are eyelets on both sides so you could use a shoulder strap if you prefer.
QUICK START
There really is no documentation included with the camera except a quick start card. We've reproduced that below.
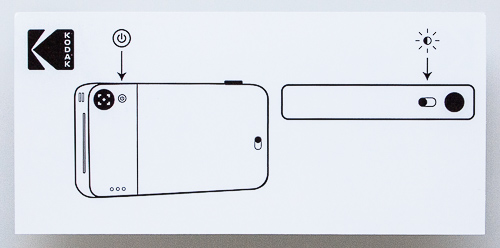

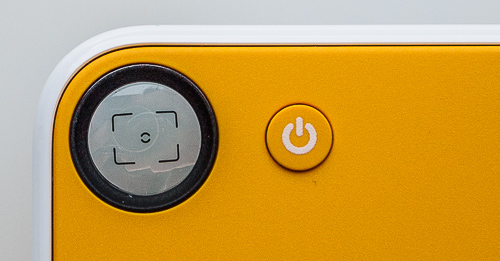
One side shows the location of the Power button on the back panel near the viewfinder and the Color/B&W switch on the top panel, which it incorrectly seems to indicate is a brightness adjustment.
The other side of the card shows how to charge the battery and how to load the paper, with the blue calibration sheet at the bottom. No wall adapter is provided, however, but you can connect this to a USB port on your computer for charging.
But there is a 14-page User Guide PDF that includes a FAQ and customer service number.
SPECIFICATIONS
Specifications for the Printomatic are for the most part unpublished but we've been able to deduce the following specs from the Exif header of the images:
KODAK PRINTOMATIC SPECIFICATIONS Sensor 10.2-Mp sensor
3680x2760 image size
3:2 aspect ratioShooting Modes Color or Black-and-White Lens 3.0mm (approx. 30mm equivalent in 35mm format)
f2.2Storage Internal storage for three images
Optional microSD, microSDHC
32-GB maxViewfinder Optical
Not accurate within six feetMonitor None Shutter 1/17 or 1/1174 second ISO ISO 50 to 600 Flash Built-in LED flash Autofocus Fixed Live View No Movie No Connectivity None Power Built-in rechargeable lithium battery Dimensions 2.32 x 6.06 x 7.48 inches Weight 0.66 lbs. Warranty One year Note that while the lens is specified as 8mm elsewhere, the Exif data insists it's a 3.0mm lens. That could be an issue with the Exif data the camera reports.
But the iPhone 6S with a 1/3" sensor has a 4.15mm lens that is the equivalent of a 30mm lens in 35mm format. And the iPhone 7 Plus has a 3.99mm lens for about a 28mm equivalent focal length. So a 3.0mm lens on the Printomatic for about a 30mm lens in 35mm format makes sense.
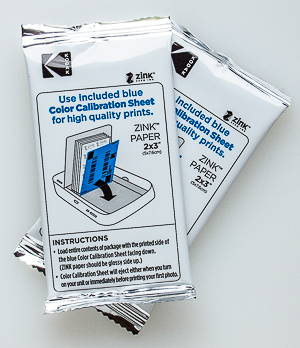
Zink Paper. A 20 pack includes two 10-sheet packages.
MEDIA
The 2x3-inch adhesive-backed Zink paper is available in packs of 20 sheets for $9.99 or 50 sheets for $24.99. That's about 50 cents a shot.
Because it's a thermal paper in which heat activates invisible dyes embedded in the paper, it can be handled immediately. It is also waterproof and tear- and smudge-resistant.
The paper has several layers:
- A backing layer with the pressure sensitive adhesive
- Heat-sensitive layers with cyan, magenta and yellow dyes in colorless form
- An overcoat layer
There are no cartridges to replace and, except for the packaging and protective backing, no waste to handle.
Even though heat is used to activate the dyes in the paper, we never felt the camera get warm during use.
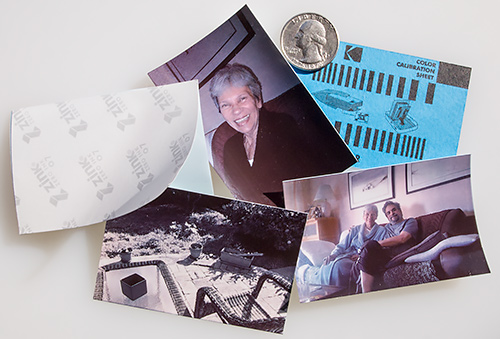
Zink Prints. Shown above are the adhesive layer, blue calibration sheet and several prints, including a black-and-white one.
The shot above shows several actual Zink color prints compared to the size of a quarter. You can also see the partly peeled adhesive back and the blue calibration sheet.
The prints do curl noticeably, so you may use that adhesive backing more than you might expect.
PAPER HANDLING
Loading the paper is really not difficult but we managed to screw it up.
First, try not to touch the surface of the unexposed paper. This may be a problem when loading a fresh pack because the last sheet's surface is facing you. Try to hold the stack just by the edges.
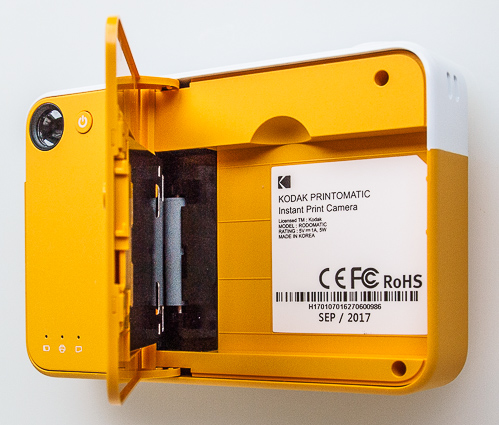
Inside. With the door open, you can see the roller.
When we loaded our first pack, we just dropped them in and shut the cover. And we got a jam. The PDF documentation (which we didn't have at the time) tells you to simply turn the camera off and back on again.
But we took the paper out and angled it in, which the bottom sheets closer to the roller than the top sheets. That worked fine.
TOUR
A tour of the hardware gives a fairly decent overview of what the camera does. Note the images are not to scale.
On both sides there are eyelets cut into the plastic. We weren't able to attach our Peak Design anchors but a rubber band slipped through to make a nice wrist strap.
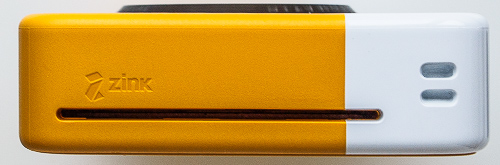
The right side also has the paper eject slot, as shown below.
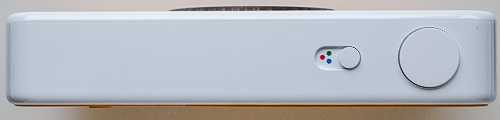
On top there's a big shutter button at the left edge and a Color/B&W switch just to the right of it.
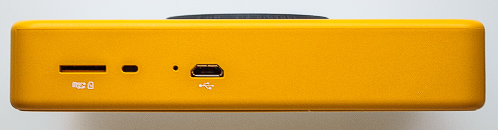
On the bottom panel you'll find the microSD card slot, a speaker port, a Reset hole and the USB port.
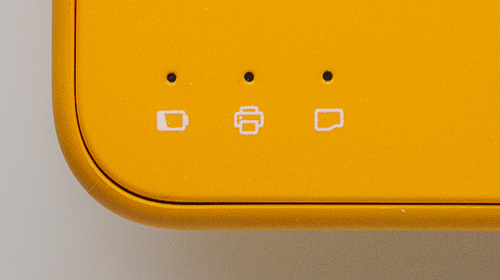
The back panel has the viewfinder, the Power button, three status LEDs and the paper door.
The front panel has the viewfinder's lens, an LED flash and the lens. In the close-up below you can see how askew the viewfinder's target is.
NOTES
You don't have to put paper in the Printomatic to shoot with it. Images will be written to the microSD card. The camera will try to print, grinding that roller, but nothing will actually happen without paper.
If you don't insert a microSD card up to 32-GB, three images are stored in the camera's internal memory. Presumably you can connect the camera to your computer with the included USB cord to transfer them.
On the Mac, Image Capture did recognize the device when it was cable connected and powered on (the LED status lights rotate red) but didn't find any images on it.
We found it very easy to smudge the plastic covering the lens when we were powering the camera on or holding it to shoot. We had to remind ourselves to avoid the lens, which does not stick out from the body.
The spring-loaded paper door works very well. Just slide the small knob down and the door will come up.
The Power button must be held in a bit before the camera actually powers up or down. Keep an eye on the three tiny status LEDs to know when to let go.
Those status LEDs indicate Paper, Printing and Card status. They are either white or red. When charging the Paper LED will burn red until charged, when it turns white.
There's no battery status indicator so you don't know how much power you have left. We got through our first 10 sheets over several days without a problem, though.
With the camera powered on, you can point it toward your subject and press the large shutter button. The camera will beep pleasantly to indicate a successful capture.
Using the viewfinder to compose a shot was not much fun. The target was placed on crookedly (as you can see in our close-up shot of the viewfinder). And if your subject is within six feet of you, the viewfinder will not accurately frame what the lens sees.
We did like the nice big shutter button.
And we liked the Color/B&W switch. The black-and-white prints were not as unsuccessful as the color ones, showing a slight color cast, but we liked them anyway.
IMAGE QUALITY
There are two ways to look at the image quality of the Printomatic. You can look at the print, like our testers did. Or you can look at the file, as we did.
A 2x3 print is one quarter the size of a common 4x6 jumbo print. That's really small.
But even at that size you can see some issues. There's a lot of flare when shooting toward (and just into) the sun, for example. And highlights are usually burned out.
But having a small print in your hand immediately is more impressive than these shortcomings. Just as long as you can recognize what you're looking at.
This image was one of the good ones with sufficient detail to identify these royals relaxing in San Francisco despite some significant flare. The strong light was coming from the left, not in front of the camera.

Printomatic Capture. Click for the full resolution image.
Here's the Exif data for that image.
Images whose quality can't surpass this level qualify the camera more as a toy than a tool. There's nothing wrong with toys, of course, unless you really need a tool.
EXPOSURE
The camera uses a wide-angle fixed-focus lens so there's no autofocus to wait for. Our test shots were exposed with one of two shutter speeds: 1/17 second or 1/1174 second. Aperture is fixed at f2.2. Flash was automatic, firing when needed.
To adjust exposure the Printomatic adjusts ISO from ISO 50 to ISO 600. If it needs more light than that, the flash activates.
CONCLUSION
The first tradeoff with the Printomatic is its size. You probably don't want to carry around a device that can make a 4x6-inch print. It would be huge.
So you get these 2x3-inch prints from a box that is still bigger than your smartphone. That's not too big. But it leads to other compromises.
You don't need a lot of resolution for a 2x3-inch print. But you could use more color fidelity than the Zink paper provides. And the parallax error of the viewfinder is going to prevent any kind of precise composition.
But everyone who tried this camera loved it. They were astonished to see a print roll out of it. And delighted.
So who are we to argue?