C O N T E N T S
•
•
Photo Corners headlinesarchivemikepasini.com
![]()
A S C R A P B O O K O F S O L U T I O N S F O R T H E P H O T O G R A P H E R
![]()
Enhancing the enjoyment of taking pictures with news that matters, features that entertain and images that delight. Published frequently.
Making A Custom Border For Exposure X3


28 December 2017
One of the reasons we launch Exposure X3 now and then is that we really like the special effects it provides. And one of those special effects is Borders. These frames for your images are unlike the cartoonish frames of many other applications. They're, uh, sophisticated.
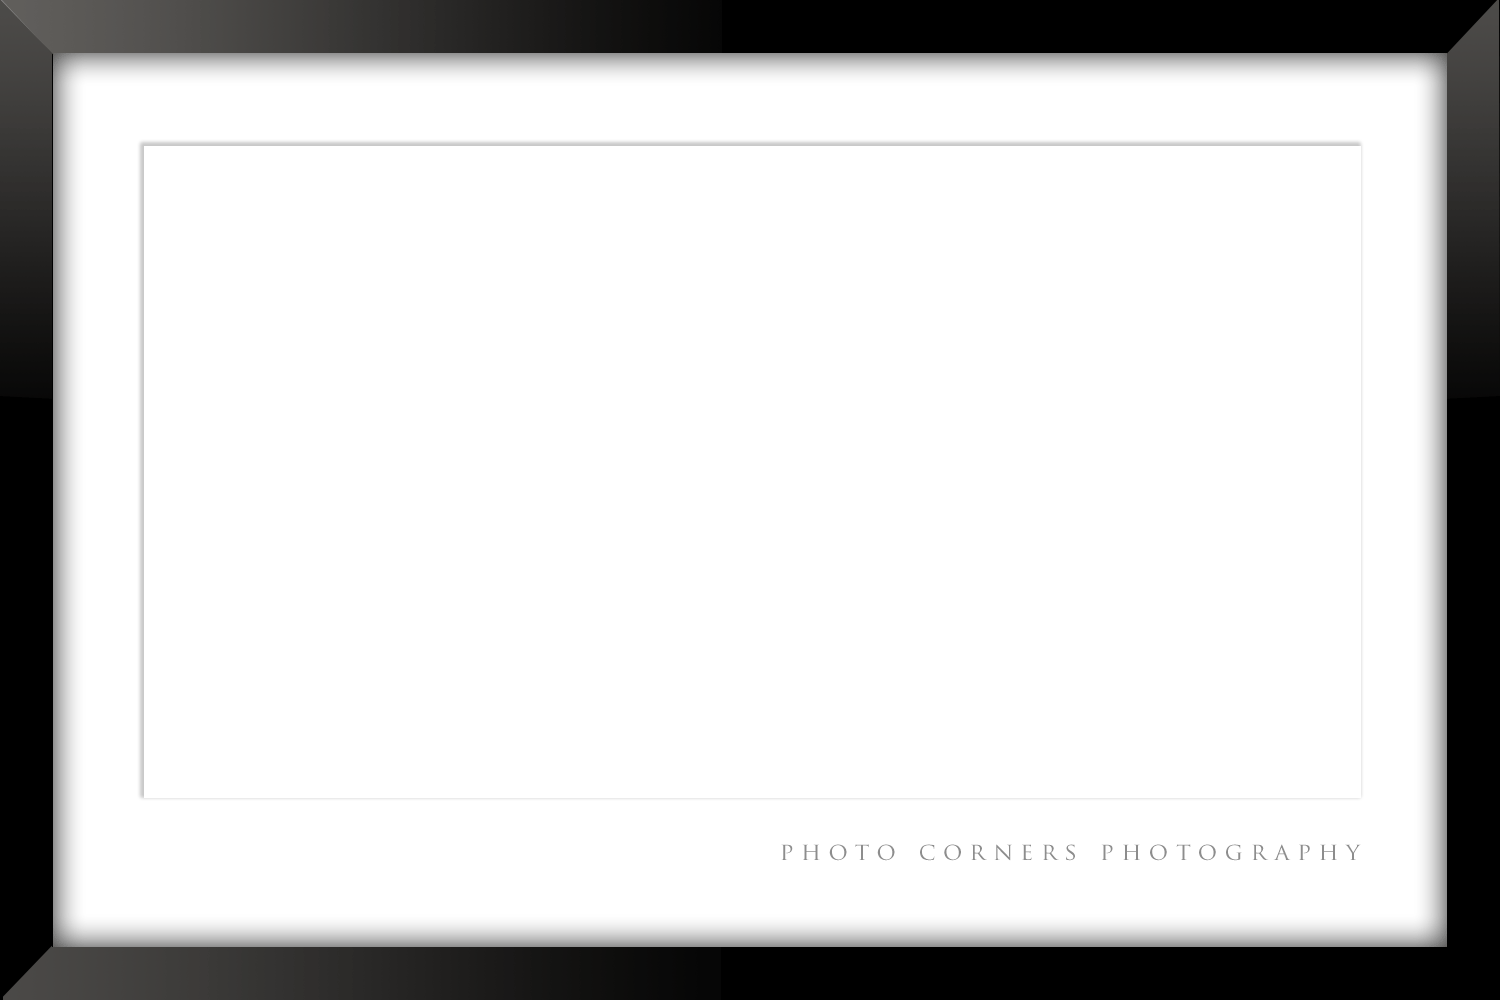
Custom Border. A white border, which we've outlined, with a black interior border.
But they aren't comprehensive. And sure enough, a subscriber asked us how to create a particular double frame he frequently used in DxO PhotoLab that just wasn't included in Exposure X3.
The frame was a wide white border with a narrower black border inside it.
Exposure 3X has simple borders you can reverse from white to black but not a double border. You can also flip them and modifying them in a variety of ways like changing opacity. In fact, tech support suggested he create a black border by reversing a white one, not quite grasping the issue.
And while you can shoot your image off to another application (like DxO PhotoLab) to finish if off with that special border, that's not really an efficient approach for more than a single image.
So we rode to the rescue.
But funny thing. The new generation of photo-centric image editing software isn't quite as capable as earlier generation image editing programs. They have a more narrow focus that starts with a consideration of all the things you might want to do to a photograph rather than a blank canvas.
FILE SIZE
So we launched Photoshop CC and opened an existing Exposure 3X border to use as a model since the specs aren't published.
The one we happened to open was 3000x3744 pixels, about a 4:3 aspect ratio. You can find them in
/Library/Application Support/Alien Skin/Exposure 3X/Textures. Yours, however, will end up in the same path but in your user directory's~/Library.There are several files for each texture. We just wanted the file size, frankly. So we avoided the thumbnail and icon.
We did try a small 100x100 pixel version but that didn't work well at all. In his tutorial on creating Exposure 3X custom overlays (of which Borders is one), Jimmy Beech advises a size of no more than 3,000 pixels on the long size for an 8x10.
If you know the aspect ratio of the images you want to apply the border to, use that to minimize border distortion.
Once we had that data, we got to work in Photoshop, creating a new PNG file.
TRANSPARENCY
You don't have to create a border with transparency as one of its attributes but this one called for it. Exposure X3 can import either a JPEG or PNG file as a border, so we went with PNG for its transparency.
If you forget to create the file with a transparent background, you can always create a transparent layer, move it to the background and merge down.
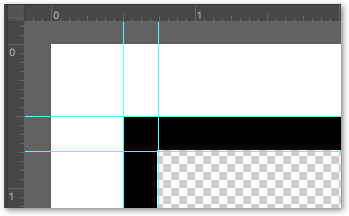
Guides. The ruler, the white border, black border and transparent area.
GUIDES
The next step was to draw Guides to mark the edges of the borders.
We enlarged the image 200 percent and set two rulers for each side, one to mark where the white border meets the black one and the other to mark where the black meets the image.
We also made sure Snap To was on for Guides.
THREE FILLS
To create the actual borders, we made three selections for three fills:
- Select All and Fill with White to do the outer border.
- Draw a selection using the largest inside Guide and Fill with Black.
- Draw a selection using the smallest inside Guide and Delete.
When you delete to the Transparent background, you are marking the area your image will show through.
SAVE FOR WEB
We saved the PNG file using Photoshop's Save For Web but you could also do it with the Save command. We're just in that habit.
You don't have to use Photoshop, of course. Any image editor that can create a PNG file with transparency will do.
Border. Note the checkbox next to Border.
Or you can just download our DxO Double Border if that's the style you'd like.
IMPORT
With the file saved, we were ready to go back to Exposure X3.
With an image selected, we clicked on the check box to enable Borders and then clicked on the border displayed by default.
That brings up the border chooser which happens to have an Import button at the bottom (see the last image in this series).
Click Import and you'll get a file chooser.
Note that you can set the Category for the new Border to make it easier to find when the Border chooser pops up. And you can set the Blend mode, too.
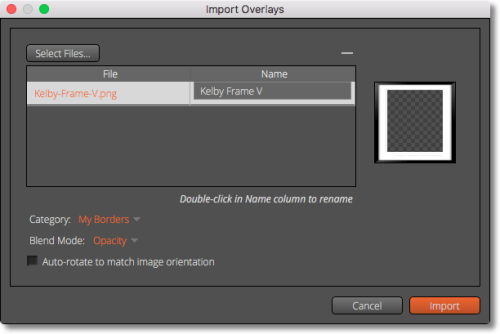
File Chooser. Navigate to your PNG to import it.
We selected Opacity so we could vary the opacity. That turns out to have nothing to do with the transparent area of the PNG but with the border itself. It's a nice extra, allowing you to ghost the image in the border.
The last option is Auto-rotate to match image orientation. We enabled that so we could use our portrait border in landscape mode, too.
You can edit the name your border will use now or later from the Border chooser.
Border Chooser. Our custom border is shown.
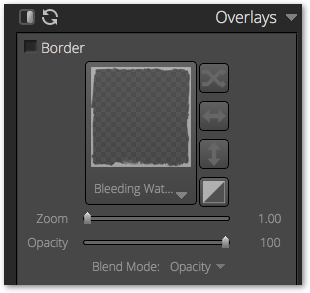
USING THE BORDER
You use your new custom border just as you would use any other border. Just enable Border and click on the thumbnail to access the Border Chooser.
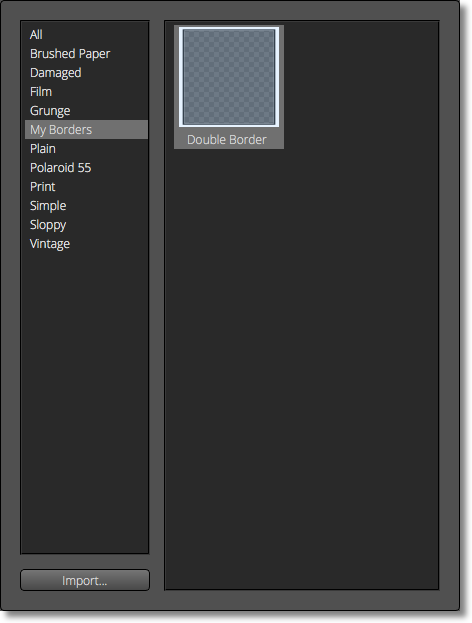
If you put your border in the My Borders category, click on that to find it. It will also be displayed under the All category.
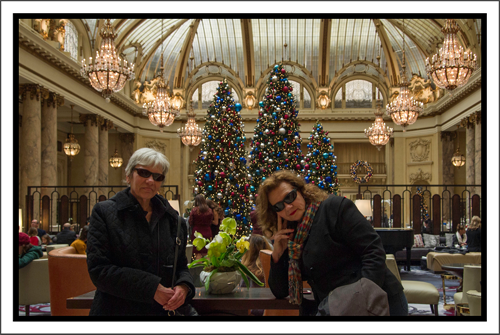
One the border is selected, you'll see it applied to your image. You can use the sliders to change the opacity or zooming.
Opacity. We set Opacity to 60 for this effect.
We were less happy with zooming. A very little worked well, but larger values simply sent the border outside the image area.
A FRAME
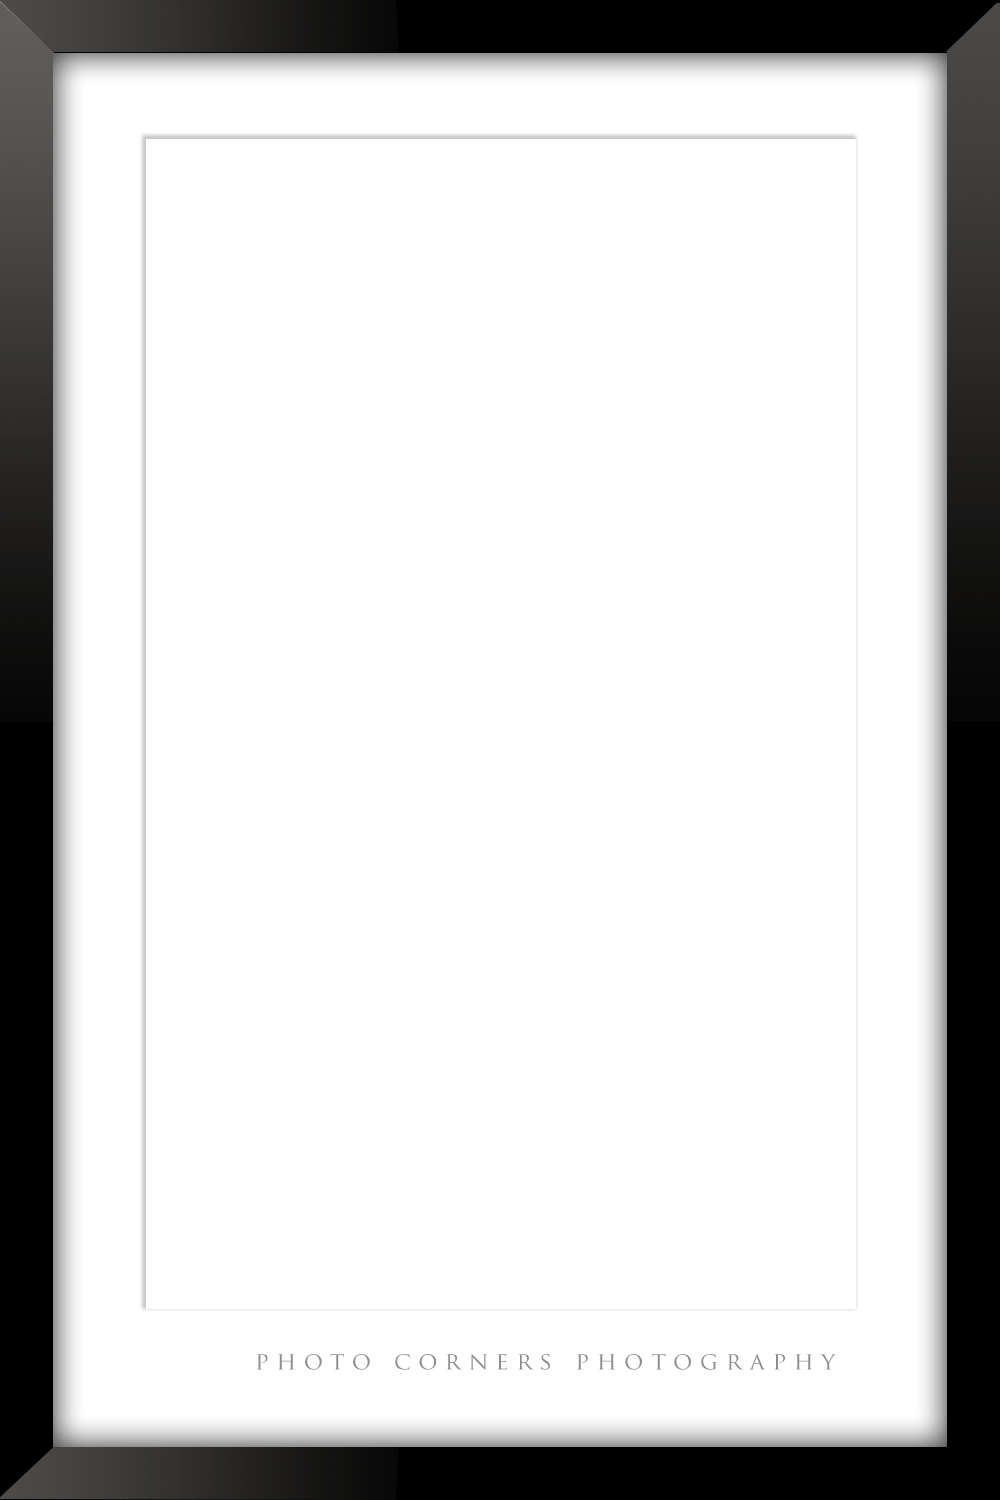
A long time ago, Scott Kelby detailed how to create a framed mat effect in Photoshop to show off your images.
We thought that might make a very nice addition to our border collection, so we dug it up and built the Photoshop file to the same dimensions as our DxO double frame file.
We did not float this over a white background as Kelby did and we maintained transparency for the image. But those were the only two changes we had to make.
Not counting, of course, putting our own studio name on the mat. You can change that in the download file, of course (and please do, BTW). In fact, you might want to remove it entirely because if your image's aspect ratio doesn't match that of the border, the type will be distorted.
Oh, and one more thing. When you simulate mats, you can no longer use one border for both horizontal and vertical images. The bottom border of a mat should be bigger than the other three sides or it will appear to be sinking in the frame.
So we've provided two PNG files, horizontal and vertical, for the Kelby frame.
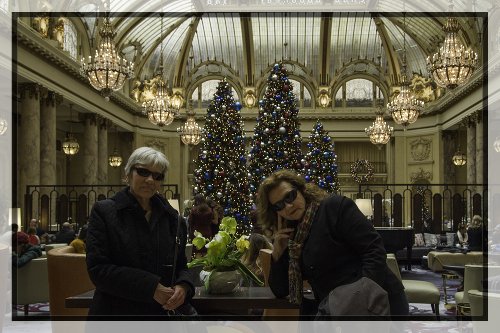
Kelby Frame. Elegant but there's one tiny problem.
There's one tiny problem with applying a framing effect like this. The image size doesn't change, so you are cropping the content with the frame.
CONCLUSION
With no specifications for file size or image attributes, we had to reverse engineer our custom borders. But they work as expected.
And you can't say that about everything these days.