C O N T E N T S
•
Photo Corners headlinesarchivemikepasini.com
![]()
A S C R A P B O O K O F S O L U T I O N S F O R T H E P H O T O G R A P H E R
![]()
Enhancing the enjoyment of taking pictures with news that matters, features that entertain and images that delight. Published frequently.
Test Drive: FilmPack 6


20 October 2021
Breathing new life into its venerable emulsion simulator, DxO has released a significant update to FilmPack. Version 6 introduces new emulsions, cinematic renderings and support for X-Trans Raw files.

Along with some new effects, it introduces Time Machine, which displays famous historical photos from 14 periods. "Each photograph is documented from a technical and historical perspective," the company said, "and users are provided with the closest rendering so they can apply it to their images and recreate a similar style and finish."
FilmPack 6 now faithfully recreates the hues, saturation, contrast and grain of 84 analog films, including Kodak Tri-X 400, Polaroid 690, Ilford HPS and Fujifilm Superia.
NEW FEATURES
The main new features, at a glance, are:
- Time Machine
- 15 new emulsions
- Wider range of creative effects
- Eight-channel HSL settings, Custom split toning
SYSTEM REQUIREMENTS
System requirements for the new version are:
Common
- 4-GB of RAM (8-GB or more recommended)
- 400-MB or more of available hard-disk space
macOS
- Intel Core i7 4th generation or higher recommended or Apple M1
- macOS 10.15 (Catalina), 11.0 (Big Sur) or 12.0 (Monterey)
Windows
- Intel Core 2 or AMD Athlon 64 X2 or higher (Intel Core i7 4th generation or better or AMD Ryzen recommended)
- Microsoft Windows 10 version 1809 or higher (64-bit and still supported by Microsoft), Windows 10 version 2004 or later recommended
Compatible host applications
- DxO PhotoLab 3, 4, 5
- Adobe Photoshop 2019, 2020
- Adobe Photoshop Lightroom Classic 2019, 2020
TEST DRIVE
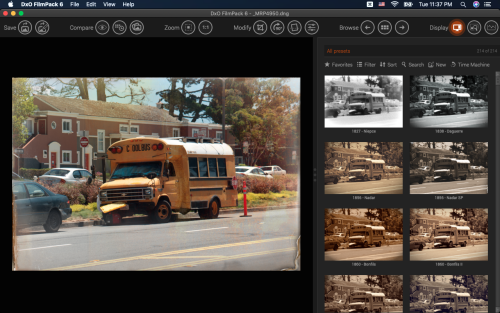
The interface is clearly laid out. There's a menu bar along the top of the window, a display panel for the image below occupying about two-thirds of the width of the screen, leaving the rest for a panel to show either the presets or an editing panel.
The menu bar has six groups of buttons, almost all of which (all that could use one, anyway) have keyboard shortcuts.

- Save: Save Image and Save Settings as Preset
- Compare: Compare with Reference Image, Change Reference Image and Side-by-Side Preview
- Zoom: Zoom Fit and Zoom 1:1
- Modify: Crop, Rotate Right 90°, Horizon, Modify Image Settings
- Browse: Previous Image, Return to Image Browser and Next Image
- Display: Hide Controls, Navigator and Histogram
FilmPack 6 lets you drop a preset on an image and/or edit the effect, as well as adjust the image itself. So you aren't doomed to duplicate but can if you like.
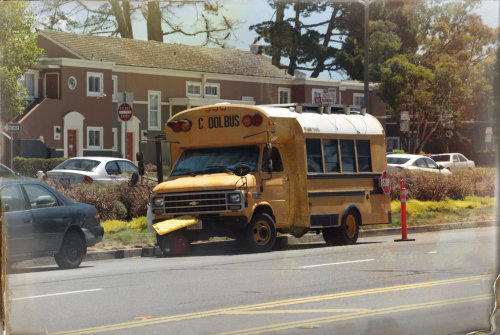
For our test drive we used a recent shot of an old school bus whose lettering had been graduated to C OOL BUS. Here's the Before and After:

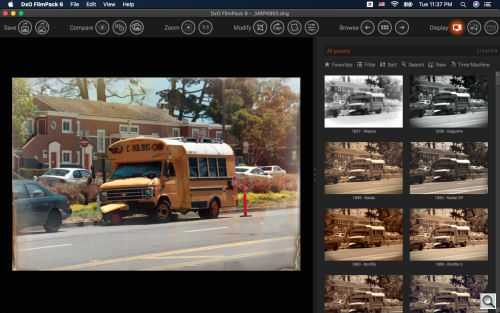
FilmPack's Presets mode resembles Nik Collection except that the presets are on the righthand dock rather than the left side.
Presets is also where you'll find Time Machine.
During a briefing DxO said it had spent a good amount of money to acquire the rights to the "iconic images by famous figures in photography" that populate the Time Machine timeline.
"We wanted to give DxO FilmPack even greater depth," said Jean-Marc Alexia, vice president of marketing & product strategy. "To document our Time Machine, we collaborated with the Friends of the French Museum of Photography in Bièvres, an association chaired by the photographer Didier Pilon, who produced fantastic research."
The idea is to be able to apply the style of a famous photograph to your own work.
So we went right to it, clicking on the Time Machine button in the righthand dock. A dock flew out from the left side of the screen titled XIX Century. Our history lesson had begun.
It steps through the decades of the 20th century, showing you a set of famous images with a title and a long caption underneath detailing the image. Below the caption is a description of the FilmPack rendering you would use to match the image.
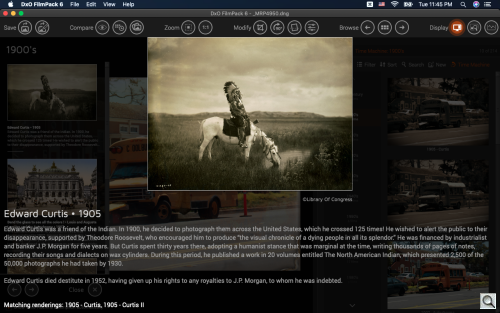
There really are some gems in this collection. You can think of it as your own private photography museum. Clicking on an image opens it full screen to make it even more enjoyable to study.
We started with the Modify tool to straighten it before we used the editing tools: Film, Development, Graphical Effects and Lens Effects. We'll step through the new features, reporting on how they affected our edit.
We were puzzled by the Zoom tool. Clicking didn't do anything. There's a 1:1 tool next to it, which did zoom into a 1:1 view, which was like looking through an electron microscope on our 13-inch screen.
Later we discovered that scrolling up or down within the image, zooms out or in.
The 15 new emulsion simulations include two legendary films: Ektachrome Professional Infrared EIR Color Slide Film from Kodak and the monochrome instant film for the Polaroid 600 camera, Impossible Px 600 Silver Shade. In addition, it includes seven film simulation modes from X-series Fujifilm digital cameras and six cinema renderings inspired by the biggest trends in cinematographic color grading.
For our Film rendering we picked Kodak E-100 GX Ektachrome 100 with no grain (which you wouldn't be able to see here anyway).
We didn't adjust any of the several parameters in the Development section. Those include Light & Color, Hue/Saturation/Lightness, Tone curve, Automated corrections.
The new effects include:
- 20 new effects, including drops and crumpled paper
- 15 new light leak effects, including light spots, haze and zoom
- 15 new frames: matte, black frame and film border
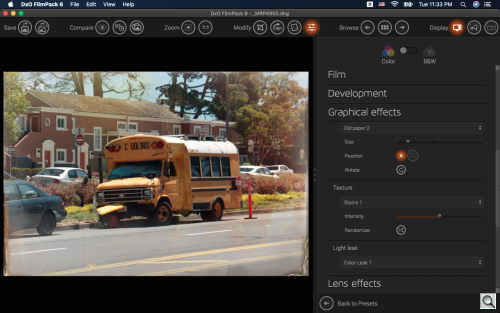
In the Graphical Effects section, we tried a number of the frames on our image. Some were just inappropriate, like a color negative analog roll on a positive image. Some were just a little too faux (like all the simulated real-world frames: wood frame, etc.). We did like the more distressed borders (which did not pretend to be frames).
We did apply a Texture, in this case, we liked Stains 1. We were going for a distressed look. And we added Color Leak 1 among the Light Leak options. We moved that to the top.
In the Lens Effects section, there are a number of traditional photographic filters you can apply as well. Orange, yellow, red, cool tone, warm tone, etc.
We also applied some Creative Vignetting in the same section, lightening the corners a bit since we'd picked the distressed paper border.
This all reminded us very much of Exposure X's creative effects. Maybe a little too much. We didn't count, but we suspect Exposure has more of them and can do more with them (like flip them). But we do like having them, so we're not complaining.
They are not the gimmicks they may at first appear. They can, instead, convey a specific feeling not far removed from nostalgia, for example.
FilmPack 6 uses new color rendering engine with eight channels instead of the six channels used in previous versions for more precise color control.
You can also select your own hue in the highlights and shadows of an image, combine colors and achieve subtle and realistic split toning effects, the company said.
And, in practice, we did feel like we were getting smoother shifts as we moved sliders around. We can't quantify that and we suspect most won't notice the improvement.
PRICE, AVAILABILITY
DxO said FilmPack 6 would be available today at an introductory price of $109.99 (regularly $139) for the Elite version and $54.99 ($85) for the Essential version until Nov. 14. Upgrades are similarly discounted to $59.99 ($79) and $39.99 ($55).
CONCLUSION
It can be hard to appreciate the subtle differences in things like grain if you are looking at small images like ours on the screen. But hue shifts are more obvious and the special effects can be difficult to create on your own.
We're not big fans of emulating emulsions as a rule. Talk to us about tone and color, microcontrast and selective focus. Emulsions?
But we are impressed with Time Machine. On our daily tour of the Web looking for articles of interest for our Around The Horn column, we don't see nearly enough focus on the history of the art. DxO's decision to invest in our education this way is truly admirable.
For that alone, we'd give this release all four corners. And to think there's so much more in it.