C O N T E N T S
•
Photo Corners headlinesarchivemikepasini.com
![]()
A S C R A P B O O K O F S O L U T I O N S F O R T H E P H O T O G R A P H E R
![]()
Enhancing the enjoyment of taking pictures with news that matters, features that entertain and images that delight. Published frequently.
Exposure X: Installation, Importing


11 December 2015
While we've published multi-part reviews for hardware before, we've never done it for a software application. Exposure X, though, merits this deeper look. So we'll present our findings in a serious of articles you can jump to using the menu on the top left on any of the reviews.
Our plan is to cover the installation and importing features of Exposure X in this installment. We'll look at Browsing in the next, followed by Raw editing. And we'll cover loose ends in the final installment.
Your feedback and questions, meanwhile, are welcomed. Just use the Feedback button at the bottom of any article. That tells us who you are but we won't share that information if you ask us not to reveal it.
SYSTEM REQUIREMENTS
System requirements to run Exposure X in either standalone mode or as a plug-in require a typical image editing setup both in terms of operating system and hardware.
- Apple-specific: OS X 10.10 Yosemite or newer
- Microsoft-specific: Windows 8 64-bit or newer
- An Intel Core 2 processor or compatible
- A monitor with 1280x768 resolution or greater
When used as a plug-in, Exposure X requires one of the following host applications:
- Adobe Photoshop CS6 or Adobe Photoshop CC or newer
- Adobe Lightroom 6 or Adobe Lightroom CC or newer
Our test system for Exposure X is a 17-inch MacBook Pro with 8-GB RAM running Yosemite 10.10.5. It's the same box on which we tested Exposure 7 a year ago.
We also tested Exposure X as a plug-in running from the latest versions of Photoshop CC and Lightroom CC.
INSTALLATION
We downloaded the gold master version of Exposure X the day before it was released. Installation went smoothly.
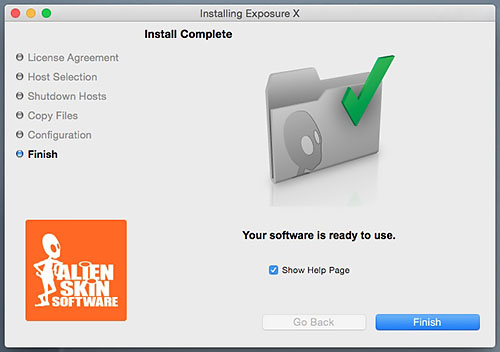
Installer. Takes you right to the tutorials.
On launch, we entered our activation key and were ready to go.
But, as with Exposure 7, we made the mistake of launching the plug-in version of the tool rather than the standalone version. So we spent some time wondering how to point it to some files because the Folder pane is not present in the plug-in version.
This mistake is easy to make when you use something like Spotlight or Alfred to keyboard a few letters of the application name to launch it. Which is what we do.
It's also easy to fix. Just launch the standalone version normally and it will be the preferred suggestion.
RESOURCES
Alien Skin provides excellent help resources. Jimmie Beech's video tutorials are clear (and fun). As soon as you finish the installation, there's a link to take you to them.
There are also handy tool tip reminders for everything in the interface.
And if all else fails, Alien Skin's Support Page may have the answer you're looking for.
IMPORT
Exposure X will look for your media when you mount it and offer to import it. It recognized both SD and CompactFlash cards as soon as they were mounted.

Ingestion. A few simple options.
The import process, which can also be called from the menu, presents a dialog box with four panels and their options: Source, Destination, File Naming and Metadata.
As we walked through those options, we were struck by how Alien Skin has not just fine-tuned the import process but reinvented it. Its simplicity is deceiving because the process offers a lot more flexibility than at first appears. In fact, we found we could use it instead of Image Capture in the first step of our own ingestion scheme.
And if you may bemoan the lack of some option Lightroom provides, you can still use Lightroom to import your images.
Lightroom. This is the collapsed metadata only pane. There's even more to review on the full import screen.
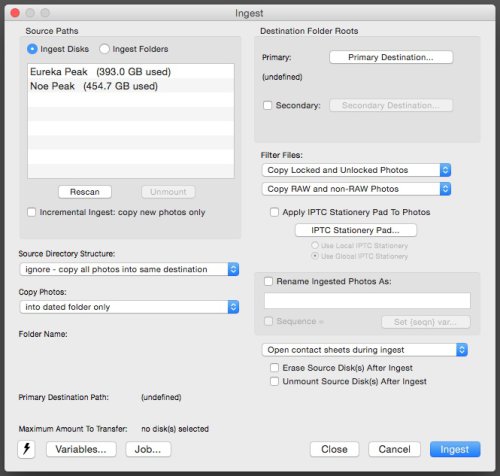
Photo Mechanic. Version 4's ingest screen for comparison.
Let's step through the options provided in Exposure X:
SourceYou can import from multiple sources, which explains the plus sign on this option. Just click to add another reader or source.
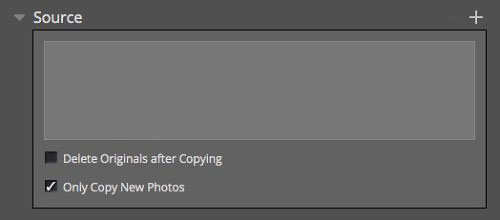
Source. With two options.
Each source is listed on a line of its own. The status line at the bottom of the dialog box tells you how many files are on the media.
Unlike Image Capture, however, no preview is provided. And no file list, either.
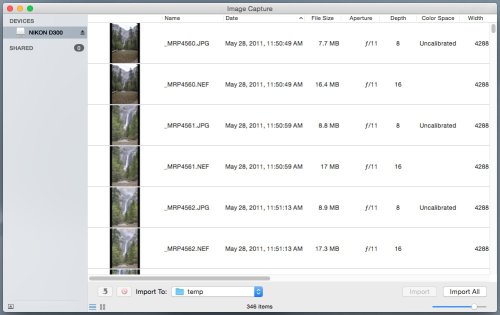
Image Capture. Thumbnail and list info for each image on the card prior to import.
Instead, two options appear under the source list. You might think they are mutually exclusive but you can use both or neither.
- Delete Originals After Copying: Alien Skin wisely disables this by default. We suggest not deleting the original files from your card until you've not just copied them once but duplicated them to other storage media. The other problem with letting the operating system delete files from the card is that the camera may no longer recognize the card. So this convenience is really not worth the trouble it can cause.
- Only Copy New Photos: We do wish Image Capture would offer this simple but useful option, enabled by default. Keeping track of what's been copied from any particular card is not complicated but it's rarely an option.
The ideal arrangement would be to use the defaults. Don't erase and only copy the new photos. That way Exposure X keeps track of what's new without destroying anything in case you need another chance to save it.
DestinationExposure X lets you tell it where things go. First it wants to know which directory you want to target. Then it lets you optionally copy the new images into a subdirectory (yes, you do want to do that), which you can name with one of the four schemas (another bright idea).
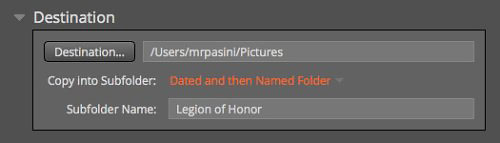
Destination. With four options for naming a subdirectory.
The four options are: None, Dated, Named and Dated & Named.
When we selected Dated & Named, Exposure X created a folder with the date in the format CCYY-MM-DD. Inside that folder, it created a folder with the name we specified. And into that folder our images were copied.
We do things a little differently, naming one folder as "CCYY.MM.DD Slug" where slug is the name. It's a little more efficient finding things because we don't have to peek inside folders to see the slugs.
But here's another example of Exposure X's flexibility. We can simply point it to the watched folder that kicks off our ingest script and leave it at that.
File NamingIf you choose to rename your files, you have two options: a Base name and a Sequence (a number, which you can reset).
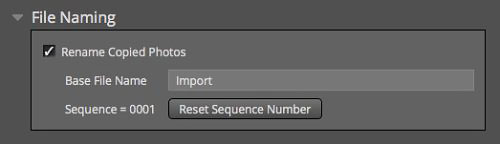
Renaming. Options for renaming the image files themselves.
That does the job, even if it isn't nearly as indulgent or comprehensive as Lightroom's renaming options.
But here's the thing. You may think that IMG_1024.JPG is the entire file name of your image and worry about duplicates. But it's not. The drive name and path of folders also make up parts of the name. And if you create unique folder names, as we do above, you will never have to rename files (and thus confuse yourself about what's what).
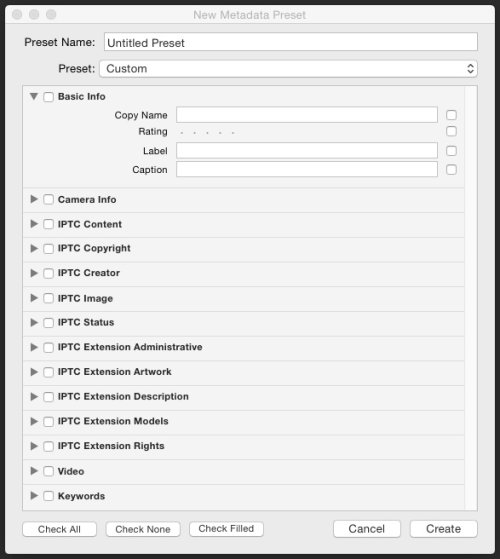
MetadataDuring import you have the option of applying metadata to the copied files. This is the only time Exposure X will touch these files.
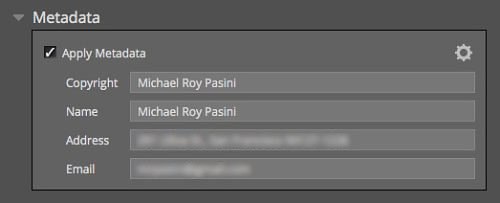
Metadata. Four fields you can save as a preset.
You can apply four pieces of information: Copyright, Name, Address and Email. You can also save sets of these to recall later.
The Copyright field only needs your name. It will prepend "Copyright " and the current year to your name.
EVALUATION
So how does Exposure X's import compare to our scheme? Among the critical operations we preform when ingesting images are 1) adding copyright information (OK), 2) creating a slugged folder name (Quibble) and converting to DNG (nope).
We'd have liked to see a Conversion panel for running DNG Converter on the camera originals.
We did appreciate the file counters at the bottom of the dialog box. It's nice to know the scope of the action so you can decide between an espresso, a cappuccino or a latte.
We have to say we missed the thumbnail previews that Image Capture gives us. And the subsequent option to decided which images to import. But we also have to say the scheme Exposure X proposes works perfectly well.
And if you've struggled trying to figure out other ingestion options (which can be intimidating), Exposure X is a godsend. The essentials are there.
(Editor's Note: This is the first part of a multi-part review of Alien Skin's Exposure X. Links to the other stories are in the main table of contents at the top right of each story.)