C O N T E N T S
•
Photo Corners headlinesarchivemikepasini.com
![]()
A S C R A P B O O K O F S O L U T I O N S F O R T H E P H O T O G R A P H E R
![]()
Enhancing the enjoyment of taking pictures with news that matters, features that entertain and images that delight. Published frequently.
Test Drive: DxO OpticsPro 11


16 June 2016
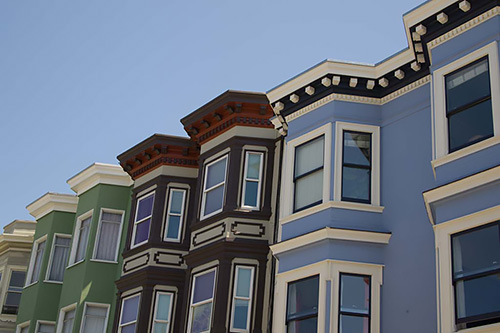
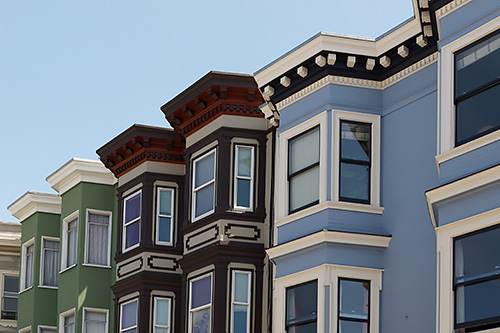
The world this photographer's images exhibits is often a very pleasant escape from the video of the world broadcast by the news each day. After watching the news for an hour or so, we're always delighted to make a double espresso and go back down to the bunker to work on a few of our own images.
When it's work-related, we're full of questions about how some new release handles an old problem. And that was the case this week as we spent some time with a set of images we shot over the weekend at the North Beach Festival.
The new release was DxO OpticsPro 11, whose launch we reported earlier this month. The new version features some neat tricks we were anxious to try. And in every case, they performed beyond our expectations.
Which is something we don't say much any more.
UPDATING
One thing we very much appreciate about DxO's approach is the updating process.
We downloaded the new version and installed it normally but when it launched, it told us we didn't have the DxO Optics module for the images we were, by default, looking at. Those were sample images provided by DxO, shot with a camera we don't have.
A simple dialog box asked us if we wanted to download the missing module before we continued. No problem.
A similar update mechanism occurs when there's a new version of the application available. We installed a couple of updates during our testing when, on launch, the application notified us that there was one, told us what it offered and asked if we wanted to install it.
We didn't have to quit the application. The installer took care of everything.
Compare that to the Creative Cloud application's clumsy (and tardy) notification system, which is always pestering us to close some application so it can continue.
It may seem like a little thing, but it's a little thing that really matters. It works in our favor, not the reverse.
FULL SCREEN DISPLAY
The first new feature we tried out was the new full screen display mode for quickly reviewing a set of images. It's a good place to start.
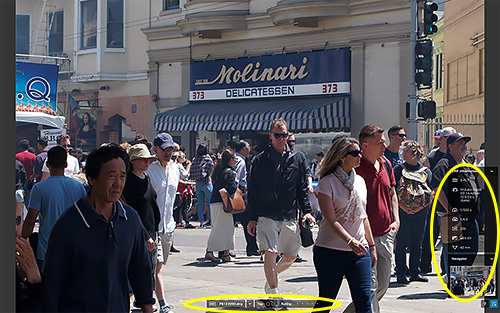
Full Screen Display. We've circled the two overlays available in this mode.
It is astonishing, frankly, how poorly this is generally implemented elsewhere. Photoshop doesn't have anything like it (you use Bridge). Lightroom requires you to import your images (which just means adding them to its catalog, not necessarily copying the image files) before you can review and rank them. Exposure X displays them efficiently but spins its wheels (and your computer's fan) building higher resolution previews.

Controls. File Type, Name, Hide/Show, Tag and Rating.
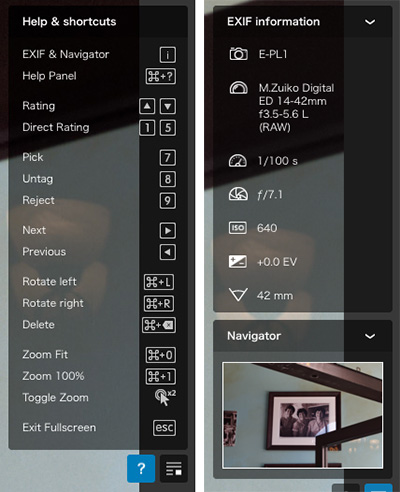
Overlays. Help and Exif info.
You find yourself being asked to wait. It takes Photoshop two minutes to launch on our otherwise quick system. Lightroom is not faster. Blame the Creative Cloud check-in. Exposure X, which loads in 15 seconds but then builds previews, is better than both of them but OpticsPro, which is ready to roll in 25 seconds, is the only one of the group that does not get in your way.
It loads quickly and in a keystroke will display any folder of images in full screen mode.
Our images were all DNGs, which meant the low-res preview had to be resolved. But OpticsPro did that quickly.
As DNGs, they weren't rotated. But a simple Command-L (left) or Command-R (right) took care of that.
We could also, if we chose, rate the images as we went through them.
Simple but necessary functions very nicely implemented with no overhead. We never saw a spinning beach ball (and we never hope to see one).
PRIME
One reason you want OpticsPro in your arsenal is its Optics modules, which inform the application about your camera and lens characteristics, something no other application does. That makes handling lens distortion, for example, much easier.
But the other big argument for OpticsPro is because it does better noise processing than anything else -- and has for a while. Noise processing in general has improved dramatically over the years and the applications mentioned above do a more than adequate job. But nothing beats OpticPro's PRIME noise processing.

Prime. Unedited original (left) and PRIME-processed edit at 100 percent.
OpticsPro, though, provides two ways to process noise. PRIME takes its time so a faster HQ option can process the file more quickly. You can compare the two options in a small preview window to see if it makes sense to wait for PRIME.
There's also a Luminance slider with an Auto option to fine tune the process.
But the big news is that PRIME is a good deal faster in 2016. We didn't feel we were being slowed down by chosing it at all. On the other hand, many of our images were shot at ISO 200, so we also didn't feel like we needed it. But for our noisy ISO 1600 images, it was a great help.
AUTO MICROCONTRAST
In our Friday Slide Shows we confess to punching up the microcontrast (with Lightroom's Clarity slider) on our images as the first thing we do. A hefty amount, too. Then we worry about tone and color. First, we want sharpness.
In Lightroom that's a manual operation with a slider. We're always in the 40s. We do hunt and seek a bit but we always end up there.
In OpticsPro, the Contrast panel has a Microcontrast slider with an Auto option. We're not sure what it's evaluating, but we let it decide and it chose a rather modest but adequate bump in the teens. The scale is the same (-100 to +100) as Lightroom's so we're include to believe the values are equivalent.
If you don't use microcontrast, Auto mode is a nice introduction. And again it makes us wonder why DxO takes the control further than its competitors.
SMART LIGHTING
Smart Lighting has been around for a while in OpticsPro but it gets an important new Spot Weighted option.
This simply lets you point to an area of the screen that should be lightened. Tones similar to the selected area are lightened while darker and lighter tones are protected.
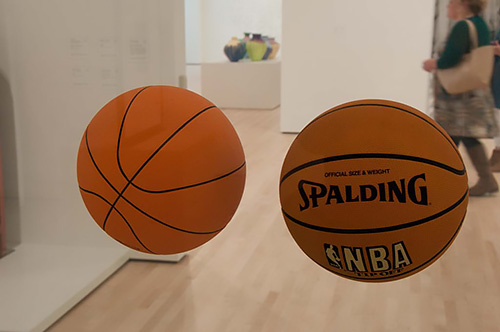
Original. The subject in the shadows.
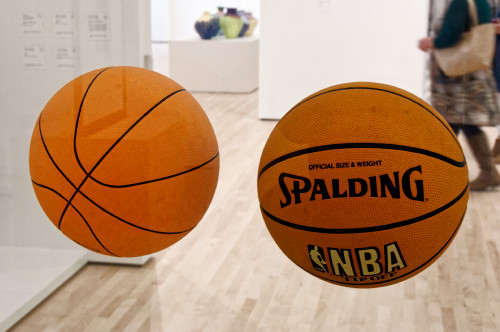
Smart Lighting. Brighter treatment.
We used this on a difficult image of a Jeff Koons sculpture of two basketballs suspended in a fish tank. The museum lighting was diffused and the basketballs were not spotlit. Meanwhile the far walls were pretty bright.
So we wanted to increase the brightness of the balls and leave everything else alone. Which is just what Spot Weighting was designed for. We clicked on one of the balls and let it work its magic.
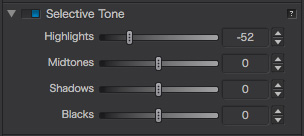
SELECTIVE TONE
In OpticsPro 11, Selective Tone control produces more natural results, efficiently recovering information in shadows and highlights while avoiding flattening midtones.
This is the reason we shoot Raw exclusively these days. We've been able to get better shadows and highlights working with the Raw data than exists in the camera JPEG. Our "original" images in this review, in fact, are the camera JPEGs embedded in the Raw file.
Before. Note the loss of detail in both the highlights (left) and shadows.
After. Recovered highlights and more detail in the shadows.
This sidewalk scene is impossible to capture with smartphone. And even a dSLR shooting JPEG can't do it. But with a Raw capture, OpticsPro was able to recover detail in the washed out sidewalk, street and sky while opening up the shadow detail as well.
THOSE SLIDERS
With each update of OpticsPro, the program seems to run more smoothly. This time we noticed more responsive sliders, which makes a big difference in finding the ideal setting for an option.
Selective Tone. Sliders are more responsive (and that helps).
They aren't quite as responsive as Lightroom's or Photoshop's sliders but on our system they're significantly improved.
This is another thing that can be more difficult to achieve than you might think.
Which goes to a larger issue. Adobe has been incorporating more and more GPU code in Photoshop and Lightroom but at the expense of some older systems and peripherals. We labored a long time with a jumpy cursor and bizarre resizing behavior in Lightroom after one update before we realized our Wacom tablet was no longer being recognized.
We'd never had that problem before. Why should an update disable a perfectly functional tablet? Because the code had been jetisoned.
OpticsPro doesn't exhibit that behavior. Our tablet works just fine with it. As it should.
PERSPECTIVE
We've been surprised how important some recently introduced tools in Adobe's arsenal have become to us. The Upright tool is one that really took us by surprise. We didn't think we'd use it very often since some moderate wide angle distortion is easily accommodated by the brain.
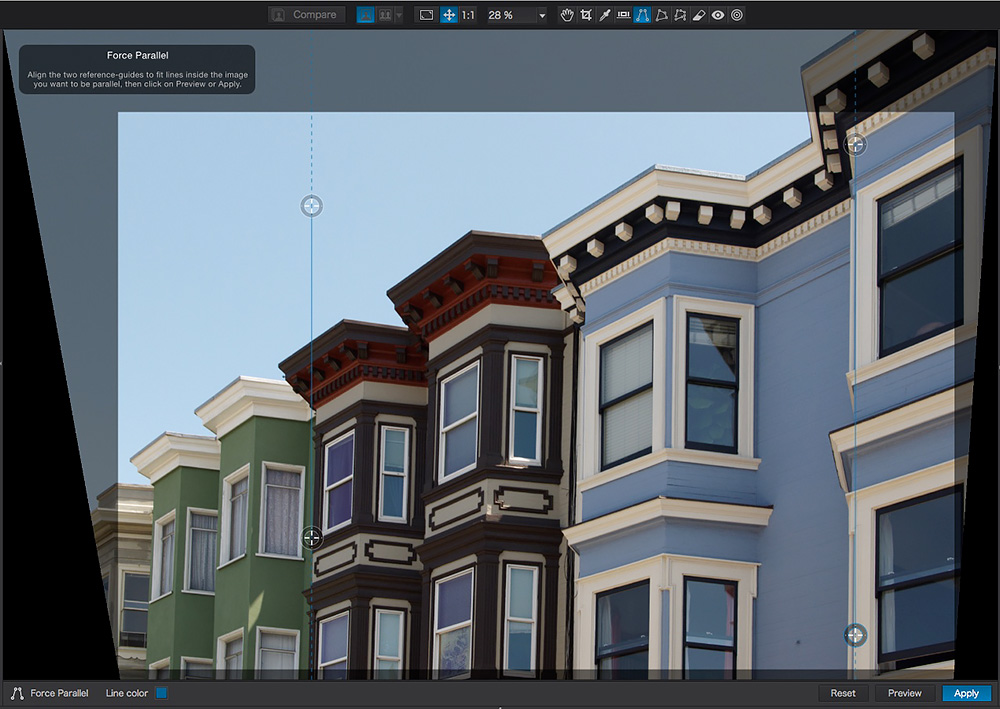
Perspective. We drew just two lines to fix the converging verticals.
But we find we use it on most of our images.
DxO pioneered perspective correction with DxO Perspective (a free iOS app of the same name is available) and it's built-into OpticsPro now. It functions much like the new Guided option in Adobe Camera Raw's Upright tool in which you align guides to edges in the image that should be made parallel.
Before. Looking up.
After. A better perspective.
Unlike the Adobe version, there's no Auto option (which we do find does the job most of the time). But there is an option we like very much that is not in Camera Raw. It's called Natural. It moderates the effect just a bit so verticals, say, converge only slightly. That often gives the image a less geometric and more realistic feeling.
CLEARVIEW
CleaView was introduced in OpticsPro 10, long before Dehaze made its appearance in Adobe Camera Raw.

Original. Two problems: converging verticals and glare.
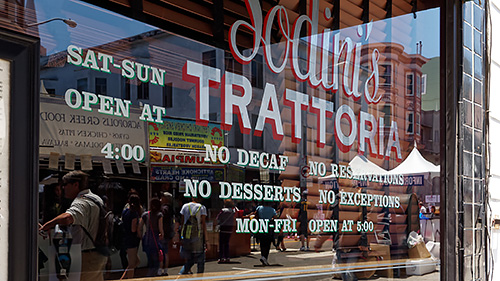
Edit. Perspective fixed the verticals and ClearView helped the glare. We also cropped to a 16:9 aspect ratio.
We hadn't thought of using it to knock down a little glare until we worked on this image. The window, whose warnings we found amusing, was only partly protected from the sun by the shade of an awning. The white lettering to the right was a bit weak as a result.
We started using the Perspective tool to straighten things up. Then we cropped the image to a 16:9 format so we could use it on the site. And we applied our usual tonal edits (like microcontrast).
But the last little touch that made the biggest difference was ClearView.
CONCLUSION
Since Adobe moved to a subscription model, there's been one after another alternative image editing application praised as "just as good." Frankly, it's a very high standard that is usually not very well appreciated.

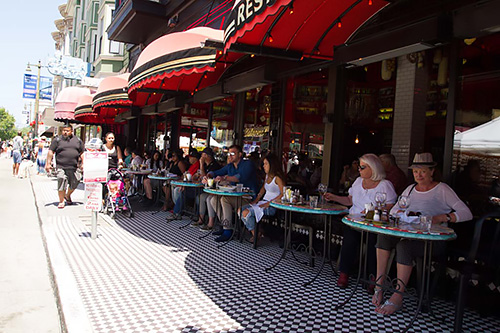
Three Ladies. They knew what they were doing.
Important tools like the Healing Brush, Clarity and the Upright tool are ignored in these evaluations simply because they don't exist in the alternative. And when the bashing involves Lightroom, topics like non-destructive editing and the catalog are entirely ignored.
As long as the alternative isn't subscription software, it seems, it's a winner.
We had lunch at U.S. Restaurant (Unione Sportiva, not United States) where we grabbed a shot of a portrait of three women who for many years waited tables at the place when it was at the corner of Stockton and Columbus. You'd walk in, sit down and they'd come over, hands on the table and listen to your order. When you were done, you'd walk over to the cash register and they'd ring you up, reciting your order from memory.
They knew what they were doing.
OpticsPro isn't subscription software but that isn't what makes it a winner in our book. Like those three women, it knows what it's doing and does it very well.
We don't miss any of the Camera Raw tools we rely on in OpticsPro because they're there. They join DxO's hardware-specific optic modules that know more about our images than any other application and provide that best-in-class noise reduction.
In OpticsPro 11 we're finding it easier to go through a set of images making the edits that are important to us. It's become a worthy alternative ecosystem for editing our images.
And that's saying something.