A S C R A P B O O K O F S O L U T I O N S F O R T H E P H O T O G R A P H E R
Enhancing the enjoyment of taking pictures with news that matters, features that entertain and images that delight. Published frequently.
Test Drive: Flexi LED Macro Flash
15 March 2018
We weren't expecting much but we were intrigued. Could this odd-looking twin-panel LED flash illuminate our macro shots with enough power to let us stop down for more depth of field?
Flexi LED Macro Flash. Put the insecticide away.
Before we answer that question, we should explain that the device we acquired is actually sold under a number of names. Here's a recent roster:
We were surprised not to find a Kodak labeled version but we didn't look long. As far as we can tell, they are the same unit, not knockoffs. And no, it isn't worth paying a premium for a brand name.
You won't be impressed by the build quality of this Chinese-made product.
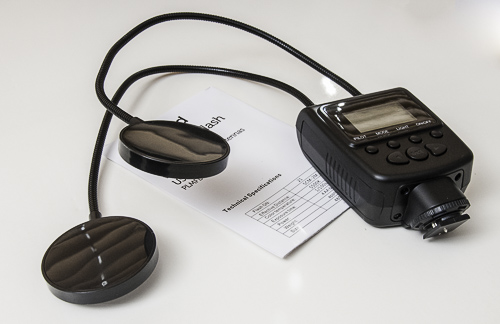
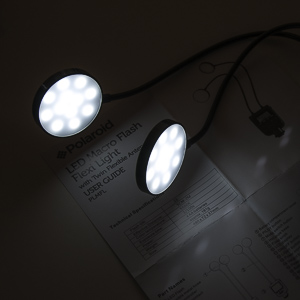
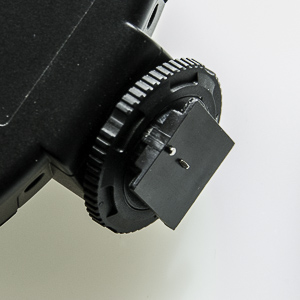
Image 1 of 3: The LEDs Image 2 of 3: Business end Image 3 of 3: Hot shoe Image 1 of 3: The LEDs
Details. Mouse over or tap for captions.
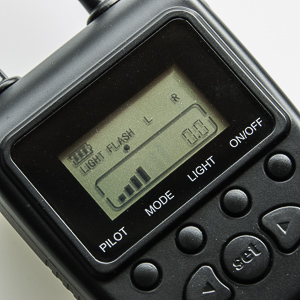
It's an inexpensive black plastic housing with an inexpensive black-and-white monitor on the back panel above a row of four small buttons and three larger buttons.
The four smaller buttons (left to right) are:
Pilot (flashes the LEDs)
Mode switch
Light (Continuous)
Power
The three larger buttons are:
Power (minus)
Set [Not Used]
Power (plus)
The LCD panel displays battery status, indicators for Light, Flash, Left and Right panels plus a power output graph with a numerical readout.
The left-hand side has a panel that opens onto the battery bay where you'll have to supply four AA batteries. We used rechargeable Ni-MH batteries with no problem.
It can be difficult to see but the metal contacts on the cover indicate orientation. From the top its Negative, Positive, Negative, Positive.
What's in a Name?
Nothing. The unit we tested came in a Polaroid box and had the Polaroid logo and name silkscreened in white on its front panel. But it wasn't designed or built by Polaroid.
When we reviewed the Kodak Printomatic we noted its similarity to the Polaroid Snap. Both products were designed and built by C+A Global which itself merely licensed the Kodak and Polaroid brands.
In fact, Polaroid and to a large extent Kodak itself have abandoned the product business to focus on brand licensing.
So what's in a name? Just the licensing fee, passed on to you, the consumer.
The top sprouts two foot-long bendable antennae with two-inch LED panels attached to the end. Each panel has 12 blue LEDs behind a white diffuser disc.
The mount, which has a single contact point, fits a hot shoe and can be locked into place with a thumb dial that screws down to tighten the connection. We tried it on our Canon, Nikon and Olympus hot shoes as well as off-camera hot shoes and found it fit all of the securely.
We've read of an adapter included with some models but we didn't see one and didn't need one either.
Our unit came with a one-page User Guide that included the technical specifications and part names but no operation details.
While we did mount the flash on our cameras, we preferred to mount it over our subject using a tripod or a clamp. With a radio trigger we could have used it in Flash mode but we also greatly preferred to use it in Continuous mode.
Leaving the light on not only made it easier to sculpt the image but it allowed the camera to find focus more easily.
The hardest part about using the unit was turning it on. The Power button has to be held down for a count or two before the LCD lights up. And if your battery is low, you'll only be able to tell when holding the Power button in fails to wake up the monitor.
It worked well in either configuration: on camera or off and Flash or Continuous.
We weren't expecting to light up a ballroom with this device. With a guide number of 21, it pales in comparison to, say, a Nikon SB-800's guide number of 125.
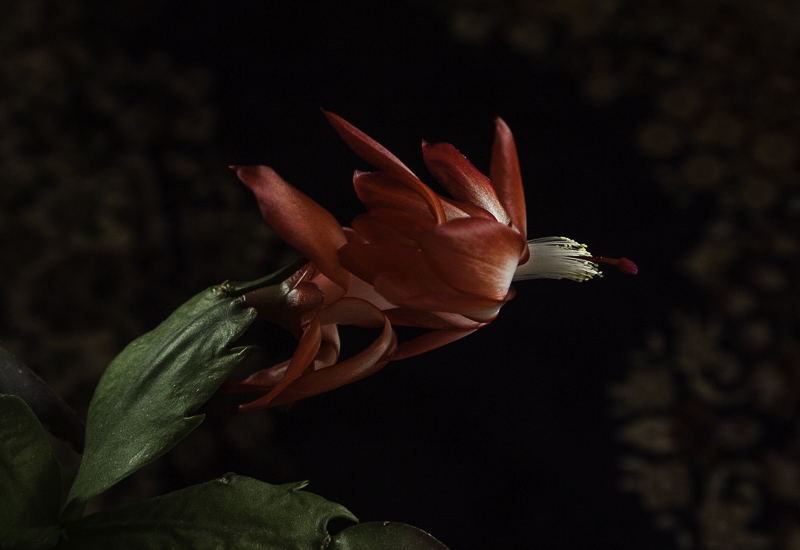
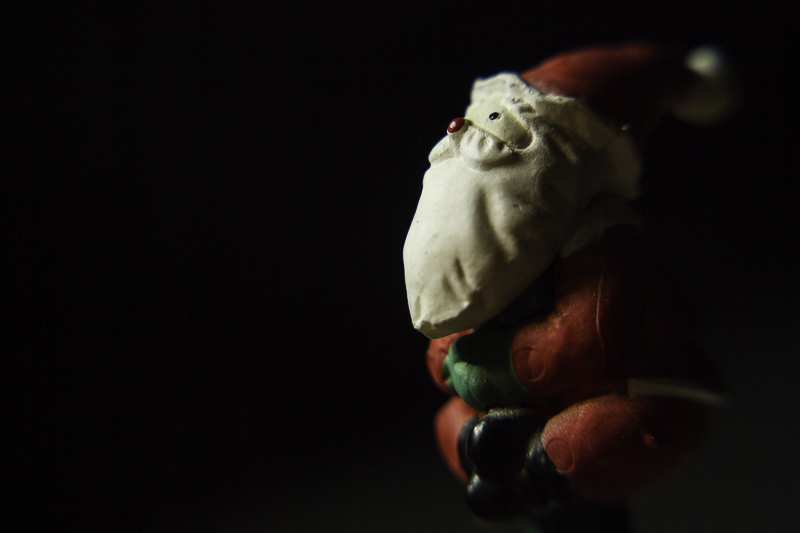
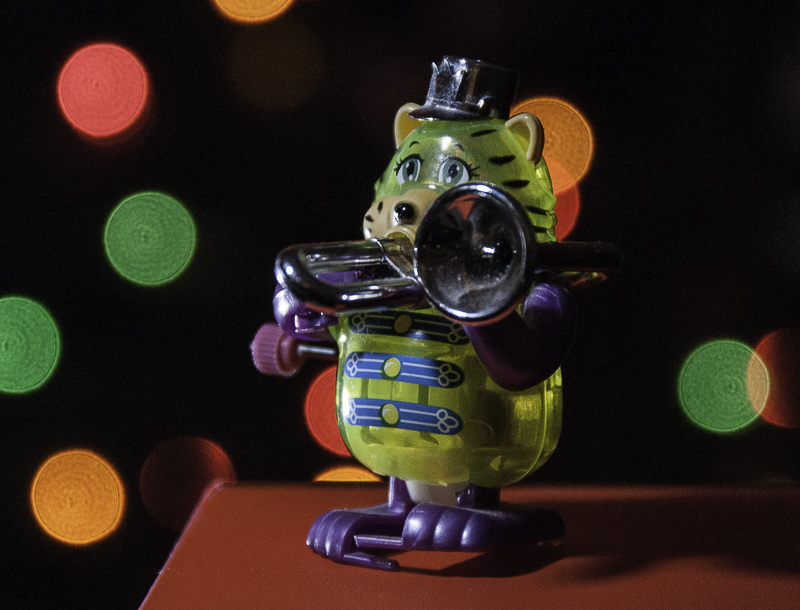
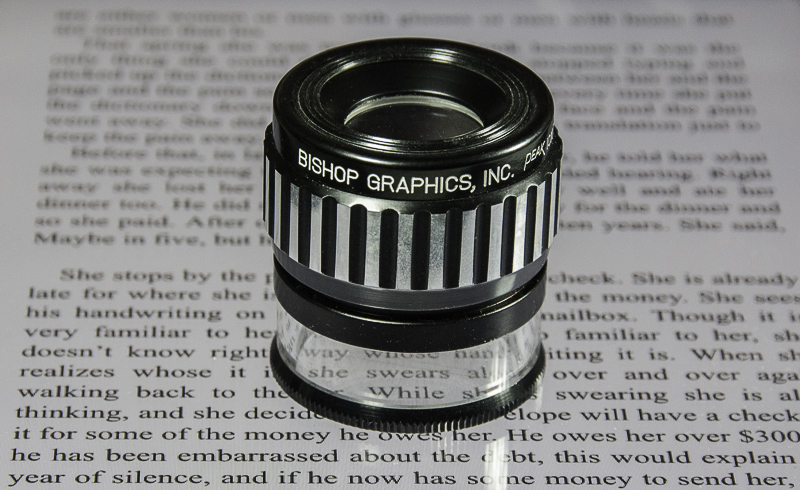
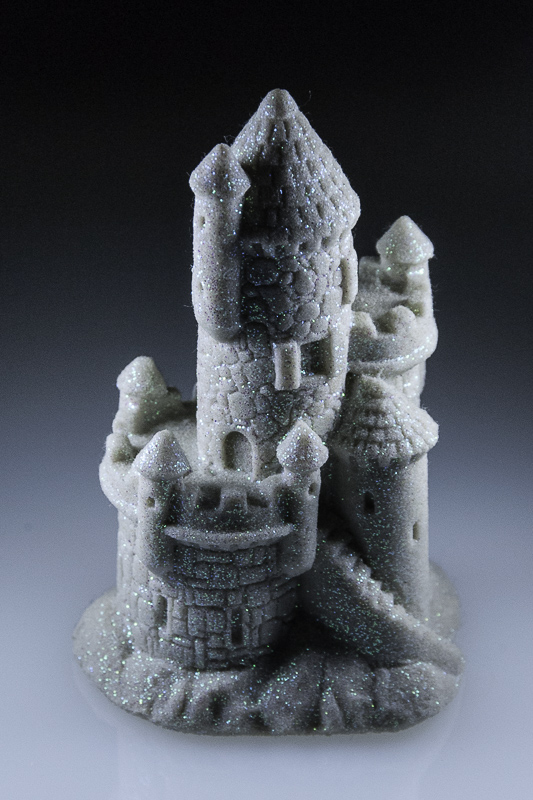
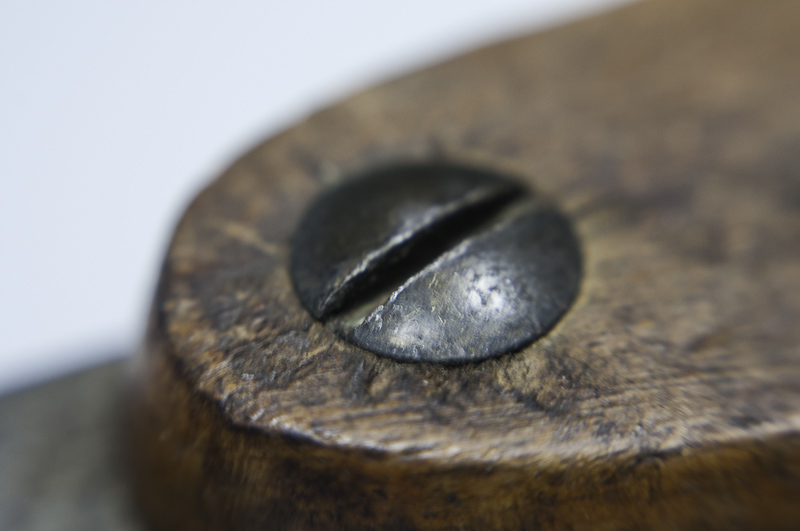
Sample Images. Three cameras, a variety of lenses and the Flexi.
Shooting at f4 with a guide number of 21 yields a maximum distance of 5.25 feet.
If we wanted more depth of field, say at f11, we'd only be able to light the scene 1.9 feet away.
But, you know, that works for macro shots.
And that short range also means your background can easily be dropped to black. Or, if you want to use a longer exposure with the flash mode of the Flexi, you can include ambient light as well.
You can mount the Flexi on your camera's hot shoe or, as we preferred, position it off camera over your small subject where it was close enough to the subject to cover it in light.
So it turns out the Flexi is a rather versatile tool for short-range exposures.
The images in our slide show were all shot as Raw files and edited in Adobe Camera Raw in Lightroom CC before exporting them as JPEGs here. The captions report the exposure details.
But using three different cameras we shot handheld between 1/10 and 1/125 second (usually with image stabilization active) and ISO set between 200 and 1600 with f-stops ranging from f2.8 to f11. Which suggests we had plenty of leeway relying on this device for illumination.
Take a look at our slide show to see for yourself if the little gizmo didn't do the job.
We had a lot of fun lighting various subjects with it and even appreciated the falloff, which made for more dramatic shots.
Availability seems to be an issue but if you can find one, you'll be as pleasantly surprised as we were at how handy it is. We've kept the batteries charged and the unit ready for action since we unpacked it. And we've found a lot of uses for it.
That earns it four photo corners. No matter what you call it.


