This is the first in a series of five product reviews of Datacolor's color management tools, which the company has this year combined into two kits. SpyderLENSCAL is part of the Capture Pro kit but can also be purchased separately.
Cameras that use phase detection autofocus are fast but not always precise. An autofocus lens may focus a bit in front of the target or a bit beyond it as a result. We call this front focusing or back focusing.
Each autofocus lens may behave differently on the same camera. One may back focus, another front focus and a third be right on the money.
This problem does not affect cameras like Micro Four Thirds or mirrorless designs which use contrast detection autofocus rather than phase detection autofocus.
Many cameras subject to the problem include an Autofocus Micro Adjustment option in their menu system.
The adjustment can be a general one or several lens-specific ones or a combination of the two. Use a general adjustment to correct a camera tendency and a lens-specific adjustments to adjust a specific lens.
The phase detection autofocus used on dSLR is fast but not as accurate as the contrast detection used by mirrorless cameras. Some dSLRs include a Micro Autofocus Adjustment to correct back or front focusing errors for any particular lens. But you still need a way to measure how much of a correction to apply.
Solution
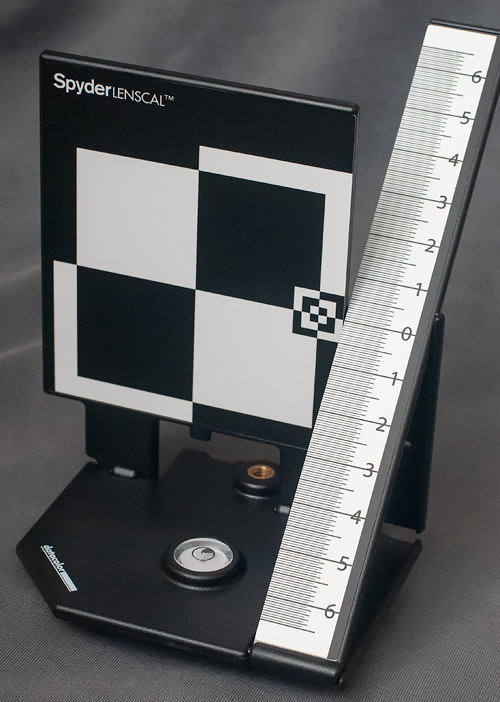
SpyderLENSCAL provides a focusing target coupled with a ruler to indicate how much of micro adjustment to make.
It can be very difficult to detect a phase detection error from any particular image. Focal length, aperture, ISO and image stabilization all affect focus.
The SpyderLENSCAL helps you measure the amount of front or back focusing each lens suffers from. It does this by providing a focus target alongside an inclined ruler.
When you setup and shoot the SpyderLENSCAL, your camera focuses on the target and you read the ruler to see where focus falls.
You can then transfer the measurement to units in your camera's Autofocus Micro Adjustment option.
SpyderLENSCAL includes just the device itself in the box, which requires no assembly.
The back of the box tells you just about everything you need to know (but not quite). The Datacolor Web site does include a helpful User Guide that fills in the blanks.
The SpyderLENSCAL lies perfectly flat for storage and quickly folds into a 45° angle which is locked into place when you drop the scale into position. It's a very efficient and clever design.
SpyderLENSCAL. Compact, lightweight design.
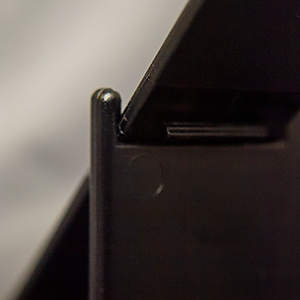
But it can be a bit tricky at first. Look at the back and you'll see the ruler is locked into position with a tab that snaps into a slot on the target. Release that and you can fold the SpyderLENSCAL. To lock the SpyderLENSCAL into its 45° fold, hook the ruler into the top of its support on the target.
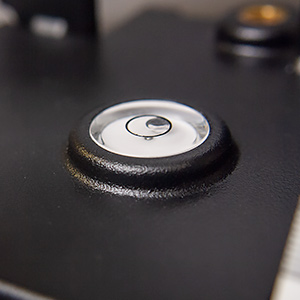
The base plate has a tripod mount and a spirit level.
Mount the plastic SpyderLENSCAL on a tripod or light stand and level it. Mount your camera on a tripod as well, setting it's height to the same height as the SpyderLENSCAL. Make sure the sensor plane and the SpyderLENSCAL are parallel to each other.
Datacolor recommends you set the distance between the camera and the SpyderLENSCAL 25 to 50 times the focal length of the lens. A 35mm autofocus prime would have to be about three feet away while a 200mm prime would require about 17 feet. Zoom lens distance should be calculated using the longest focal length on the lens.
Instructions. Enter the focal length of your prime or the longest focal length of your zoom in the first field. The tab out or just hit enter to see how far away to set the target. Distance is rounded up to ensure sufficient space. The 25x multiplier is the minimum recommended.
Settings on the camera itself are also critical. Datacolor recommends:
Manual or Aperture Priority mode
The lowest native ISO
Turn off image stabilization on the lens
Open the aperture to its wide setting
Set any zoom lens to its longest focal length
Use a flash if you need more light
If you use a flash, make sure it doesn't throw a shadow on the ruler.
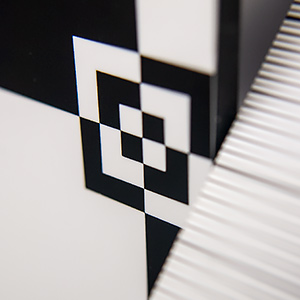
Image 1 of 4: Target and Ruler Image 2 of 4: Leveling Bubble Image 3 of 4: Tripod Mount Image 4 of 4: Ruler Support Image 1 of 4: Target and Ruler
Details. Mouse over or tap for captions.
Use a single point for autofocus and make sure that it is in the center of your viewfinder.
It's also a tremendous convenience to shoot in tethered mode so you're able to evaluate the focus, make an adjustment and retest without ferrying a card from your camera to your computer and back again.
Once you have an image on your screen, it's time to evaluate it.
Examine the ruler markings to find the sharpest line.
If your lens autofocused correctly, that line should align with the zero on the ruler. If it focuses on a line in front of the zero, it is front focusing. If it focuses behind it, it is back focusing.
Front focusing requires setting a minus adjustment to back focus up while back focusing requires a plus adjustment to move focus forward. A little trial and error will show you which way you should go on your camera. And shooting tethered will make it quick and easy to see when you've nailed the adjustment.
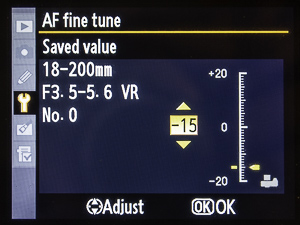
Make the adjustment in your camera's Autofocus Microadjustment option.
Because the values on the ruler do not correspond to the units in your camera's adjustment, you simply have to work by trial and error. In our case, positive values move the focal point away from the camera while negative ones move it closer.
If you have trouble finding the sharpest line on the ruler, try using the Find Edges filter in Photoshop in the Stylize fly-out menu.
We put the SpyderLENSCAL on a light stand, screwing it into the tripod mount. We set the height about chest high, which is where we wanted the camera.
The lens we were testing was the 18-200mm Nikkor (with no filter) so we marked off 18 feet and set up the camera on a tripod there. We aligned the target in the viewfinder, making sure by sight that the sensor plane and SpyderLENSCAL target were parallel.
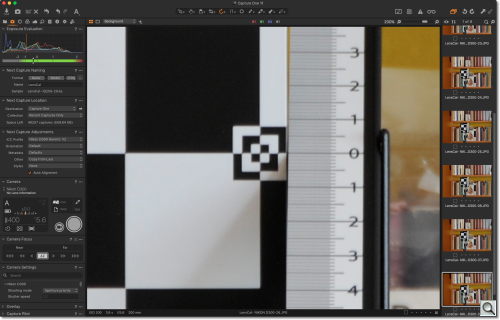
Target Captured. We zoomed in to evaluate the ruler markings.
We turned off image stabilization on the lens, racked it out to 200mm and connected it to our laptop with Capture One 12 running. Capture One recognized the camera right away and we finished our setup sitting down at the keyboard.
Autofocus Micro Adjustment. Making the adjustment.
We set the ISO to 200, the lowest native ISO, set the f-stop to f5.6 (the widest) and selected a JPEG capture. The camera was already in Aperture Priority mode.
We hit Capture One 12's shutter button to fire the camera without touching it.
Bingo. Because we'd previously set the Autofocus Micro Adjustment for this lens, it hit the zero.
But it was a little dark in the studio so we tried a few other f-stops, all of which confirmed the results. The wider f5.6 is more helpful because it's shallower but you have to have enough light to evaluate the image. And, just as important, to keep the shutter speed quick.
The SpyderLENSCAL provides a simple but effective design for measuring autofocus lenses on dSLRs that have a micro adjustment feature.
It's main benefit is how compactly it can be stored when not in use, which is most of the time. And though it doesn't really need to be handy, it's nice to know it can easily slip into a camera bag. Its compact, flat storage and quick setup is really what distinguishes it from the competition.