This is the second in a series of product review of Datacolor's color management tools, which the company has this year combined into two kits. SpyderCUBE is part of both the Capture Pro and Studio kits. It can also be purchased separately.
Captured images contain no measured references to pure black, pure white or neutral gray. JPEGs estimate these values while Raw data must be edited to place the data on the spectrum of dark to light tonal values with a credible white balance, all without reference to the real world data. This results in inaccurate tonality and color.
To accurately map both tonality and color data, you should take a reference shot of the scene that includes known values for black, white and gray. You can then use your editing tools to set the black point on that black, the white point on that white and the white balance tool on that gray for more accurate tones and color.
Captured images contain no measured references to pure black, pure white or neutral gray. JPEGs estimate these values while Raw data must be edited to place the data on the spectrum of dark to light tonal values with a credible white balance, all without reference to the real world data. This results in inaccurate tonality and color.
Solution
When the Cube is included in a reference shot, you'll be able to map the known values of its black trap, black face and white face to the tonal scale and set the white balance to match the gray face.
When the SpyderCUBE is included in a reference shot, it provides known values for pure black, white, spectral highlights and middle gray.
You'll be able to map the known values of its black trap, black face and white face to the tonal scale and set the white balance to match the gray face.
The advantage of the SpyderCUBE is that you are guaranteed to have a spectral highlight, a white highlight, a deep black shadow, an unilluminated pure black, and a middle gray in your image -- no matter what the scene holds.
Having measured these values in your scene with the SpyderCUBE, you'll be able to accurately adjust contrast and color temperature in your image.
The SpyderCUBE is made of ABS Cycoloy, a hybrid resin that is not only very durable but is fire-resistant, fade-proof and shock resistant. The colors are not painted on but the actual color of the plastic itself all the way through.
The QuickStart Guide included with the SpyderCUBE really says it all, but it's brief. The online User Guide goes into more detail, if you need it.
Even better, the Datacolor site has a few videos that illustrate the SpyderCUBE's features, how to shoot with it, how to edit a Raw image in Lightroom and in Photoshop's Camera Raw.
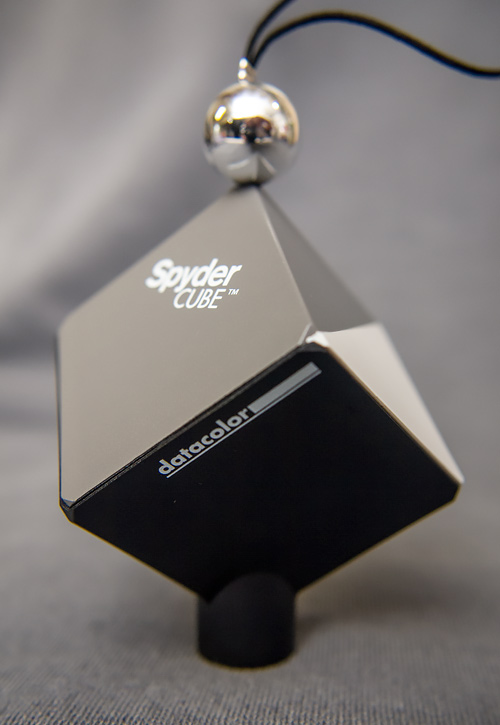
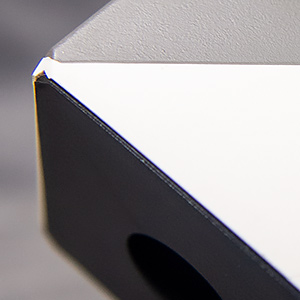
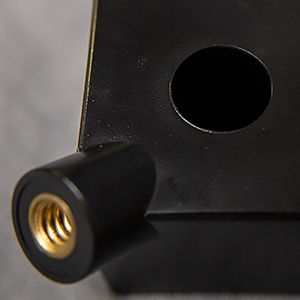
Although the SpyderCUBE is a cube, it doesn't rest on one of its faces. Instead, at the bottom corner there is a brass tripod mount. And at the opposite corner is a chrome ball with an elastic string.
SpyderCUBE. Beyond the gray card.
You can either tripod mount the SpyderCUBE or hang it up.
It will stand on its own propped up on the tripod mount because it's very light. Or you can mount it on a light stand, a tripod, a selfie stick or anything that uses the standard tripod screw size. Or you can hang it from the elastic string.
One of the three black bottom faces of the SpyderCUBE features a half-inch diameter hole. Datacolor calls it a black trap because no light illuminates it. It represents an absolute black even in a high-key scene.
The top three faces of the cube have one solid panel of gray and two panels split diagonally with white and gray. The 18 percent gray on all three faces represents the midtone of the image and its color temperature (or white balance). The white on two faces represents a true highlight value where either spectral highlights are misleading or no other real highlight exists in the image.
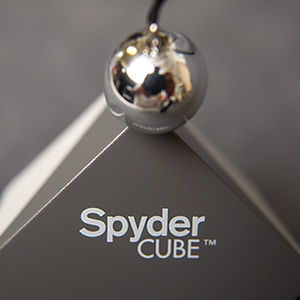
The chrome ball records the value of spectral highlights in the scene so you don't confuse those values with your white highlight value.
The SpyderCUBE is spectrally neutral so you can rely on it in any light. That's why you can also use it to color correct your image, in addition to correcting luminance values.
Once you've placed the SpyderCUBE in your scene, turn it so the camera can see three of its six faces. Those would be the bottom black with the light trap and the two white/gray split faces above it. The assumption here is that your primary light is coming from above and either the left or right. Unlike a flat card, the SpyderCUBE gives you two angles of reflectance.
Image 1 of 3: Top Image 2 of 3: Corner Image 3 of 3: Bottom Image 1 of 3: Top
Details. Mouse over or tap for captions.
It can be hard to correctly orient the SpyderCUBE if you hang it by its elastic string, so for better control, stand it up. On flat surfaces the tripod mount is enough. For other surfaces, you'll want to mount it on some sort of stand.
Make sure the black face with the light trap is not being illuminated directly. Also beware of any reflections from nearby objects, which can show up on the semi-glossy finish of the SpyderCUBE faces.
And make sure one of the split white/gray faces is facing your main light. That way your image -- regardless of the subject matter -- will have white, middle gray and black reference points with a specular highlight and an absolute black.
There are two steps to using the device: shooting it and reading it in your image editing software.
Shooting it is easy enough but it's fundamentally different from using a gray card. You are not setting exposure with the SpyderCUBE (as you would with a gray card). It's really too small for that, although you could manage using spot metering to lock in the reading of the gray face. But you'd want to make a plus half stop adjustment anyway since your camera meters not at 18 but at 12 percent gray.
Instead, you just have to take one reference shot with the SpyderCUBE in the same light as your subject.
Outdoors watch out for shadows falling on the SpyderCUBE and setting it beyond middle distance where its surfaces may become too small to measure. You may find it more convenient to simply hold it in front of you at arm's length to make the reference shot. It doesn't have to be in focus to work.
Indoors consider the location of your primary light and any secondary or reflected light when placing the SpyderCUBE.
Take a reference shot with the SpyderCUBE in the image or in the same lighting conditions as the image (if your subject is not nearby). Then put it away and take the shots you plan to use.
If shooting in sunlight throughout the day, take a reference shot whenever the light changes, as it will.
You can use any image editor to edit your SpyderCUBEd images. The essential adjustments are White Balance, Exposure, Brightness and Black Level. So if your image editor has those adjustments, you're in business.
Same for Raw image editors. And working with 16-bit channels in a Raw edit really shows off what the SpyderCUBE can do for you.
The editing process (either way) involves four steps, which should be followed in order:
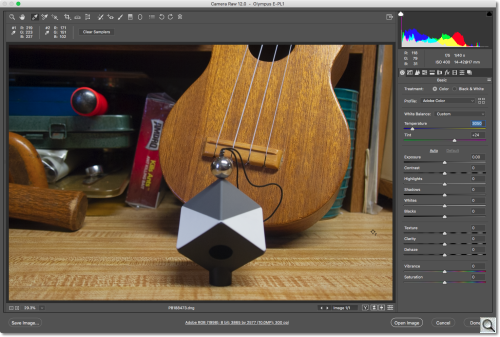
Step 1: Set the White Balance. Use your image editor's White Balance tool to click on the gray part on the brighter of the two gray/white faces. The brighter face represents your primary light source. Click several times to make sure your White Balance tool isn't sampling too small an area. If the value changes significantly each time you sample the gray area, enlarge the pixel matrix the tool samples (say from 3x3 to 5x5 pixels) to avoid any noise a higher ISO image might have that could throw off the reading. Also avoid clicking in any reflection or shadow from the chrome ball.
Step 2: Adjust Exposure. Use any Exposure tool (usually a slider in Raw converters) to adjust the histogram so none of the color channels are clipped. Let those spectral highlights go, though. Hold down a modify key to see what parts of the image are being clipped as you make this adjustment.
Step 3: Set the Black Level. True black is represented by the black trap on the SpyderCUBE. Again, hold down a modify key to see what parts of the image are being turned black (and losing detail) as you make this adjustment. Let the trap go but consider what else in your scene is going with the black face of the SpyderCUBE when that goes. You might try to set this so you can barely distinguish between the trap and the black face itself.
Step 4: Adjust Brightness. The previous adjustment will have shifted the midtones, making them either too light or two dark, so you want to reestablish your midtones by using the Brightness tool. The gray value of the brighter face represents those midtones at 18 percent gray, which should appear in the middle of your histogram.
Datacolor recommends doing those four steps in the following order: 1, 2, 4 and 3. Since the midtone can shift in Step 3, we recommend taking them in the above order. Datacolor's David Tobie once said to us, "There is plenty of justification for nailing both ends and then tweaking the middle; I won't argue with that approach. But whatever order you use, it's best to revisit the others to fine tune once basic adjustments have been made to all."
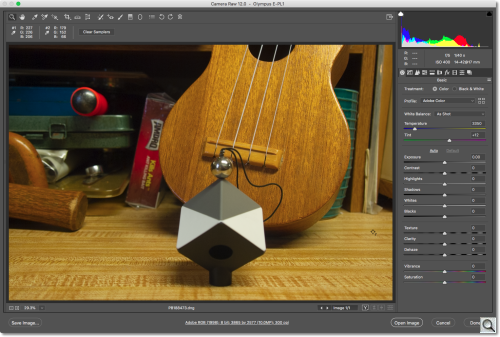
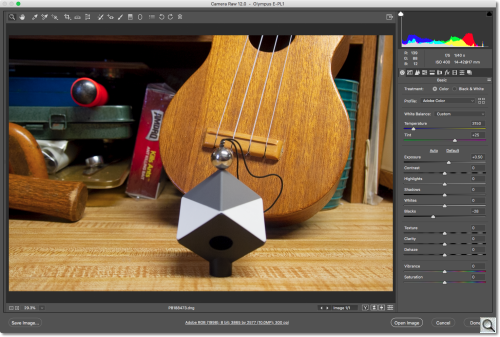
Here's how approach looks in Adobe Camera Raw:
Original. This is what we started out with.
White Balance. We used the dropper on the top tool bar.
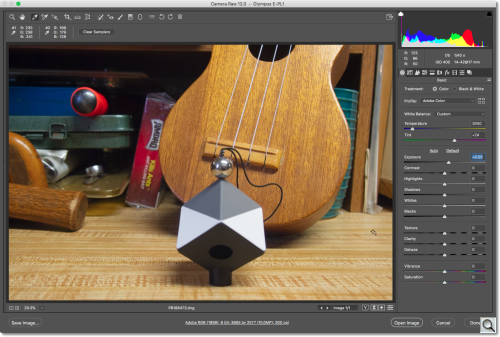
Exposure. We gave it half a stop more.
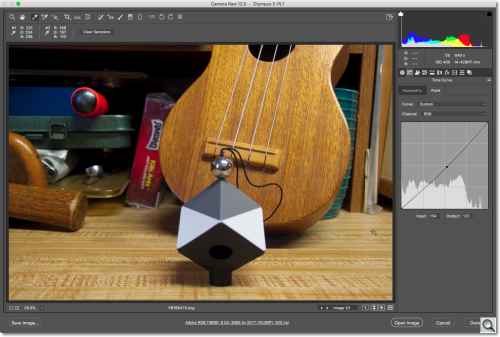
Black Level. We used the modifier key to watch for the dark hole to fill as we moved the Black slider.
Brightness. We darkened the midtones using Curves.
There's no hard and fast rule for where to set anything after Step 1. Only you know what the subject of your image is and how has been lit. These decisions depend entirely on your subject and the lighting, which is why the modifier key trick is very handy. It shows you just what parts of your scene are being changed.
Apart from Step 1, these adjustments are to the tones in the image. And while Step 1 will eliminate any color cast, it doesn't ensure each hue in the image is accurate. To improve hue fidelity, you need the SpyderCHECKR, which we'll review in the next segment of this review.
To apply these settings to other images in the shoot, you simply save them as a Preset you can apply to them. You may also be able to just paste these settings to a selection of images, depending on what image editing software you are using. Investigate the batch editing capabilities of your software to learn more.
With a JPEG image and just a basic Curves dialog, you would use the gray eye-dropper to set the white balance on the brighter gray area of the SpyderCUBE, the black eye-dropper to set absolute black on the light trap and the white eye-dropper to set the highlight on the brighter white area of the SpyderCUBE. Again, everything depends on your subject and the lighting. Those are just starting points.
We've used a variety of image editing software to adjust both Raw captures and JPEG images by reading values on the SpyderCUBE. With the SpyderCUBE, they all delivered the goods with ease.
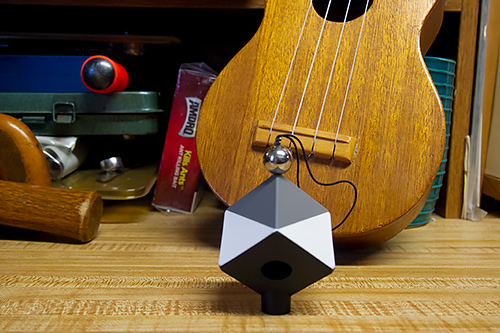
Final Correction. After setting the ACR sliders to match the Cube, this is the final result.
Opening a Raw image can be as intimidating as looking at the cockpit of an airliner. There are a lot of controls and fiddling with them tempts disaster. But with the SpyderCUBE in your reference shot, you can make a few key adjustments quickly, save them as a Preset (or just sync) and apply them to the whole shoot.
We really appreciated having reference points for absolute black and a spectral highlight plus a white and black reference point in the image, too. Rare is the image that otherwise contains all that and the lack of one or the other can lead to some poor adjustments. With the SpyderCUBE hanging from your rear view mirror that doesn't have to happen.
The SpyderCUBE is small enough to take anywhere. It provides a a tonal range from absolute black to spectral highlights with black and white points in between. Unlike a gray card, it provides two angles to catch the light.
With a reference shot, editing an image is quick and easy, delivering the right contrast and color temperature of the original scene.