A S C R A P B O O K O F S O L U T I O N S F O R T H E P H O T O G R A P H E R
Enhancing the enjoyment of taking pictures with news that matters, features that entertain and images that delight. Published frequently.
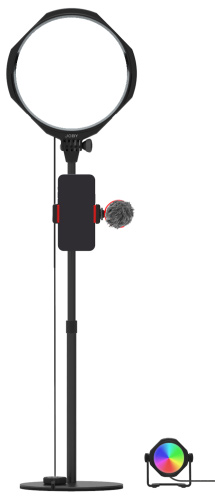
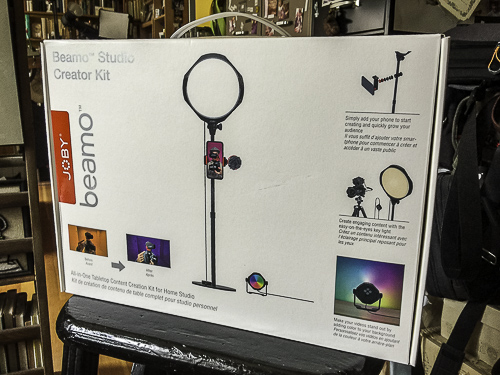
Review: Joby Beamo Studio Creative Kit
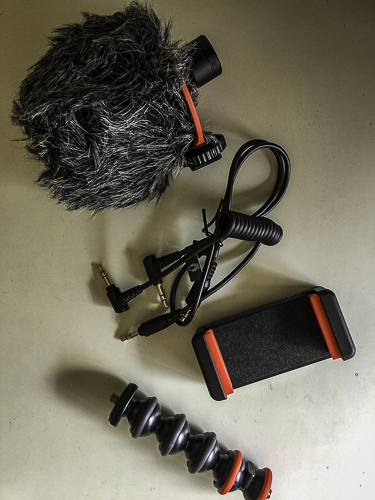
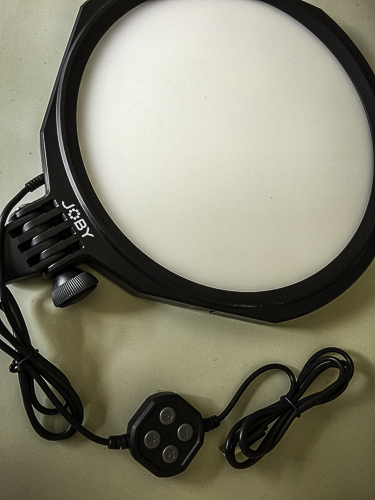
Beamo Studio Creative Kit. Key light with micropohone (l) and background LED.
15 February 2024
When Joby announced its Beamo Studio Creative Kit late last year, we confess we were confused. The only way to clarify things, we thought, was to get our hands on one. So we did.
The SCK is designed specifically for providing a more polished videographing setup. But you don't have to be a vlogger with a YouTube channel to need this. It works from Zoom calls, too. Not to mention FaceTime.
And, as we suspected from the very beginning, it provides some nice options for small product studio photography too.
The $139.88 Beamo Studio Creator Kit includes a key light, a color background light and a microphone. Both lights are diffused LEDs that run off USB power.
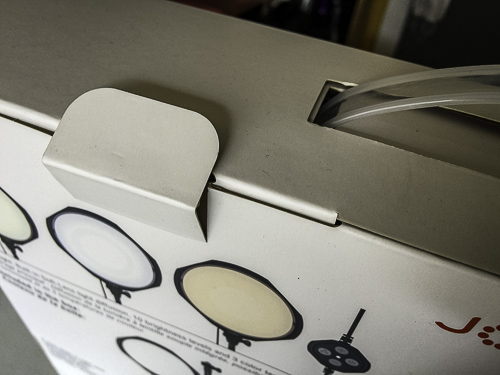
It arrived in a box with a handle that makes not only for convenient storage but easy portability if you want to take the kit on location.
The components are all you need to provide beauty-dish key lighting for the person (or object) in front of the camera with background (or secondary) fill light whose color you can set in the light itself.
There is also a flexible phone mount that attaches to the key light stand with a wired connection to a Wavo Mobile microphone that mounts on the key light or phone holder.
It's a comprehensive lighting, sound and video kit. You don't really need anything else.
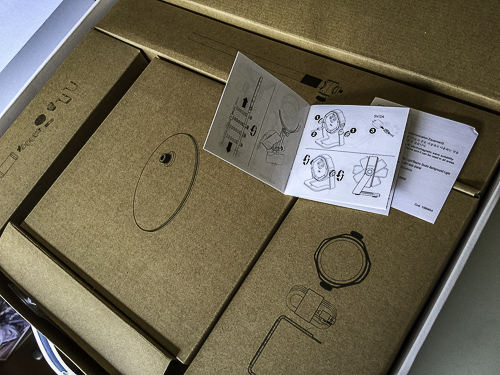
Image 1 of 4: The Box Image 2 of 4: Resealable Image 3 of 4: Individual Boxes, Instructions Image 4 of 4: Illustrated Use Image 1 of 4: The Box
Details. Mouse over or tap for captions.
Well, assuming you have some USB-A ports or a 5V/2A USB adapter or two handy. You do have to bring your own power. In our case, we relied on 5V/1A power bricks, which worked just fine.
You don't have to excelled in shop class to put this kit together. But there is really not much in the way of instruction apart from a tiny little printed booklet, which is mainly illustrations.
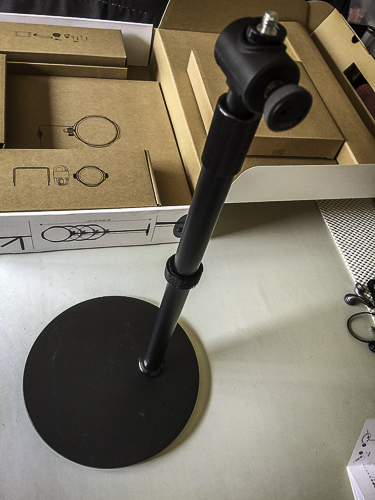
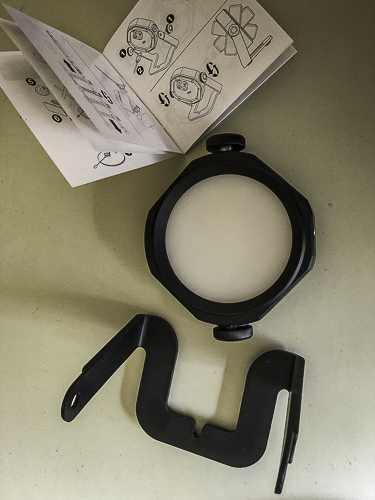
Image 1 of 6: Stand Assembled Image 2 of 6: Background LED Image 3 of 6: Microphone Image 4 of 6: Key Light Image 5 of 6: Microphone Connections Image 6 of 6: Microphone Plugs Image 1 of 6: Stand Assembled
Details. Mouse over or tap for captions.
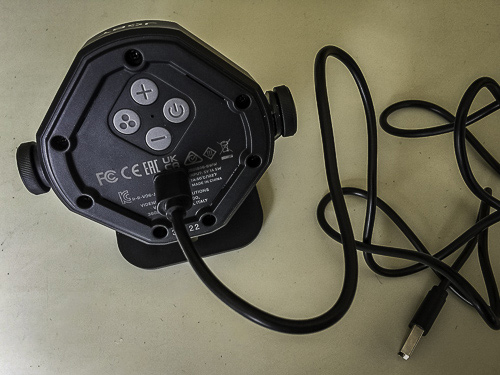
The Beamo backlight was the easiest to assemble. You unscrew the thumbscrews on the side, align the Beamo to its stand and put the screws back in. Look for the USB power cable in the same box and plug it into the back of the unit where the controls are. Done.
The key light has a hefty metal stand to which you screw an upright telescoping pole. Not hard. Then you screw in the PodZilla Medium mobile tripod kit to the mount on the telescoping pole. It can handle 12.25 oz. maximum.
You can attach the hairy, dead cat microphone to either the phone mount or the key light. Two audio cables, a short coiled one for camera connections and a longer straight one for phone connections, were supplied to connect the microphone to the audio port of your phone.
The key light itself is 8-inches diagnonal and hefty. It screws onto the top of the telescoping pole and can be angled. But you are warned to angle it over the base and not away from the base to avoid toppling.
The USB cord and the key light controller are already attached to the unit.
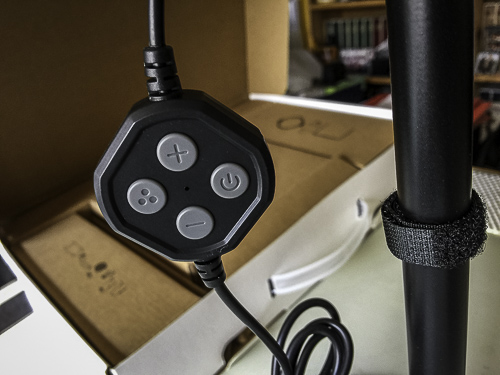
Each light has its own controller. On the Beamo backlight, the controller is built into the back of the unit's housing. On the key light its inline on the USB power cord.
Image 1 of 2: Background Controller on Rear Image 2 of 2: Inline Key Light Controller Image 1 of 2: Background Controller on Rear
Details. Mouse over or tap for captions.
There is a small white LED that confirms you have power and four buttons.
The Top and Bottom buttons increase or decrease brightness in 10 steps. The Right button is the On/Off switch for the light. On the key light the Left button changes the color temperature of the light from warm to cool while on the background light it cycles through 12 color choices.
To set the kit up for a typical Zoom or vlogging session, you would find a white wall to bounce the backlight off and pick a color.
Then you would arrange the stand with the key light and your camera in front of you, using the telescoping pole and the locking phone holder to position the camera and the light.
The key light provides enough light at close range to illuminate a face while the background light can color that white wall with something more appropriate to the mood than, well, white.
We did find one influencer video we found illuminating for video use.
With stills, the key light becomes the main source of illumination and the smaller background light becomes a secondary colored light source.
For photographing small objects, we found it our new favorite lighting kit. It's small enough to maneuver into any position, bright enough to light small objects, diffused enough not to cast dark shadows and the colored background light can optionally add some visual interest.
Usually we include a test drive with our product reviews but in this case, we've gone well beyond a mere test drive, using the Beamo Studio Creative Kit in production for several months.
Here's a list of our published stories that relied on the kit for lighting with a few comments about each shoot:
Our first use of the kit was simple. We used the small background LED for a macro shot of the contacts of an SD card. To dramatize the image, which accompanied a story about the card's failure, we lit it in orange.
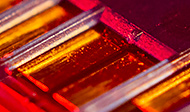
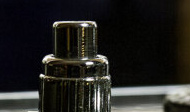
Our second use of the kit was a bit more ambitious, using both the key light and background light to illuminate a small bottle stopper. We used the Joby Beamo key light to light the right side at a 45° angle with various color temperatures and the background light to light the left side directly from a bit rear of the side.
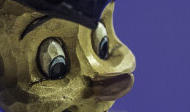
A bit more creativity with our third use, macro shots of two Ronson lighters in mixed lighting. The small background LED doesn't have a cold or warm white mode. But the large key light has both, so we started with that.
The big diffused 8-inch circular LED source easily angled over our staging area. We powered it with a USB power brick, which allows us to put a light source anywhere.
To supplement it, we added a warm LED table lamp. We matched the Beamo color temperature to table lamp's color temperature. Roughly.
The result was more a duotone than full color but the only "color" other than brown was the white stage and the chrome parts of the lighters.
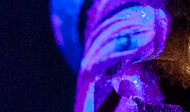
Our next job used both LEDs from the kit for the first time. We used the background light as a background (lighting a white board in blue) and the key light to light the subject (because we wanted its actual colors).
We shot with a macro converter, which explains the optical defects. And added a vignette, which spoiled the even blue background. But the color was right where we wanted it. True hues on the subject against a blue background. Perfect.
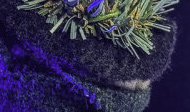
To shoot a Christmas decoration, we used he big key light set to a cool white and the small background LED set to deep blue.
Unlike our other tests with the kit, we shot this one with the iPhone 15 Pro Max using the 5x zoom.
You'll notice we were careful to avoid challenging the kit's limitations. We didn't try to compete with sunshine and we didn't cast the background light on faraway backgrounds. The LEDs aren't bright enough for that.
If you wonder if we just weren't having too much using the Beamo Studio Creative Kit to actually review it, you wouldn't be too far off the mark.
The problem, so to speak, is that you can use the kit in more than one way. It handled everything we threw at it and we just kept throwing things at it.
That earns the Beamo Studio Creative Kit all four corners. Our highest recommendation.